Eccho's Old TV modding

Want to show off your own project? Want to keep a build log of it? Post it here!
User avatar
Eccho
Posts: 235
Joined: Mon Nov 28, 2016 5:35 am
Has thanked: 86 times
Been thanked: 106 times

Eccho's Old TV modding

Post by Eccho » Mon Sep 25, 2017 1:22 pm

Hello fellow sudomoders.

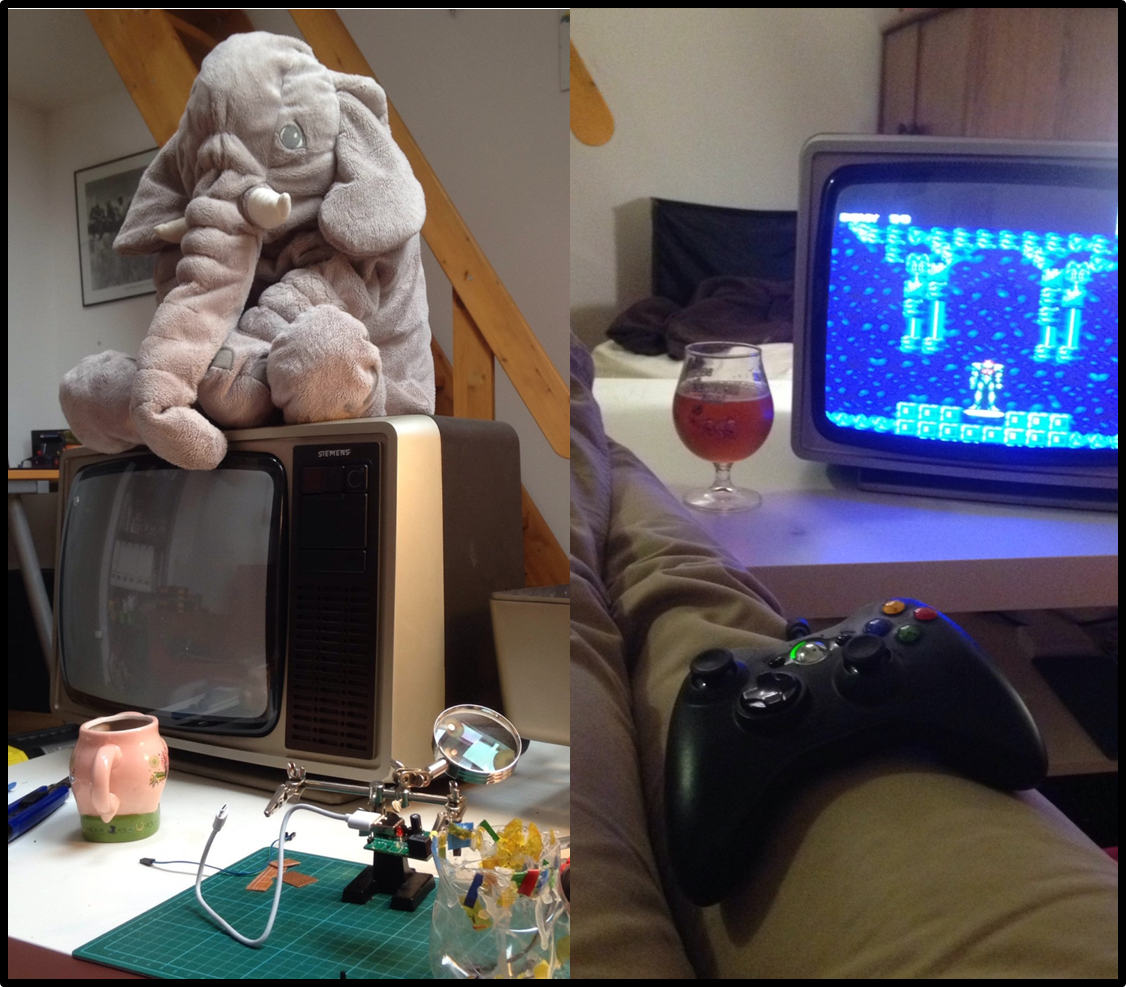
One of my aims about getting into electronics is being able to play around with old scrap and turn it into something useful. After my GBZ builds, I've acquired some basic knowledge and skills to do so. Here is my first creation: turning an old colour TV into a gaming station! Needless to say I am super proud pulling this off, and it is getting in use almost every day!
TV2.png
TV2.png (2.36 MiB) Viewed 9913 times
Here you can find the list of all the parts that were needed to mod the TV. It was a bit hard finding the RF modulator but found from a german company. You have to build it yourself, I had fun assembling it! The quality is amazing, very robust, and works right after assembly. German quality never fails you :D
Also, I wanted a safe shutdown (thanks Camble and 144TECH for injecting the idea) because I just can't do without it anymore and get paranoid about corrupting my SD card. Documentation is also crystal clear and very straightforward.
Components listShow
  • Old TV
  • Raspberry Pi3 model B
  • Coaxial cable
  • Antenna connection cable
  • microUSB charger
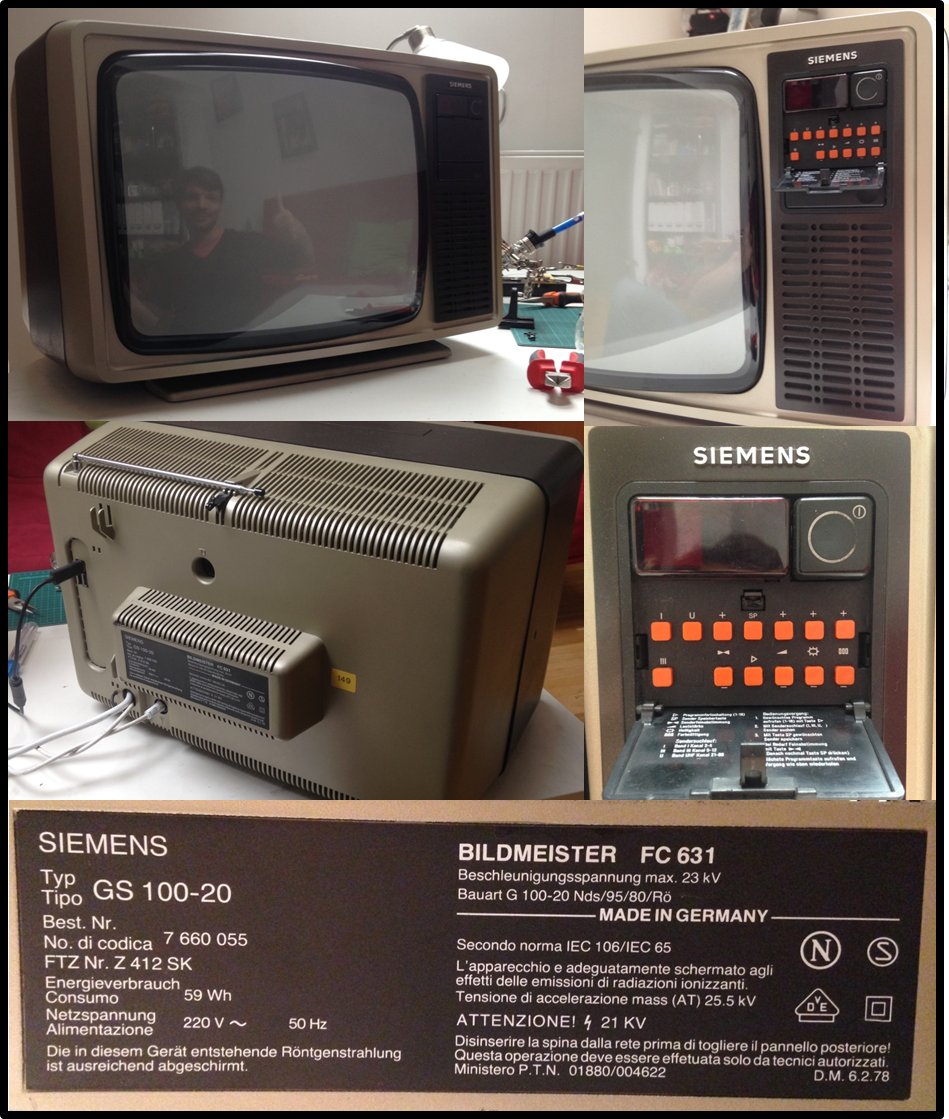
Ok, so the TV looks as follows. I bought it on Willhaben (german equivalent of Craig's list). I aimed at a TV that had seemingly quite a lot of space behind the screen. Don't get fooled by those bad boys, they are heavy as hell!
Final resultShow
TV1.png
TV1.png (1.19 MiB) Viewed 9913 times
I can hardly put a date on the TV, but I would estimate late 80s-start 90s. Just to make you guys a bit nostalgic, the screen and the sound both have this sissing noise. Really reminds me of my first TV memories.
Extra specsShow
ExtraSpecs.png
ExtraSpecs.png (2.16 MiB) Viewed 9913 times
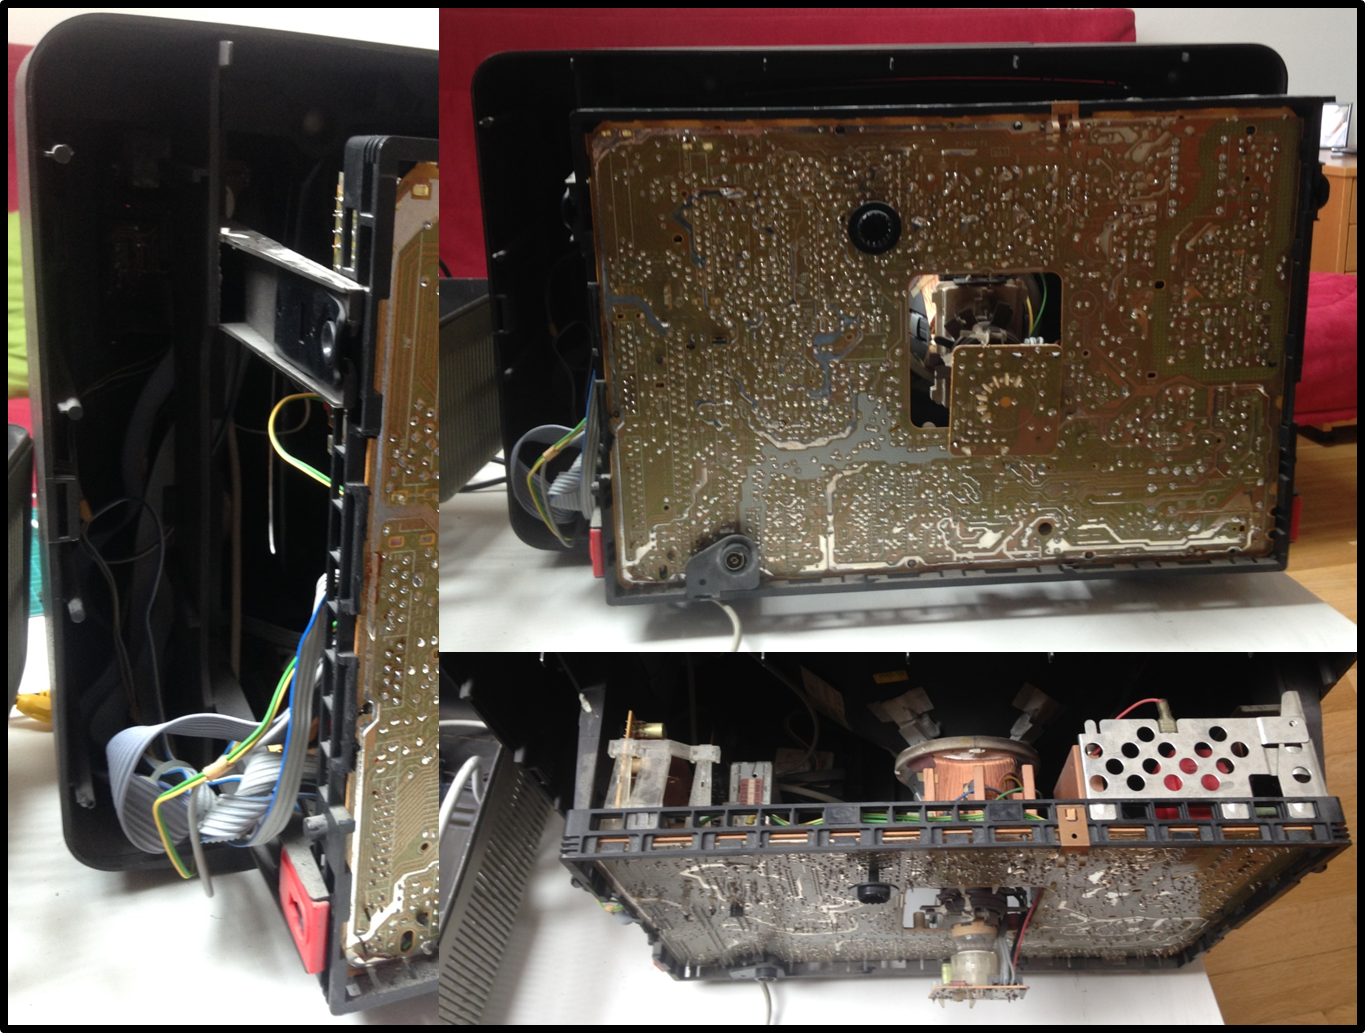
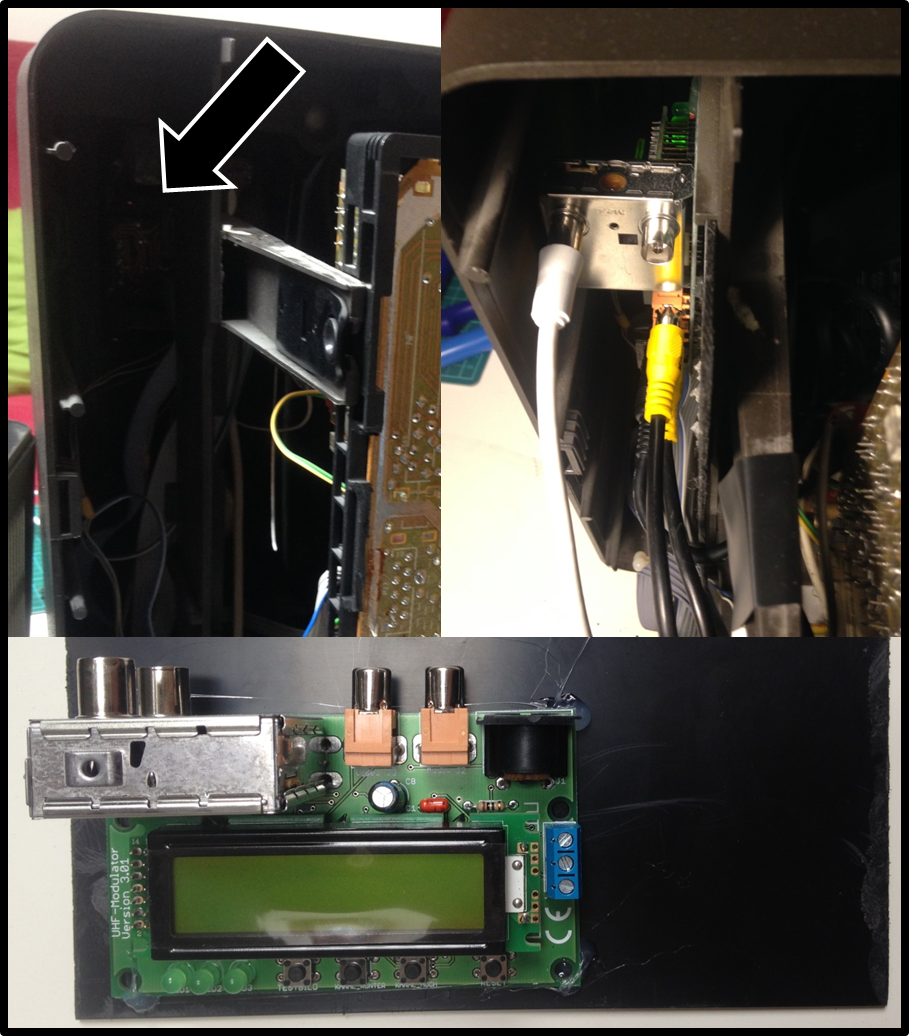
Most of the space available is on the left (looking from behind) and on top (right above the screen). Those are the two areas I exploited to put all my stuff. I got lucky from the TV I chose since it has a plastic rail on the left side where I could just slide in the RF modulator that I sticked on some plastic scrap. Really convenient having it that way.
Opened TVShow
Opened.png
Opened.png (2.78 MiB) Viewed 9913 times
As mentioned above, I sticked the RF modulator on a plastic slide for some easy positioning on the side of the TV. The biggest part is the power supply (not pictured) but it is basically a 14x5x8 black box with a lot of cable! I think those germans overdid a bit the power management for the RF modulator :lol:
RF modulatorShow
RFmodulator.png
RFmodulator.png (1.56 MiB) Viewed 9913 times
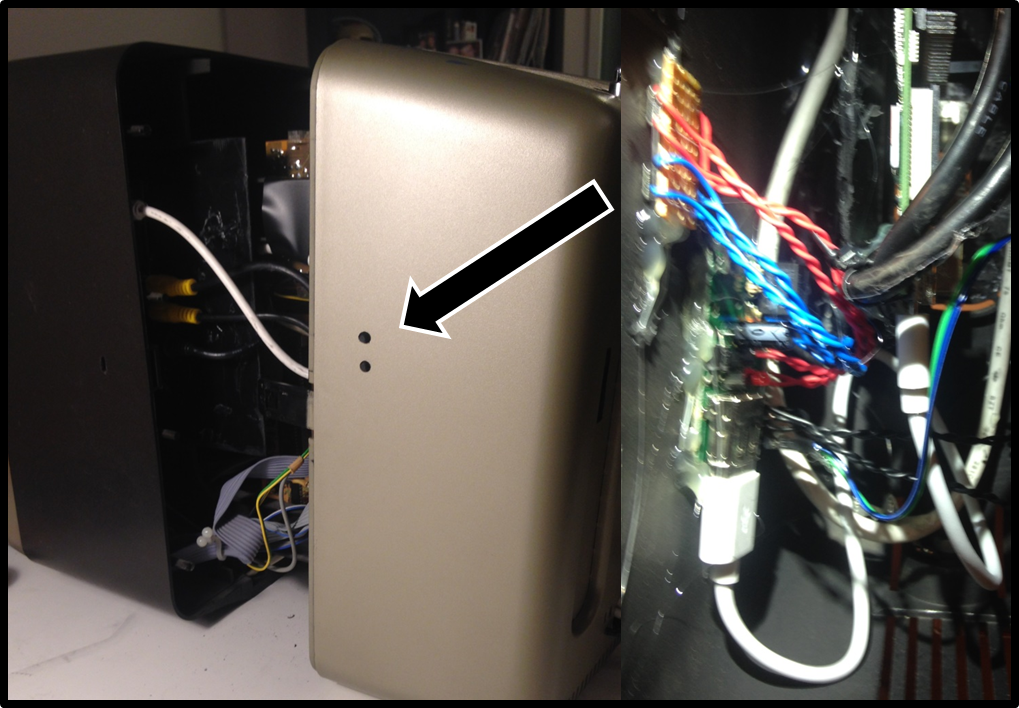
Best addition to my build is the safe shutdown. It has an ON button, an OFF button and a SAFE OFF button. I got a bit creative by extending the buttons with some 26awg wire so that I could neatly place them on the side and behind the TV. On the side, you have on top the ON button, and right below the SAFE OFF button. Behind the TV, a bit hidden, the FORCE OFF button. Again, the safe shutdown script was super easy to install (I managed it, so everyone can, no joking) and the assembly was really straightforward with their online video.
Pi Supply Safe shutdownShow
Safeshutdown.png
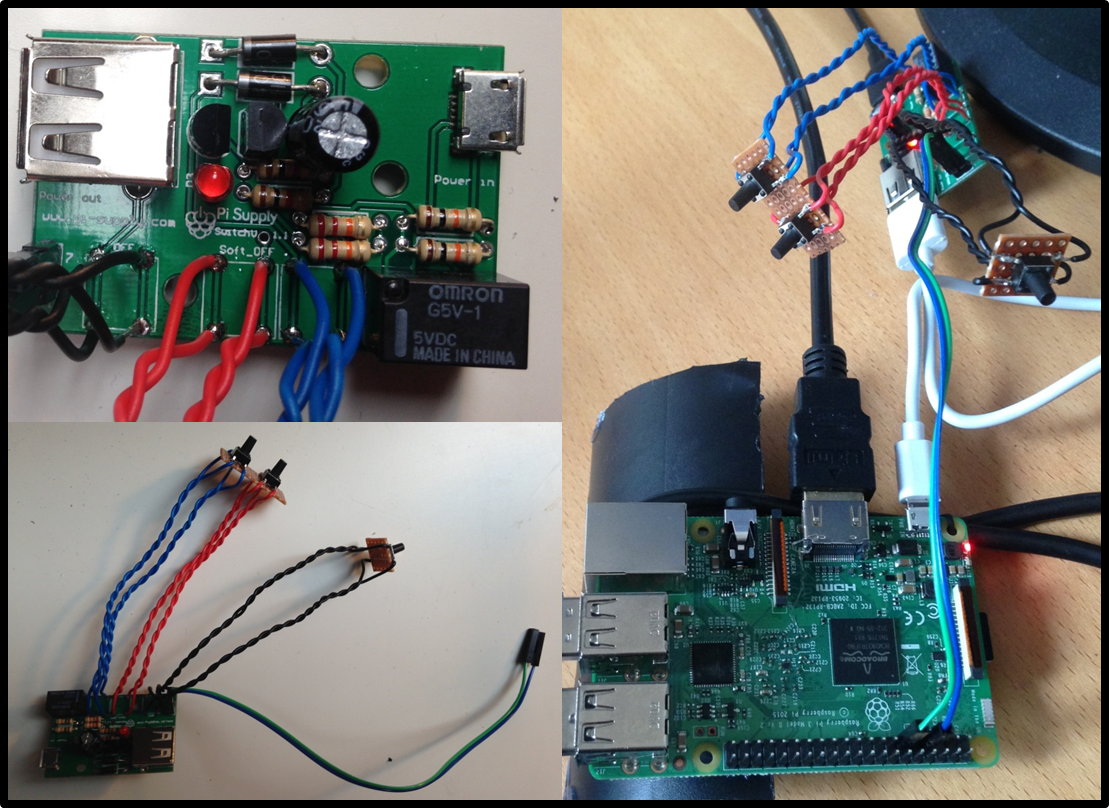
Safeshutdown.png (2 MiB) Viewed 9913 times
I screwed up a bit the USB hole, it is bit too large. But placing the Pi3 was probably the most challenging. When you close the TV, it bearly positions itself on the left of the internals of the TV. Also, it bumps a bit against the coaxial cables from the RF modulator. I had to play with both of them the most to get the TV to close properly.
Pi3 USB ports and force shutdownShow
Pi_and_Forceshutdown.png
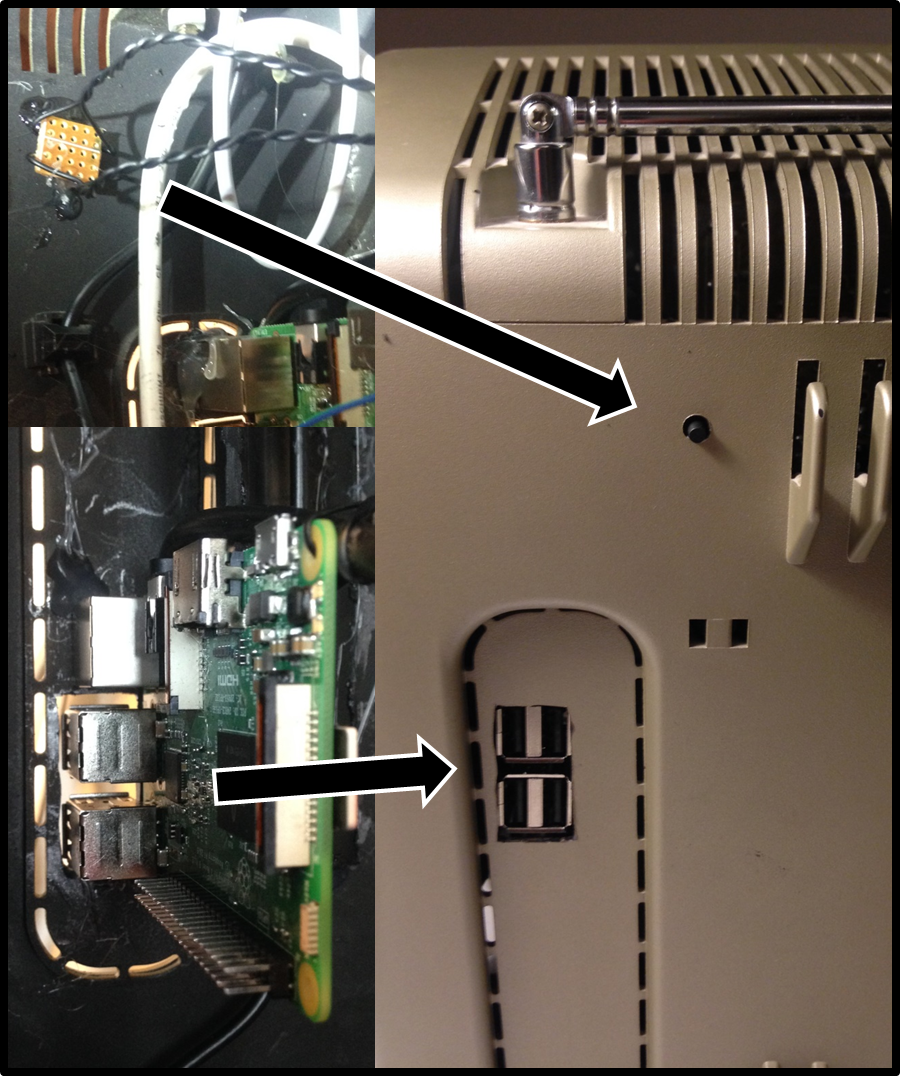
Pi_and_Forceshutdown.png (1.84 MiB) Viewed 9913 times
As mentioned above, the SAFE OFF and ON button are placed next to each other on the side of the TV as I will use them the most. I would just like to label them (wink wink to whoever has a nice old school label maker). From the inside, both buttons were fixe on a piece of perf board (exactly like I saw someone do before, can't remember the person...).
On and Off buttonsShow
safeshutdown onandoff.png
safeshutdown onandoff.png (1.31 MiB) Viewed 9913 times
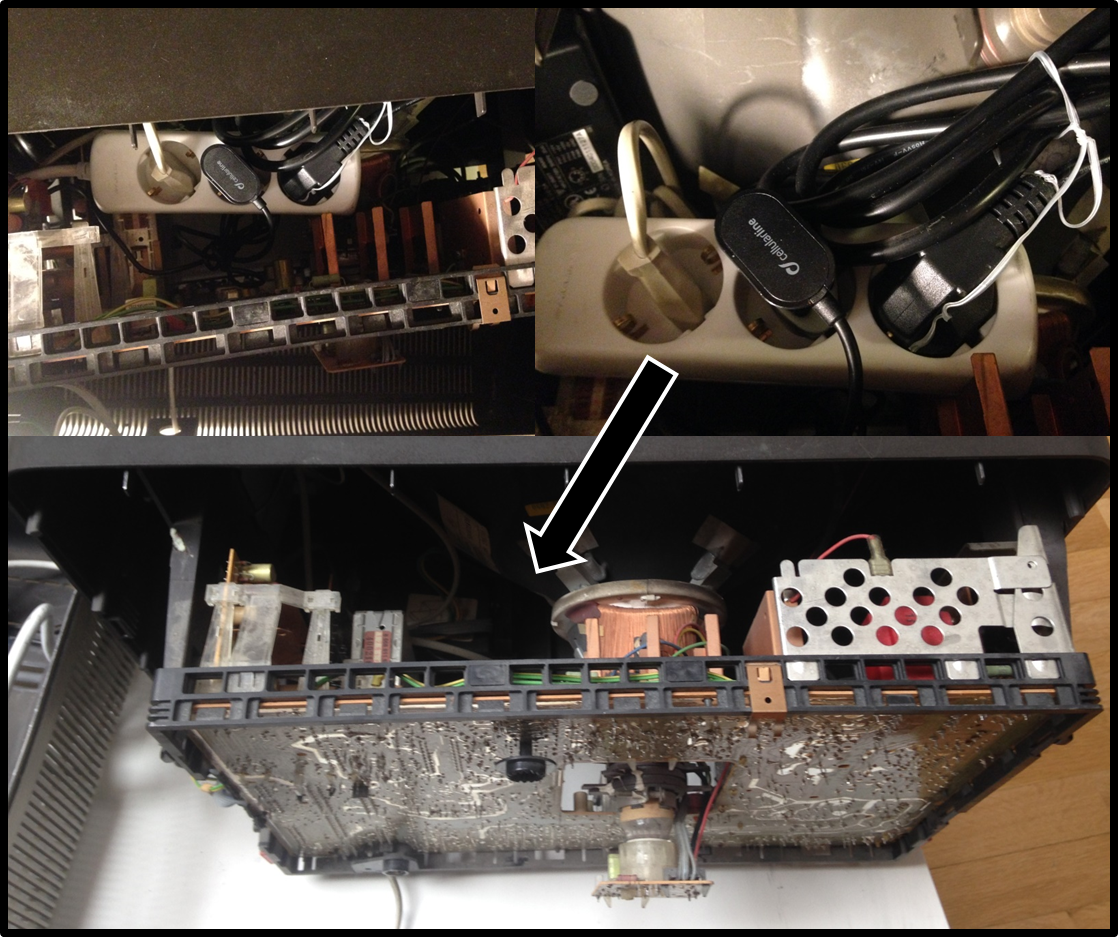
I just stuffed everything in the back/top of the TV, right behind the screen There is a lot of space available. So the RF modulator, the Pi3 and the TV all need their power (duh) and put it all in one multi-socket. The latter is then going OUT of the TV and plugged to the wall.
Cable managementShow
Cable_management.png
Cable_management.png (2.14 MiB) Viewed 9913 times
What should I do with this guy?
Challenge to SudomodersShow
remote.png
remote.png (1.32 MiB) Viewed 9913 times
Last edited by Eccho on Tue Sep 26, 2017 5:35 am, edited 4 times in total.

User avatar
Eccho
Posts: 235
Joined: Mon Nov 28, 2016 5:35 am
Has thanked: 86 times
Been thanked: 106 times

Re: Eccho's Old TV modding

Post by Eccho » Mon Sep 25, 2017 1:23 pm

Slot saving.

User avatar
moosepr
Posts: 524
Joined: Wed Jan 25, 2017 6:18 am
Has thanked: 69 times
Been thanked: 241 times
Contact:

Re: Eccho's Old TV modding

Post by moosepr » Mon Sep 25, 2017 2:36 pm

Remote needs to be converted to a Bluetooth controller!
Get a small cheep LCD in your project https://www.sudomod.com/forum/viewtopic.php?f=22&t=2312
Wrap it all round a battery https://www.sudomod.com/forum/viewtopic.php?f=13&t=2292
Or use a custom PCB to make it really small https://www.sudomod.com/forum/viewtopic.php?f=13&t=2512
or make it really really really really tiny!! https://www.sudomod.com/forum/viewtopic.php?f=13&t=2919

User avatar
rodocop
Posts: 1723
Joined: Mon Aug 22, 2016 3:14 pm
Location: Saskatchewan
Has thanked: 606 times
Been thanked: 608 times

Re: Eccho's Old TV modding

Post by rodocop » Mon Sep 25, 2017 2:46 pm

cool!

User avatar
Eccho
Posts: 235
Joined: Mon Nov 28, 2016 5:35 am
Has thanked: 86 times
Been thanked: 106 times

Re: Eccho's Old TV modding

Post by Eccho » Mon Sep 25, 2017 2:47 pm

moosepr wrote:
Mon Sep 25, 2017 2:36 pm
Remote needs to be converted to a Bluetooth controller!
Haha, you mean a game controller right? Haven't thought about it =) Sounds like this TI calculator modding on another thread!

User avatar
woans
Posts: 15
Joined: Fri Aug 18, 2017 4:52 pm
Been thanked: 9 times

Re: Eccho's Old TV modding

Post by woans » Mon Sep 25, 2017 3:04 pm

Impressive work !

User avatar
Eccho
Posts: 235
Joined: Mon Nov 28, 2016 5:35 am
Has thanked: 86 times
Been thanked: 106 times

Re: Eccho's Old TV modding

Post by Eccho » Tue Sep 26, 2017 4:40 am

Does any of you have a label maker? I mean like this:
labelmaker.jpg
labelmaker.jpg (23.02 KiB) Viewed 9864 times
Would love to make "On", "Off" and "Force Shutdown" labels :)

Edit: Updated main post with text commentary.
Soon to come: diagram of the whole build! :D

User avatar
YaYa
Posts: 1719
Joined: Mon Jun 26, 2017 12:42 pm
Location: brittany - France
Has thanked: 871 times
Been thanked: 689 times
Contact:

Re: Eccho's Old TV modding

Post by YaYa » Tue Sep 26, 2017 1:11 pm

Yeaaah cool project :D

I finally saw your face hahaha ;)

Did you do the safe shutdown yourself ?

Interested in a link or circuitry for my MinPItel project.

I have a circuitry and started some testings with a breadboard but i’m interested in looking into it with different approches.

Thanks for sharing :mrgreen:
Follow me on instagram Image

User avatar
Eccho
Posts: 235
Joined: Mon Nov 28, 2016 5:35 am
Has thanked: 86 times
Been thanked: 106 times

Re: Eccho's Old TV modding

Post by Eccho » Tue Sep 26, 2017 2:00 pm

Thanks Yaya.
No I bought the safe shutdown on Pi supply. I have a link in the parts list! ;)

User avatar
YaYa
Posts: 1719
Joined: Mon Jun 26, 2017 12:42 pm
Location: brittany - France
Has thanked: 871 times
Been thanked: 689 times
Contact:

Re: Eccho's Old TV modding

Post by YaYa » Tue Sep 26, 2017 2:26 pm

Oh well, i didn’t see the links because of your elephant :lol:

You know what ? Your board is the exact same that i’ve been testing. I found the circuitry on their website and decided to design my own board based on this circuitry just to say : hey, i did it lol :lol:

Here’s the tutorial i followed
https://www.pi-supply.com/make/adding-a ... pberry-pi/

EDIT : home made safe shutdown board
90636E00-0832-4FC0-A828-648B3976DFAA.png
90636E00-0832-4FC0-A828-648B3976DFAA.png (232.1 KiB) Viewed 9828 times
478F37DC-91C2-494D-8050-F355AB3D4877.png
478F37DC-91C2-494D-8050-F355AB3D4877.png (145.84 KiB) Viewed 9828 times
Follow me on instagram Image

Post Reply

Who is online

Users browsing this forum: No registered users and 1 guest