New 3DS modified case pi zero portable
Posted: Mon Jan 02, 2017 9:13 pm
Hi there, I’ve been lurking around this forum for quite a few weeks and thought it was time to start posting about my project.
I will need to come up with a better name later but basically it's a raspberry PI zero portable with a heavily modified New 3ds replacement case to make it more ergonomic (I get so many cramps from my 3ds and small handhelds in general). I’m thinking also to make it so that it can be plug into a TV and have a second controller to be able to play with someone. I’ve got a bit of modding experience under my belt, mainly with portabilizing PS2 console but haven’t touch this for a while and got tempted to do a project like this from seeing all the great handheld projects from this site.
Part listing
Case
New 3ds replacement case
http://www.ebay.com.au/itm/272205880719 ... EBIDX%3AIT
New 3ds grip
http://www.ebay.com.au/itm/162036881778 ... EBIDX%3AIT
Back and shoulder button from broken GBA (This seller as a lot of broken nintendo system to play with)
http://stores.ebay.com.au/japan4youstor ... 3055681014
Video
Dalian Good Display 3.5inch 5v screen Video version
https://www.aliexpress.com/item/5V-powe ... 0.0.SehSqh
there is also a VGA version (Couldn’t resist to get this one too)
https://www.aliexpress.com/item/5V-Powe ... 0.0.SehSqh
Mini HDMI adapter
http://www.ebay.com.au/itm/141959339555 ... EBIDX%3AIT
Audio
new 3ds speaker
http://www.ebay.com.au/itm/Replacement- ... 3641.l6368
Sabrent USB Stereo Sound Adapter
http://www.ebay.com.au/itm/191979340467 ... EBIDX%3AIT
PAM8403 Audio Module
http://www.ebay.com.au/itm/351634130386 ... EBIDX%3AIT
3.5mm Stereo SWITCHED PCB Socket from Jaycar ( radio shack Australian equivalent )
https://www.jaycar.com.au/3-5mm-stereo- ... t/p/PS0133
Battery
NCR18650B 3.7V 3400mAh 18650 Li-ion Battery
PCB Charger 3.7V 3A Protection Board
http://www.ebay.com.au/itm/272001467151 ... EBIDX%3AIT
Adafruit Powerboost 1000C
https://learn.adafruit.com/adafruit-pow ... t/overview
microUSB Breadboard Adapter
http://www.ebay.com.au/itm/222300087660 ... EBIDX%3AIT
various prototype board from Jaycar
https://www.jaycar.com.au/universal-pre ... l/p/HP9550
DPDT Switch
https://www.jaycar.com.au/sub-miniature ... h/p/SS0812
Other hardware
Raspberry PI Zero
Star Shaped 4-Port USB 2.0 Hub from Jaycar (Radio Shack Australian equivalent)
https://www.jaycar.com.au/star-shaped-4 ... b/p/XC4302
ION GO PAD Folding Computer Game Controller
http://www.ebay.com.au/itm/252254005180 ... EBIDX%3AIT
Worklog
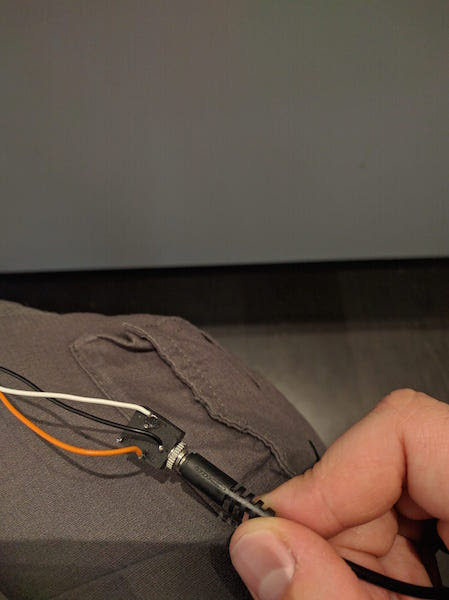
While I was waiting for the different parts for my case I started to do some small things like soldering the protective circuit to my battery and figuring out how to wire the audio jack.


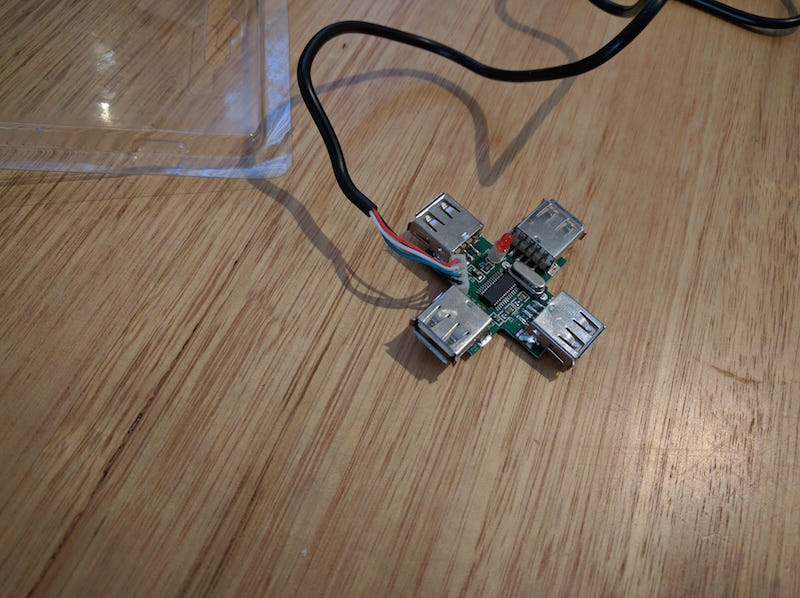
I also had a play with one of those octopus USB hub but out of the 2 I bought one just didn’t work (most likely bad wiring) and the second one was only a usb 1 even if the eBay list was saying it was a USB 2.0. It’s probably why it was only a few bucks. Luckily I found in a Jaycar store ( radio shack Australian equivalent ) close by a nice and compact USB hub 2.0. By trimming the PCB it should end up be quite compact.


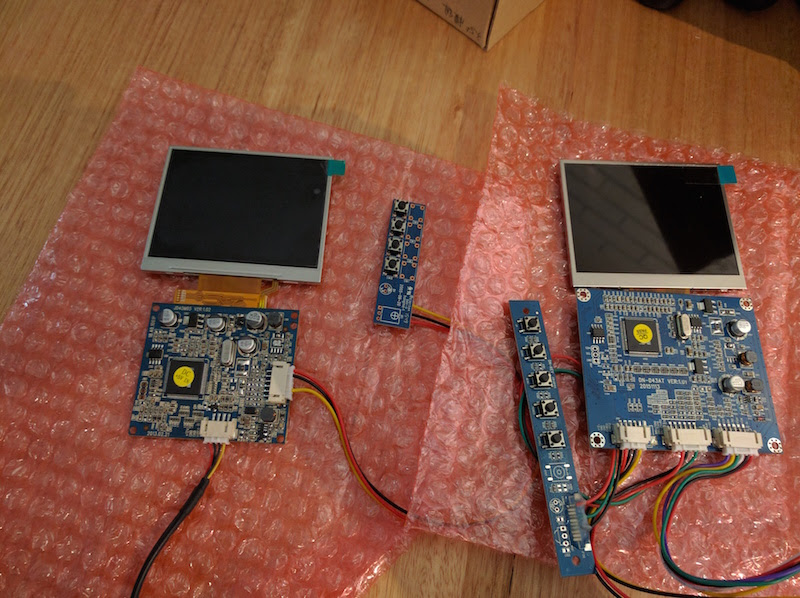
I then received my reverse monitor that I had ordered a month ago. One thing that I realised by playing with it was the viewing angle where not great and mine came with a dead pixel, I of course realised this only after the screen was apart Oh well at least the case is made of ABS so I will be using this for my Frankencasing later on. By doing a bit of searching I then found some Dalian Good Display screen at 3.5inch at 5v input which sound pretty good so I ordered those. In the past I had a bit of experience playing with there screen and usually they are quite good.

I then cut in big chunk the monitor case (only the back part) and submerged the piece with some acetone in a glass jar to create some ABS cement.
As always safety first when handling chemicals, you should be wearing gloves to avoid contact with this product.

After almost 2 month of waiting, I finally receive my new 3DS replacement case.


Started to do some fitting and cutting.

The result some nice runny ABS cement, this cement will start drying quite fast so you want to only open the jar when using it.
Also if it get dry just add a bit more acetone and mix it up.

Cut the case and tested the cement, it work quite well.


Next I went to cut the bottom part of the 3ds, gluing it to the bottom part of the grip and gluing the front of the 3ds case to the front of the grip.


I got a broken GBA a few weeks before, I really like the chunky shoulder buttons it has so end up cutting them along with the back of the case.
I did a bit of rough sanding, keep both part of the shoulder button case together with some blue tack and the screws and glue then in the case after cutting the space for them.


The last big part was to relocate the Dpad and placing the back of the GBA in the case


Next will be quite a lot of sanding, apply filler and more sanding. Also thinking about where to place the different ports.
I will need to come up with a better name later but basically it's a raspberry PI zero portable with a heavily modified New 3ds replacement case to make it more ergonomic (I get so many cramps from my 3ds and small handhelds in general). I’m thinking also to make it so that it can be plug into a TV and have a second controller to be able to play with someone. I’ve got a bit of modding experience under my belt, mainly with portabilizing PS2 console but haven’t touch this for a while and got tempted to do a project like this from seeing all the great handheld projects from this site.
Part listing
Case
New 3ds replacement case
http://www.ebay.com.au/itm/272205880719 ... EBIDX%3AIT
New 3ds grip
http://www.ebay.com.au/itm/162036881778 ... EBIDX%3AIT
Back and shoulder button from broken GBA (This seller as a lot of broken nintendo system to play with)
http://stores.ebay.com.au/japan4youstor ... 3055681014
Video
Dalian Good Display 3.5inch 5v screen Video version
https://www.aliexpress.com/item/5V-powe ... 0.0.SehSqh
there is also a VGA version (Couldn’t resist to get this one too)
https://www.aliexpress.com/item/5V-Powe ... 0.0.SehSqh
Mini HDMI adapter
http://www.ebay.com.au/itm/141959339555 ... EBIDX%3AIT
Audio
new 3ds speaker
http://www.ebay.com.au/itm/Replacement- ... 3641.l6368
Sabrent USB Stereo Sound Adapter
http://www.ebay.com.au/itm/191979340467 ... EBIDX%3AIT
PAM8403 Audio Module
http://www.ebay.com.au/itm/351634130386 ... EBIDX%3AIT
3.5mm Stereo SWITCHED PCB Socket from Jaycar ( radio shack Australian equivalent )
https://www.jaycar.com.au/3-5mm-stereo- ... t/p/PS0133
Battery
NCR18650B 3.7V 3400mAh 18650 Li-ion Battery
PCB Charger 3.7V 3A Protection Board
http://www.ebay.com.au/itm/272001467151 ... EBIDX%3AIT
Adafruit Powerboost 1000C
https://learn.adafruit.com/adafruit-pow ... t/overview
microUSB Breadboard Adapter
http://www.ebay.com.au/itm/222300087660 ... EBIDX%3AIT
various prototype board from Jaycar
https://www.jaycar.com.au/universal-pre ... l/p/HP9550
DPDT Switch
https://www.jaycar.com.au/sub-miniature ... h/p/SS0812
Other hardware
Raspberry PI Zero
Star Shaped 4-Port USB 2.0 Hub from Jaycar (Radio Shack Australian equivalent)
https://www.jaycar.com.au/star-shaped-4 ... b/p/XC4302
ION GO PAD Folding Computer Game Controller
http://www.ebay.com.au/itm/252254005180 ... EBIDX%3AIT
Worklog
While I was waiting for the different parts for my case I started to do some small things like soldering the protective circuit to my battery and figuring out how to wire the audio jack.
I also had a play with one of those octopus USB hub but out of the 2 I bought one just didn’t work (most likely bad wiring) and the second one was only a usb 1 even if the eBay list was saying it was a USB 2.0. It’s probably why it was only a few bucks. Luckily I found in a Jaycar store ( radio shack Australian equivalent ) close by a nice and compact USB hub 2.0. By trimming the PCB it should end up be quite compact.
I then received my reverse monitor that I had ordered a month ago. One thing that I realised by playing with it was the viewing angle where not great and mine came with a dead pixel, I of course realised this only after the screen was apart
I then cut in big chunk the monitor case (only the back part) and submerged the piece with some acetone in a glass jar to create some ABS cement.
As always safety first when handling chemicals, you should be wearing gloves to avoid contact with this product.
After almost 2 month of waiting, I finally receive my new 3DS replacement case.
Started to do some fitting and cutting.
The result some nice runny ABS cement, this cement will start drying quite fast so you want to only open the jar when using it.
Also if it get dry just add a bit more acetone and mix it up.
Cut the case and tested the cement, it work quite well.
Next I went to cut the bottom part of the 3ds, gluing it to the bottom part of the grip and gluing the front of the 3ds case to the front of the grip.
I got a broken GBA a few weeks before, I really like the chunky shoulder buttons it has so end up cutting them along with the back of the case.
I did a bit of rough sanding, keep both part of the shoulder button case together with some blue tack and the screws and glue then in the case after cutting the space for them.
The last big part was to relocate the Dpad and placing the back of the GBA in the case
Next will be quite a lot of sanding, apply filler and more sanding. Also thinking about where to place the different ports.