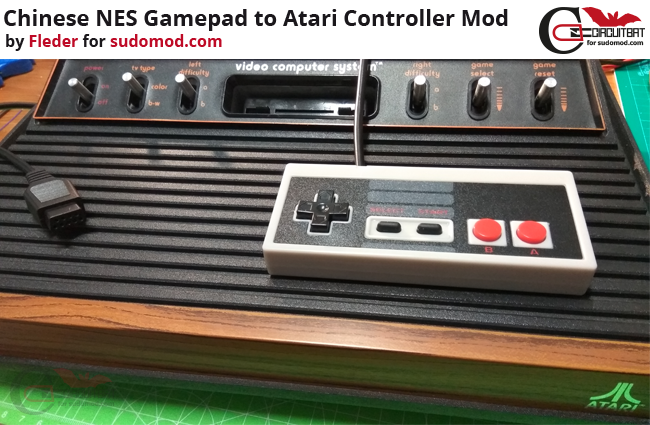
So... you want to play a few good old-fashioned games on your trusty Atari 2600/7800
but your gamepad/joystick is broken or you don‘t even own one because they are a bit on the expensive side and/or quite rare these days? Chances are, you even just bought the Atari Console without any controllers, because you aren‘t all that bright and just wanted to have that beautiful piece of nostalgia right now, because the seller told you it was the last one available and he‘s got another guy interested in it, which means you have to decide right now or it will be gone forever.
Fear not, my fellow retro gaming friend (we are not really friends, stop calling me on weekends), for I am here to help you out of your misery (can‘t help with your crushing anxiety, though).
We are going to mod a cheap chinese knock-off NES Gamepad to work with the Atari 2600/7800 series and save a lot of bucks ins the process to make your wife less angry about buying this overpriced „kids game you don‘t even play with“.
All you have to do is to buy a few parts, solder a couple of wires and hand me over all your stuff as a thank you. Sounds easy, right? And it really is, if you know how to use a soldering iron and read. So naturally, I expect you to fail miserably.
Well now, but what do we actually need?
You really want to do this? Fine, but don‘t tell me I did not warn you of your inevitable failure!
Parts (around 4-5€)
1x Chinese NES controller clone
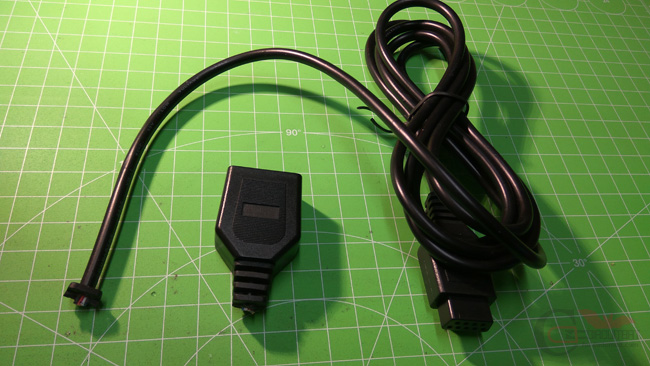
1x Atari Controller extension cable
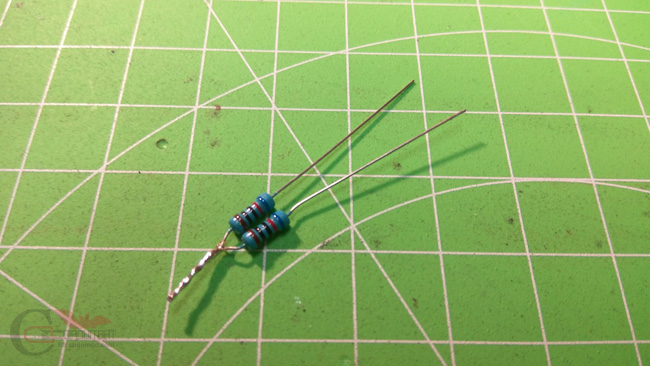
2x 620 Ohm resistor (1/4W - 0,25W)
Tools
- Soldering Iron & Solder
- Phillips Screwdriver (the one with the cross)
- Box Cutter (sharp knife)
- Cutting Pliers or Scissors
- Drill & 2mm Drill Bit (or bigger)
- Multimeter (recommended)
- Shrink Tubing or Insulating Tape
- a bit of wire
Now, let us begin:
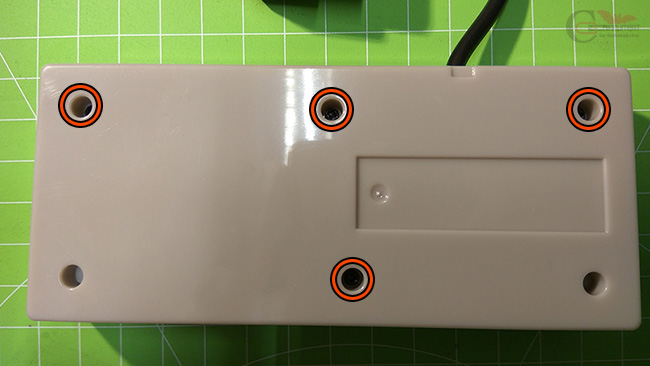
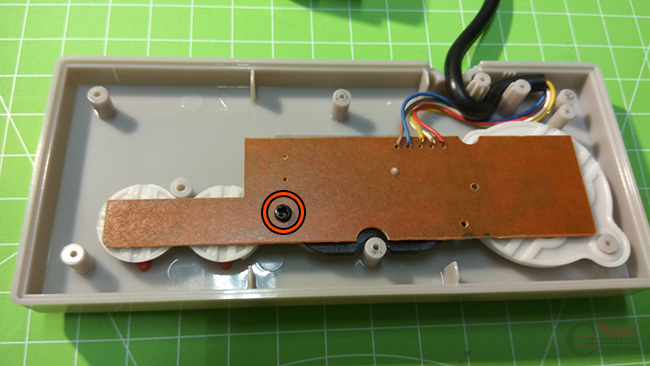
Grab your screwdriver and remove the 4 screws at the back of the gamepad.
(yes, it is the silver thingy with the cross-shaped end that hurts when inserted into your eye)
screwing aroundShow
screwing some moreShow
If not, you can‘t follow this guide, but there should still be a way to make it work. Just write me a PM and send over some good pictures and we will surely figure something out (if I did not „accidentally“ delete your PM right away, of course).
look at this beautyShow
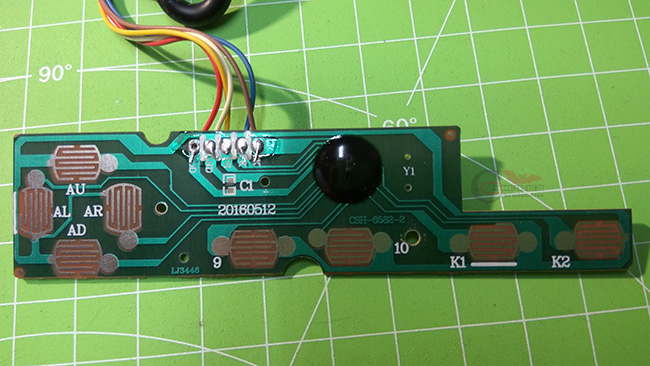
The following images should, hopefully, explain what you have to do, pretty well.
If you, despite all hope I still have left for the human race, manage to f%#k up, just post here on this thread, wait for the users to stop laughing at you and hope someone else figured out your mistake.
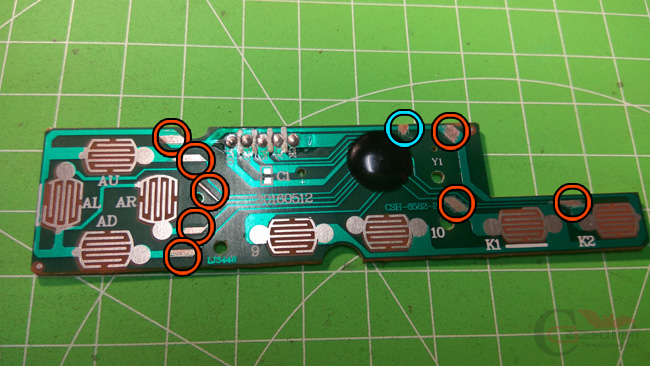
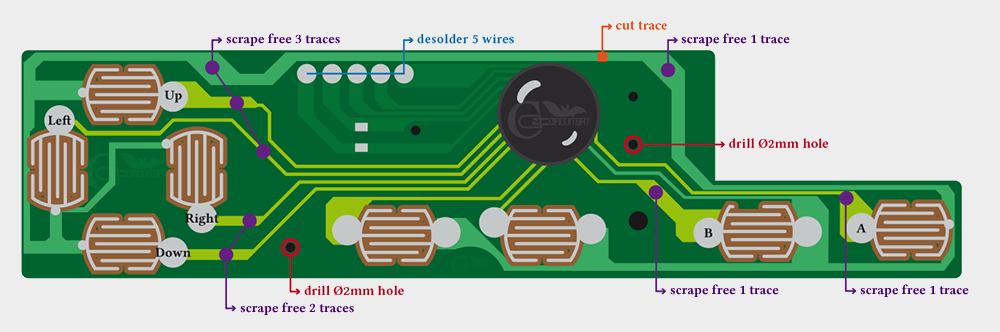
As you can see, you have to scrape the traces with your box cutter/sharp knife to expose the actual conducting traces underneath. Be careful to not damage the traces in this process. Just scrape gently until you start to see some shiny silver stuff. That‘s it! You found a Silver vein! Get out your pickaxe and mine the heck out of it, before some evil griefer will detonate the TNT package underneath you- wait, nevermind.
Some traces are a bit thin, just scrape a longer part of it, to get enough exposed area for your wires to stick to.
You also have to cut a trace (yes, this time actually damage it, so there is no connection anymore) at the orange marked spot on the top right. Use your Multimeter to make sure you really severed it.
Then widen 2 holes that are already on the PCB with your drill to make them bigger. This is where you will pull the wires you will later solder on through, to make them not increase the thickness of the PCB and thus disrupt the button presses (this would be bad, not horrible, but bad).
Also, desolder the 5 wires in the top middle and discard the original NES cable. We do not need it anymore. If you want, you can salvage it for other projects or just the wires inside. Or make a small whip out of it and pretend you are a succubus/incubus to revive your boring love life with your partner (don‘t do this. this is a terrible idea, believe me).
scrape, cut and drillShow
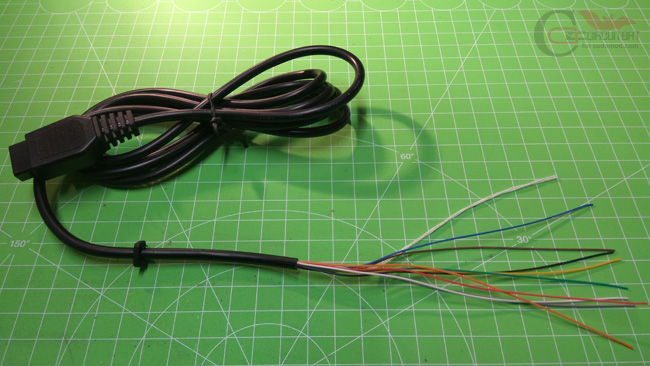
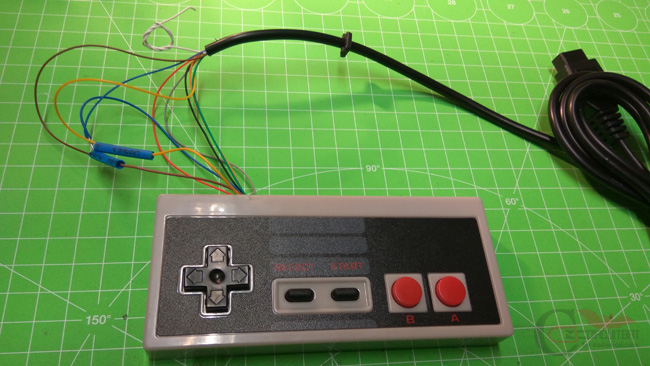
Cut away enough insulation to have around 13cm of wires exposed, to make it easier for you to solder.
There is some sort of string inside the cable, too. Just cut it away, you will not need it.
I like to tin the wires up front, so it will be faster to solder them on in the next step. But you can try to do it after you finished this project, sure. No, really, it‘s okay. Go ahead, you are the genius here.
cut my cable into piecesShow
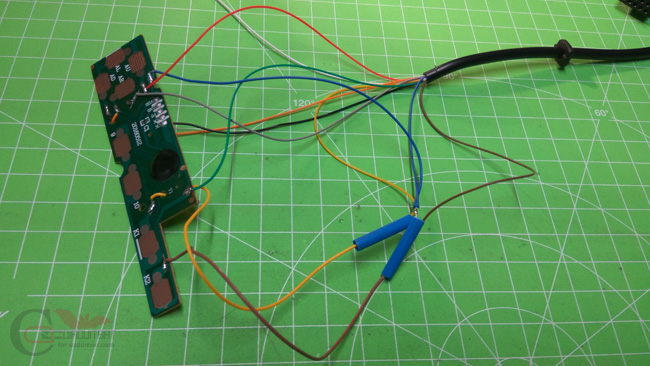
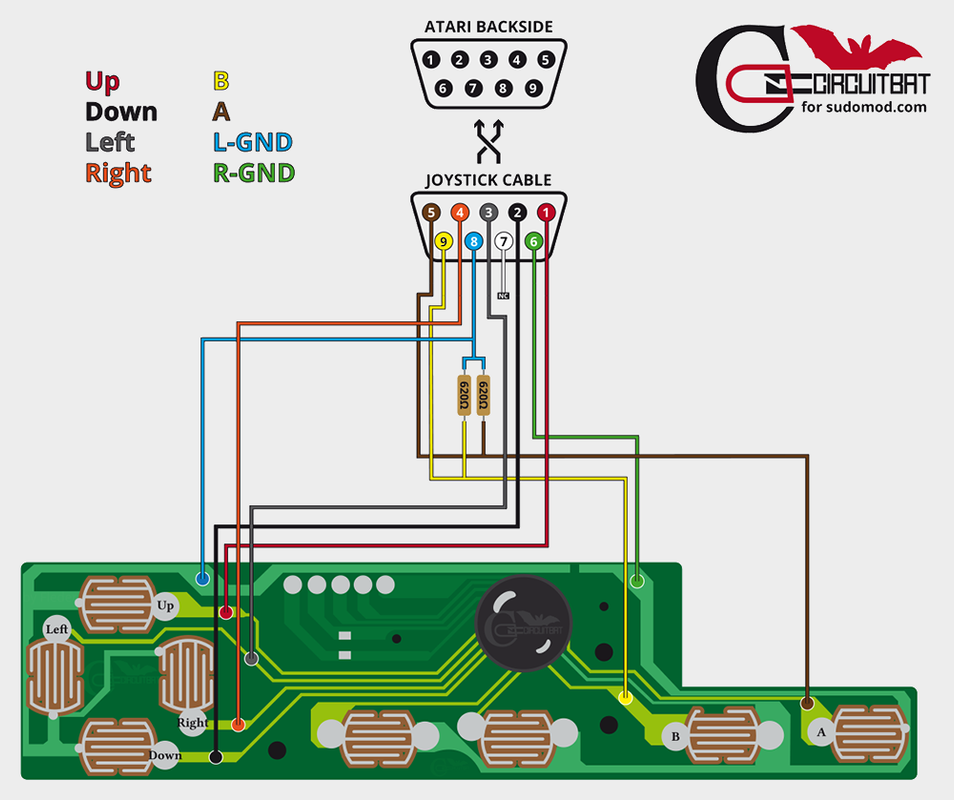
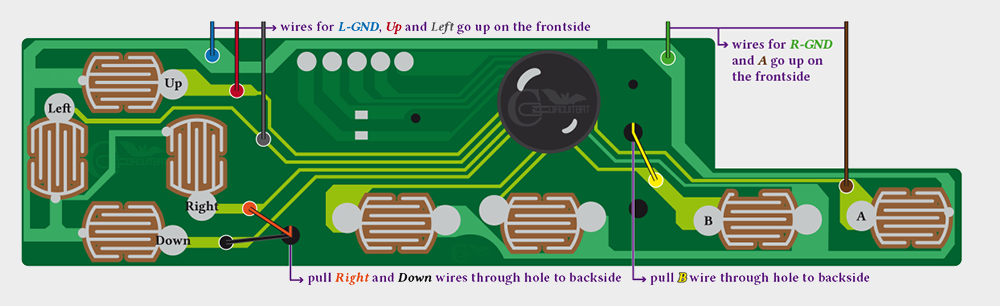
Get your stripped Atari Cable and solder on the wires as seen below. But also take a look at the second image after that, because you will have to run 3 wires through the widened holes you drilled before, to get them out of the way. Otherwise, they would increase the thickness of the whole PCB and thus your buttons will be harder to press, which makes it really uncomfortable to play with.
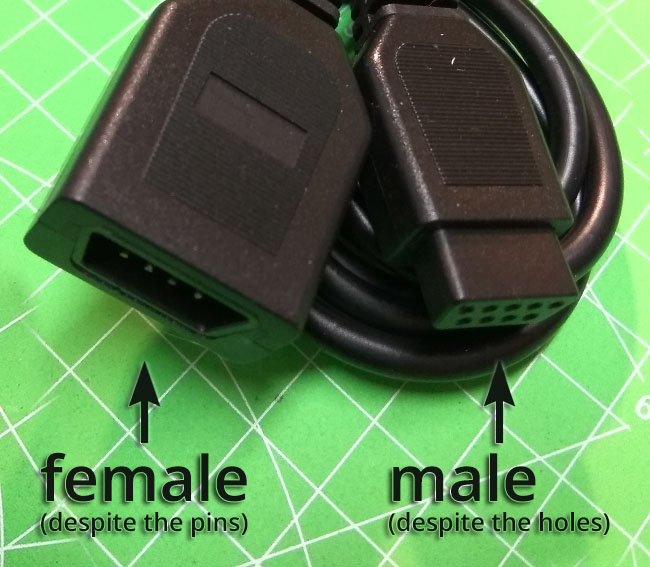
The colours pictured here are like that on all of my ordered Atari extension cables, but they might differ from yours! So make sure to check continuity with your Multimeter before soldering them on. Or don‘t, I don‘t care.
You can put the probe of your Multimeter inside the little holes (yeah, you like that part, don‘t you? pervert) of the male end and the other on the bare wires. Use the reference in the picture below. The colours should correspond to the Buttons (written top left).
The R-GND (right ground) is actually connected to the trigger pin, but to make it easier for you to understand, (I do not really think you will manage to do this) let us just call it R-GND (right ground).
Here, the extra wire comes into play, as you have to solder in the Resistors and make other connections.
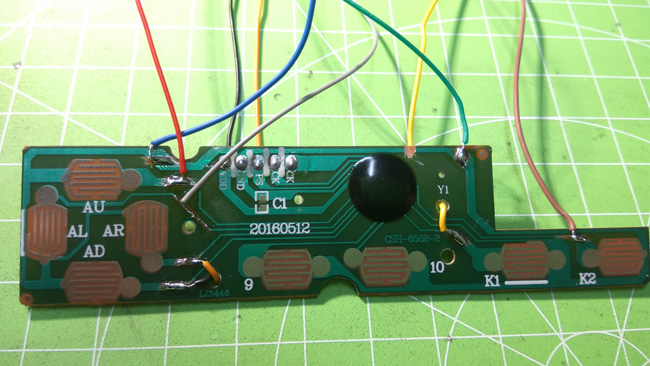
oh god, so many wiresShow
just hide a fewShow
(maybe better, but I am pretty sure you really did a bad job at soldering, shame on you!)
shinyShow
In the last Spoiler Tag, you will find a few detail pictures for your enjoyment.
Now, go and play with your little DIY toy as long as your shoddy solder joints hold it together. Good luck!
Your first and only love, Fleder

I am the last Spoiler Tag he was talking aboutShow