Page 1 of 1

Gameboy Zero Project

Posted: Sat May 28, 2016 5:48 pm
by obey_yourmaster
Hi guys, just wanted to share my Gameboy Zero project!

Here are the pictures of the Gameboy I purchased on eBay:

Image

Image

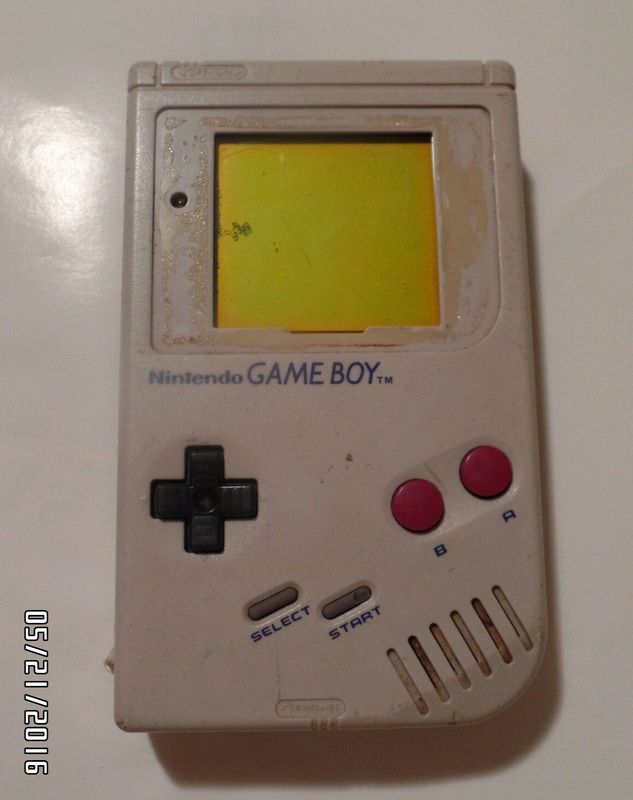
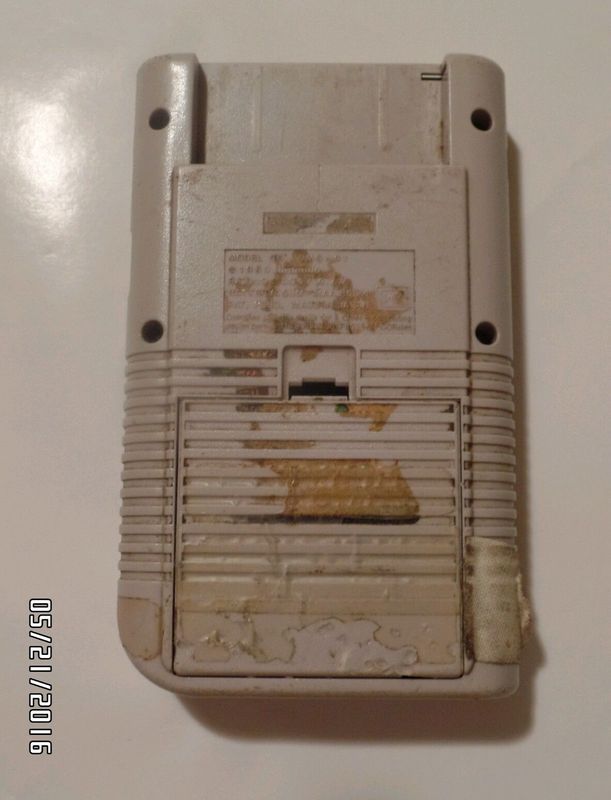
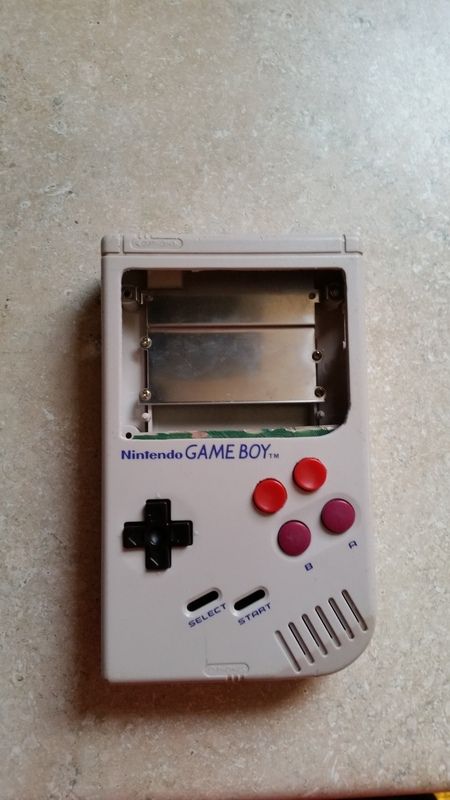
The unit was a bit dirty, with some residue from what I assume were stickers. The batter cover was held on by tape, which I can only assume was from the beginning of time. Additionally, it looks like something (which I hope was a dog) chewed on the battery cover. It's missing the tabs on the bottom of the cover, as well as the tab at the top, but it stays in pretty well. So, after gutting the thing, I washed the case and was able to get it pretty clean.

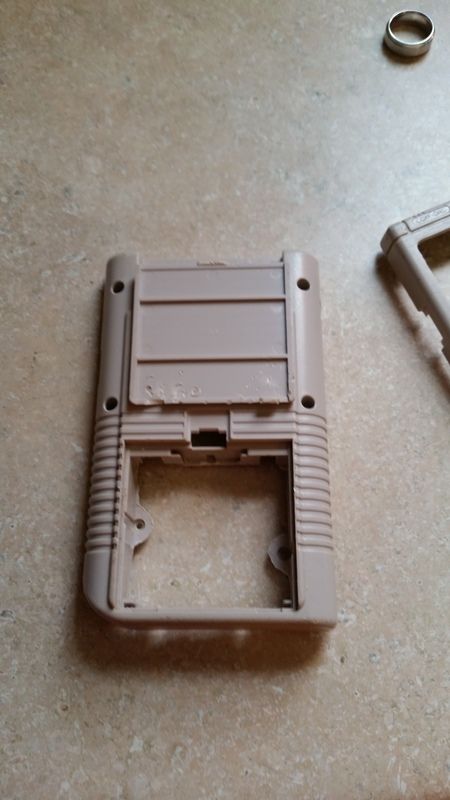
I used Wermy's method of tracing the button holes on the NES controller and transferring the graphite to the case. I used wax paper, which worked fine. The buttons were by far the hardest part of the project so far. I dremeled out most of the button hole, then used a knife to finish them off. I'm a perfectionist, so I was meticulous when it came to the button holes and the screen.

I've used a dremel in the past, but not for a while. What I did not expect was the molten globs of plastic flying at me when shaping the case. Luckily, I survived to tell the tale.


Image

Image

Image
This is my first project like this. I've soldered a bit before (some work in electric guitars) but nothing on such an intricate scale. Hopefully it'll go well. My Raspberry Pi, Teensy board and a set of helping hands are coming in the mail next week, so we'll see how good I really am at soldering!

On a final note, I'll share the conversation I had with my wife about the project earlier:

Her: "So...you took it apart...and then you're just going to put it back together again?"
Me: "Yeah, but it'll have a new screen, extra buttons, and it'll let me play basically any game I want."
Her: "...did it work before?"
Me: "No, it didn't."
Her: "And you paid $25 for it?!"

We'll see how it plays out.

Thanks for reading!

Re: Gameboy Zero Project

Posted: Sat May 28, 2016 8:28 pm
by Topher
Man that case sure did clean up nice. I'm in the same boat as you soldering wise, but it looks like fun. Hopefully I don't mess mine up too bad, my screen just got here today, time to start putting it all together.

Re: Gameboy Zero Project

Posted: Sat May 28, 2016 8:51 pm
by jlane52641
obey_yourmaster wrote: Her: "So...you took it apart...and then you're just going to put it back together again?"
Me: "Yeah, but it'll have a new screen, extra buttons, and it'll let me play basically any game I want."
Her: "...did it work before?"
Me: "No, it didn't."
Her: "And you paid $25 for it?!"
LMFAO!
Sounds about right, I can't tell you how many conversations about it with people go like this lol

Re: Gameboy Zero Project

Posted: Sun May 29, 2016 12:59 am
by Bendra
Those kind of conversations are probably just well understood here :lol:

Looks great so far! How did you cleanup the case, did you use some kind of bleaching technique? My GameBoy came very disheveled too...

Hope to see further pictures of your progress.

Re: Gameboy Zero Project

Posted: Wed Jun 01, 2016 7:37 pm
by obey_yourmaster
Bendra wrote:Those kind of conversations are probably just well understood here :lol:

Looks great so far! How did you cleanup the case, did you use some kind of bleaching technique? My GameBoy came very disheveled too...

Hope to see further pictures of your progress.
Just Dawn dish soap and an old toothbrush :)

I'm soldering the traces now...talk about a pain! I've got to the point where they're connected and glued down, but definitely my least favorite part of the project thus far.

Just out of curiosity, how has everyone been doing their X and Y buttons? As you can see, mine are a bit rough around the edges. I'm hoping sandpaper will help smooth it out...

Re: Gameboy Zero Project

Posted: Wed Jun 01, 2016 7:48 pm
by wermy
Haha! I've had similar conversations. :D

Looking good so far! And yes tapping into the controller board traces are a pain in the butt. I have no experience in designing/manufacturing PCBs so I did what I could with what I had -- sure would have been nice to have the custom button PCBs that people are selling on here. :D

As for the button holes, I just used a sanding bit on my dremel and went very very slowly.

Re: Gameboy Zero Project

Posted: Wed Jun 08, 2016 7:08 pm
by obey_yourmaster
An update for anyone who may be following my progress.

Image

After much headache, heartache, and patience, I was able to get all of my button traces soldered up to the Teensy and working properly. I had all of the wires soldered, tested the connection, then hot glued. I programmed my Teensy, plugged it into my computer, and....

nothing worked. Awesome.

It was at this point I realized that I had not yet connected the ground wire (which is a big deal, let me tell you) to the Teensy board. I got that soldered up and about half of my buttons worked. Progress, at least.

Here's what worked:

Up
Right (but it was hitting right and up at the same time...)
A
X
Y
Select

No response from the others.

So, I ripped it all apart and started again, making sure each trace had a good connection, and wasn't bridged to another trace by mistake.

Same issue. But at least Right is only hitting Right, now.

Well, I reviewed Wermy's example and found that I had missed a ground connection, in the lower left next to Select. That would explain it.

So I scraped some traces, threw on some solder, and it works, right? Nope.

I scraped too much and went right through the trace. Awesome.

So, I ended up bridging the traces in two spots. Once near the original trace, then once again after the broken trace. To avoid further issues, I covered some wire with solder and used that to bridge the connections. Works like a charm.

Everything works now (thank God), but I do have one issue. When I press the X or Y buttons, I'm getting multiple button hits. In Notepad (when testing), I'll get a signal, but it'll send the signal three or four times for each button press. I'm not overly concerned, as I'm not planning on using them much, but if anyone has had similar experience or anything I could try, I'd be open to some ideas.

I did use foil tape (usually used for duct work) for the contact points for the X and Y buttons, which could be part of the issue. I was initially worried about overheating, but I'm doubting 5v will overheat them.

Now the project is halted, as I'm waiting for my screen (http://www.gearbest.com/development-boa ... 29447.html), but making progress!

Thanks for reading!

As a side note, when I was purchasing supplies I was very anxious to find wire to use in the project. I've been using the wire from the NES controller I got the red buttons from, and it works like a charm!

Re: Gameboy Zero Project

Posted: Wed Jun 08, 2016 7:38 pm
by joe7dust
obey_yourmaster wrote: The unit was a bit dirty,
+1 for Understatement of the Year! :)

Re: Gameboy Zero Project

Posted: Thu Jun 09, 2016 8:03 am
by _N0x
obey_yourmaster wrote: [...] a bit dirty, with some residue [...]
Lol

Re: Gameboy Zero Project

Posted: Sun Jun 19, 2016 8:49 pm
by obey_yourmaster
After browsing the forums, it seems this thread is in the wrong category...maybe Wermy could move it for me? :)

Anyways, my Gearbest screen FINALLY came through (word of advice; the screen works well and was super cheap, but splurge on the shipping. Their free shipping is so so so slow. Anyway...) and I was able to convert it to 5 watts very easily and get it hooked up to the Raspberry Pi. It actually went off without a hitch the first time by some miracle. Here's a pic:

Image