Hi,
can you share your config.txt please?
Thanks.
chiz's GB Pi2

Re: chiz's GB Pi2
@GnobarEl
Which part exactly of the config.txt you're interested in?
*** Update #17 ***
Finally, after busting two (2) USB hubs, frying one USB gamepad board and lots of sleepless weekend hours, my GB Pi 2 is almost complete. Managed to mount today the battery connector and the LCD button controller board.
Battery Connector
I thought of mounting the battery JST connector in one of the sides in the battery compartment. This makes it easier to pull the connector if I want to replace the battery with a fully charged one.
[spoiler="battery connector"]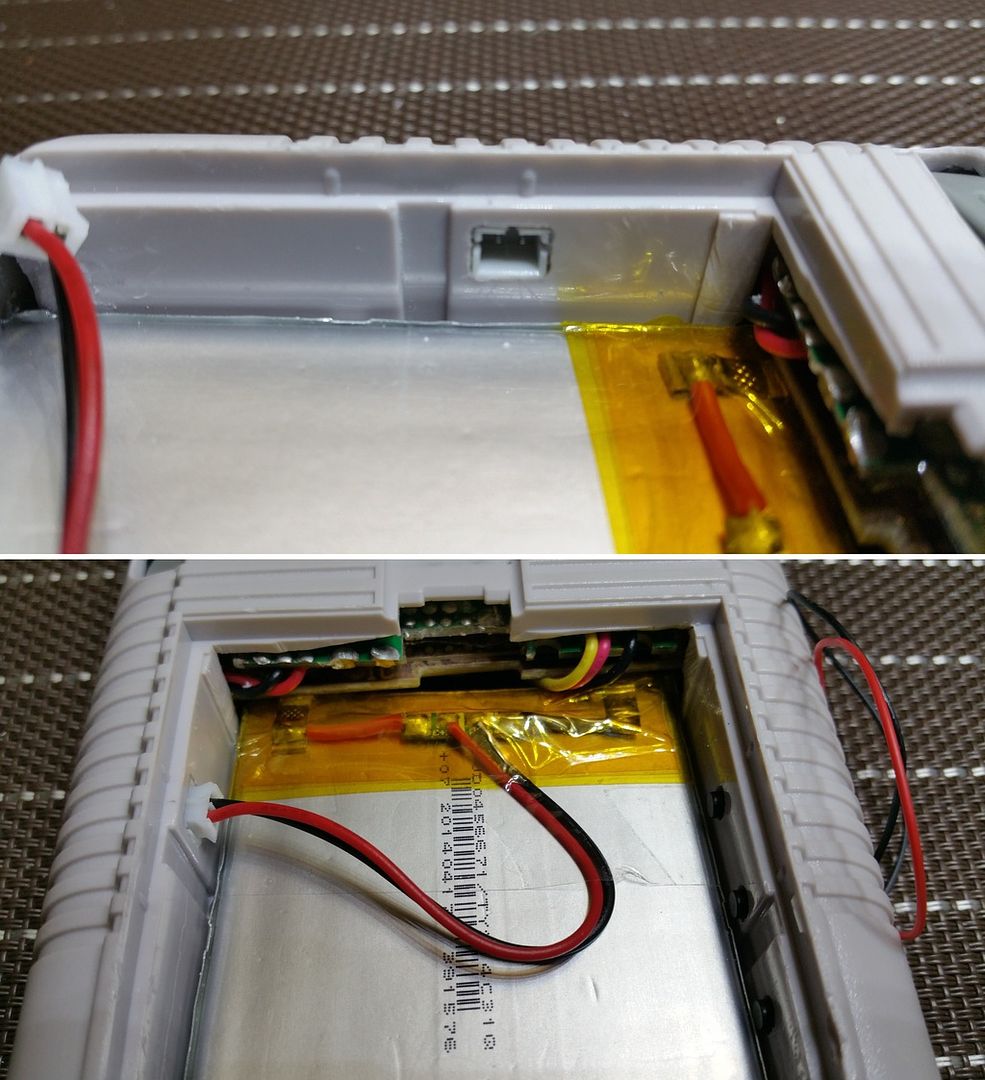 [/spoiler]To make it easy to pull the battery, I simply added a pull tab using scotch tape.
[spoiler="battery pull tab"]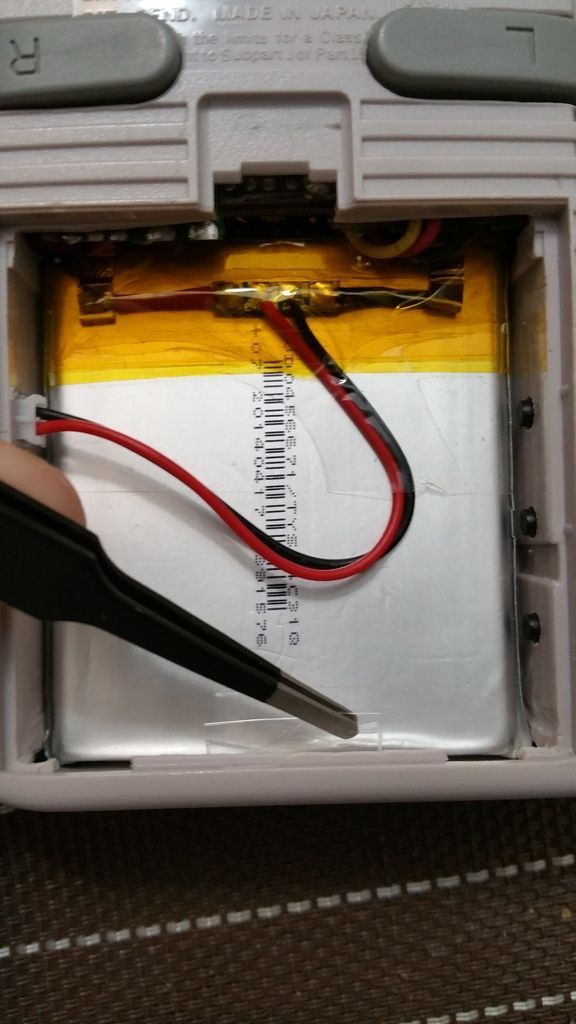 [/spoiler]
LCD Button Controller
I mounted the LCD button controller on the other side of the battery compartment opposite the battery JST connector. This makes the button controller easily accessible by just removing the battery cover.
[spoiler="LCD button controller"]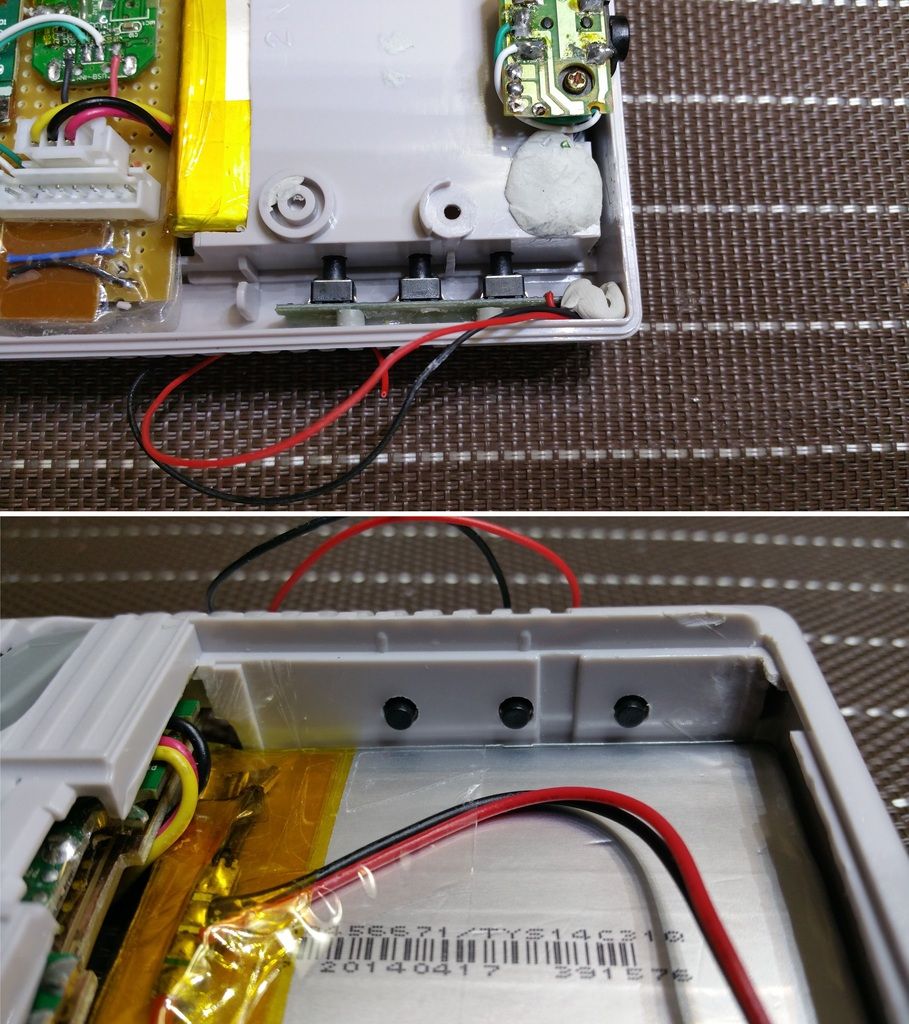 [/spoiler]
"Mostly final state" Shots
Here are pictures of the almost final state pending completion of the following:
1. Replace the sticky tack with double adhesive foam to secure the components
2. Add mini speaker - currently, audio works using the 3.5mm jack. I'm awaiting arrival of the 4-ohm and 16-ohm mini speakers that I ordered.
3. Replace screen protector with glass protector and mount permanently.
4. Add HDMI port - not needed at the moment but will be required to play 2-player games by connecting another USB gamepad
5. Optional: block areas with light bleed - I noticed some areas of the case that have lights bleeding. Not a show stopper but I like to address nonetheless.
6. Optional: incorporate Popcorn's graceful shutdown - right now I rely with EmulationStation's shutdown menu action then wait for the screen to turn off before I turn off the power. Works for now.[spoiler="front"]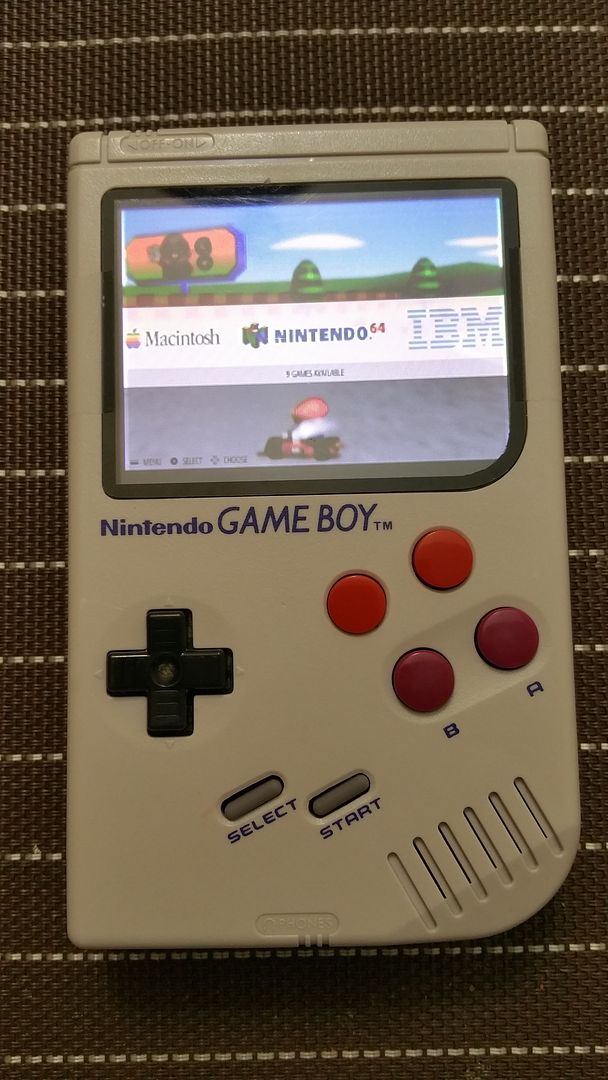 [/spoiler][spoiler="top showing power and charging LEDs"]
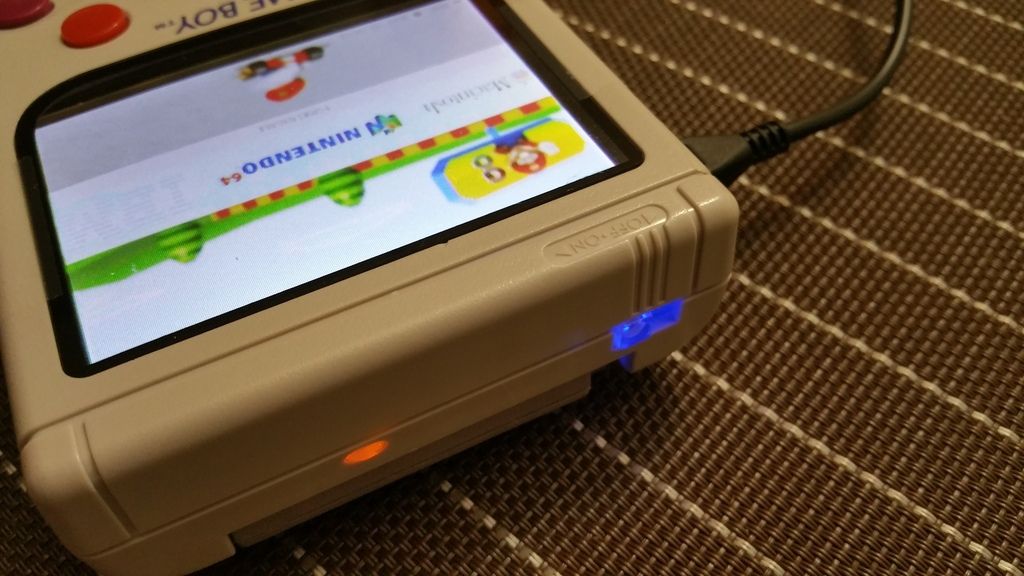 [/spoiler][spoiler="left side view showing stock volume wheel and USB port"]
 [/spoiler][spoiler="bottom showing stock 3.5mm jack"]
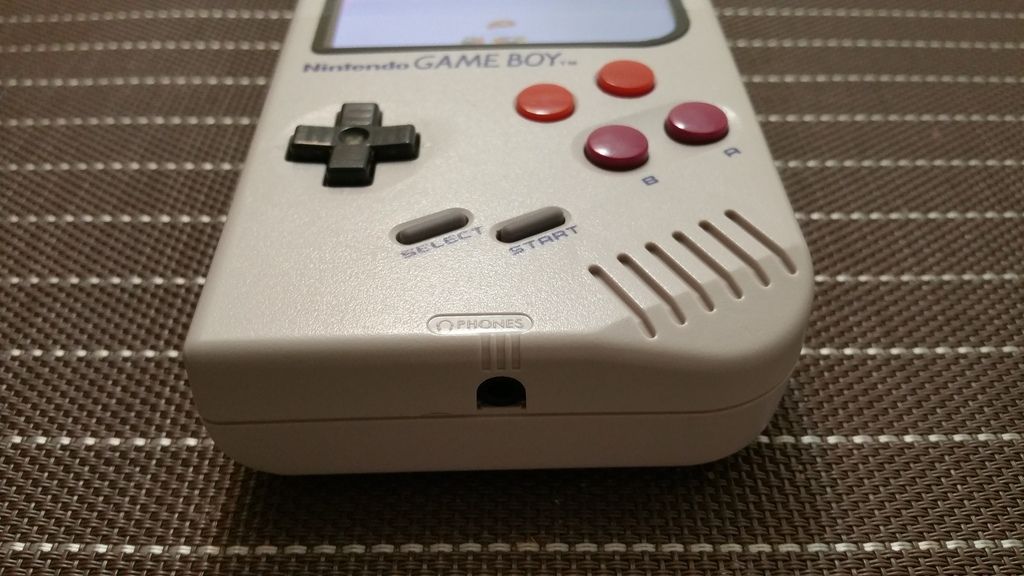 [/spoiler][spoiler="right side view showing micro USB power connector. Will add HDMI port later."]
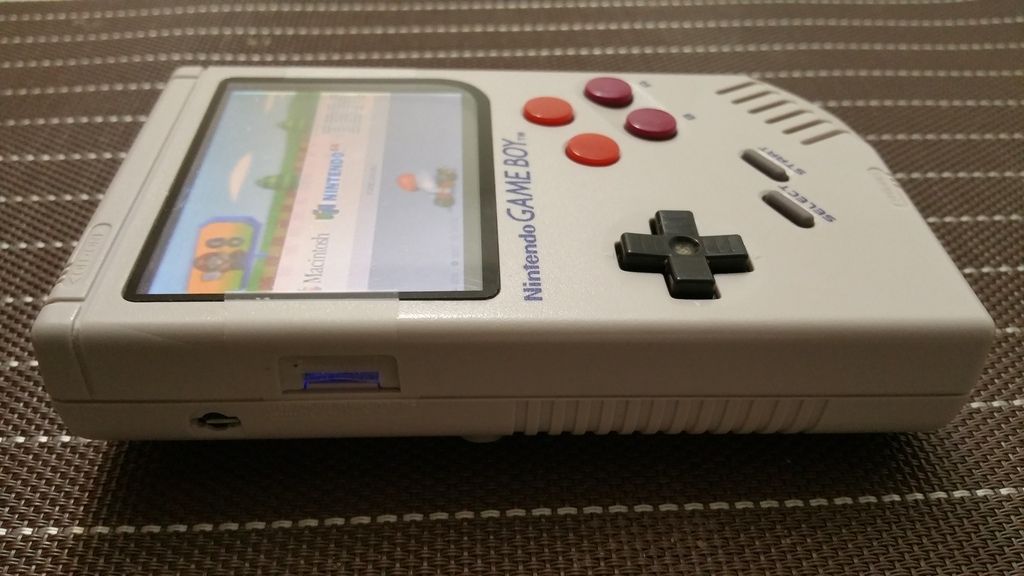 [/spoiler][spoiler="back view showing back buttons, battery and cart covers"]
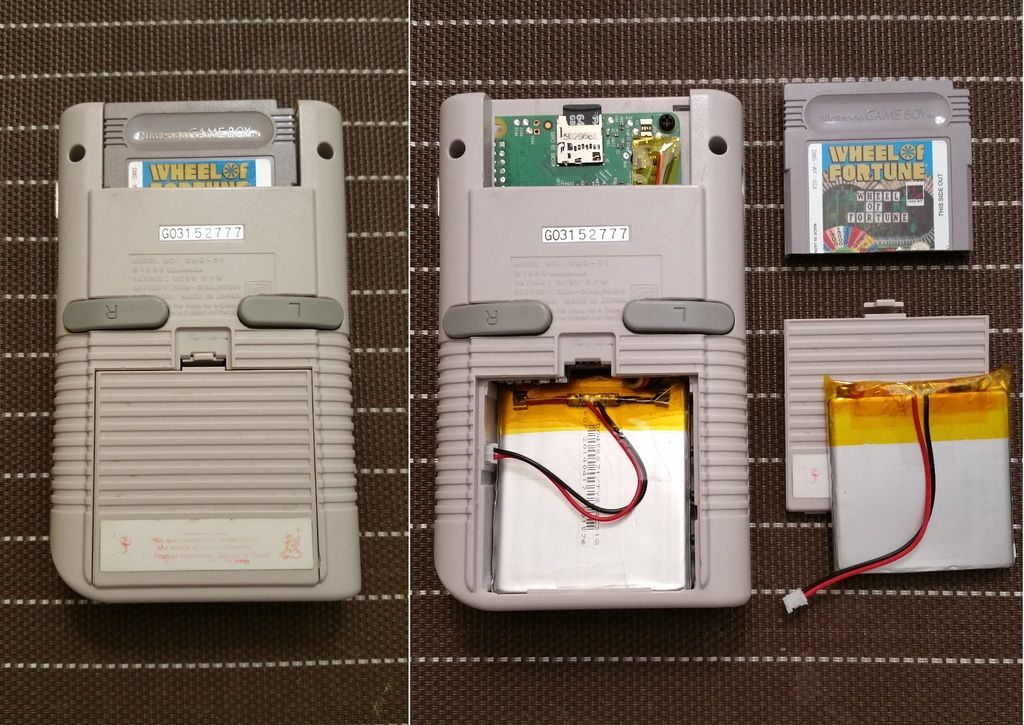 [/spoiler]
Joining its bigger "portable" brother: the PortaMAME
Adding this new baby to my growing family of retro and arcade consoles. Here are pics of my GB Pi 2 together with my PortaMAME portable arcade machine.[spoiler="PortaMAME full shot"]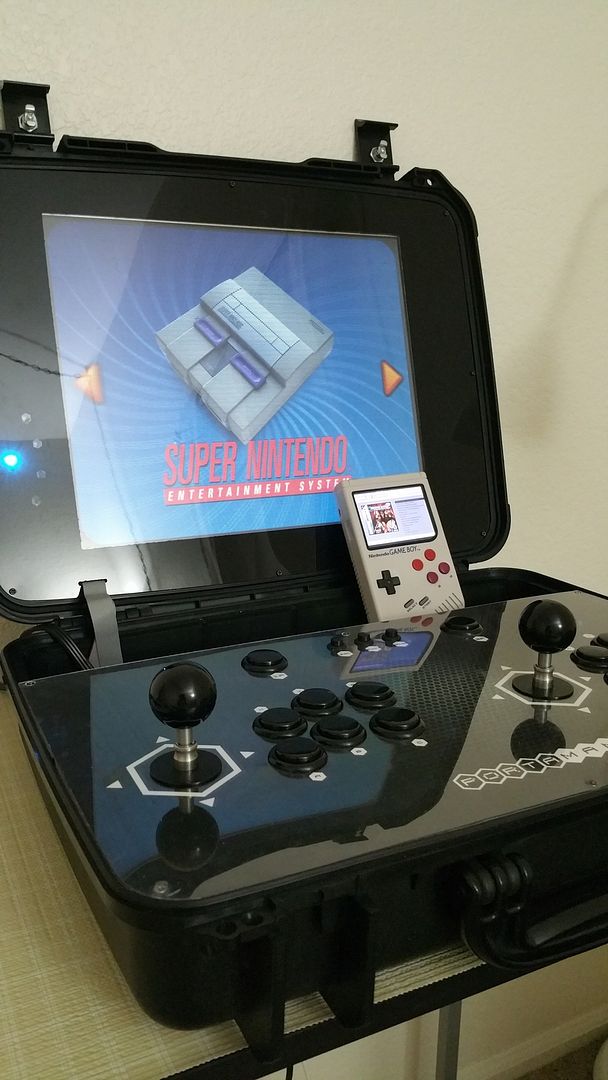 [/spoiler][spoiler="PortaMAME controller close-up"]
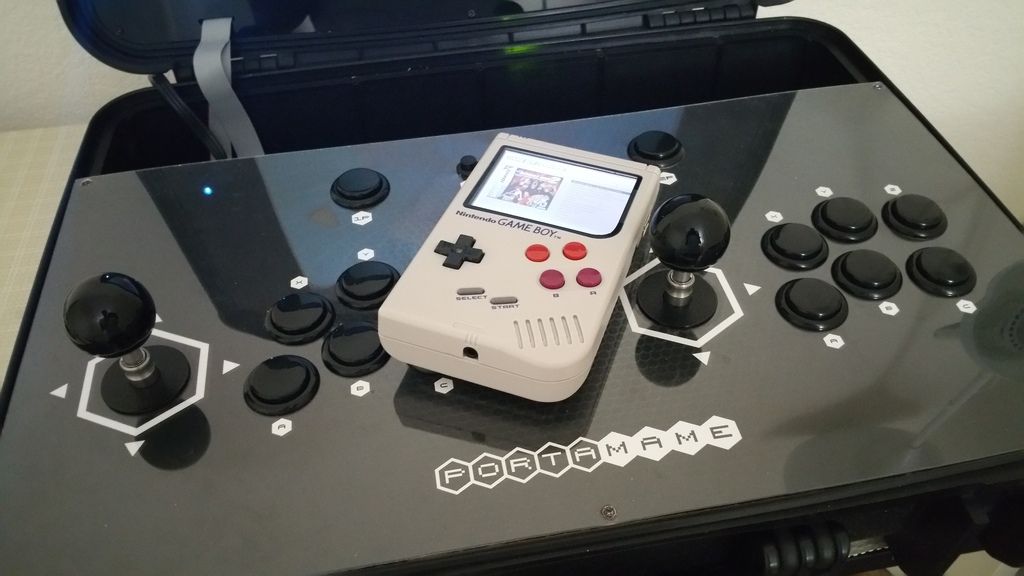 [/spoiler]
Which part exactly of the config.txt you're interested in?
*** Update #17 ***
Finally, after busting two (2) USB hubs, frying one USB gamepad board and lots of sleepless weekend hours, my GB Pi 2 is almost complete. Managed to mount today the battery connector and the LCD button controller board.
Battery Connector
I thought of mounting the battery JST connector in one of the sides in the battery compartment. This makes it easier to pull the connector if I want to replace the battery with a fully charged one.
[spoiler="battery connector"]
[/spoiler]To make it easy to pull the battery, I simply added a pull tab using scotch tape.[spoiler="battery pull tab"]
[/spoiler]LCD Button Controller
I mounted the LCD button controller on the other side of the battery compartment opposite the battery JST connector. This makes the button controller easily accessible by just removing the battery cover.
[spoiler="LCD button controller"]
[/spoiler]"Mostly final state" Shots
Here are pictures of the almost final state pending completion of the following:
1. Replace the sticky tack with double adhesive foam to secure the components
2. Add mini speaker - currently, audio works using the 3.5mm jack. I'm awaiting arrival of the 4-ohm and 16-ohm mini speakers that I ordered.
3. Replace screen protector with glass protector and mount permanently.
4. Add HDMI port - not needed at the moment but will be required to play 2-player games by connecting another USB gamepad
5. Optional: block areas with light bleed - I noticed some areas of the case that have lights bleeding. Not a show stopper but I like to address nonetheless.
6. Optional: incorporate Popcorn's graceful shutdown - right now I rely with EmulationStation's shutdown menu action then wait for the screen to turn off before I turn off the power. Works for now.[spoiler="front"]
[/spoiler][spoiler="top showing power and charging LEDs"][/spoiler][spoiler="left side view showing stock volume wheel and USB port"][/spoiler][spoiler="bottom showing stock 3.5mm jack"][/spoiler][spoiler="right side view showing micro USB power connector. Will add HDMI port later."][/spoiler][spoiler="back view showing back buttons, battery and cart covers"][/spoiler]Joining its bigger "portable" brother: the PortaMAME
Adding this new baby to my growing family of retro and arcade consoles. Here are pics of my GB Pi 2 together with my PortaMAME portable arcade machine.[spoiler="PortaMAME full shot"]
[/spoiler][spoiler="PortaMAME controller close-up"][/spoiler]
Last edited by chiz on Wed Jun 29, 2016 2:58 am, edited 1 time in total.
Re: chiz's GB Pi2
Thanks Kite! I'm sure yours would be awesome once done! 
I'm also following your work on the custom display and other boards you're making. Considering them for my 2nd unit.
I'm also following your work on the custom display and other boards you're making. Considering them for my 2nd unit.
-
Robots86

- Posts: 268
- Joined: Thu May 05, 2016 1:18 am
- Location: Birmingham, UK
- Has thanked: 39 times
- Been thanked: 28 times
-
SidSilver
- Posts: 263
- Joined: Sun May 22, 2016 6:22 am
- Location: France
- Has thanked: 137 times
- Been thanked: 37 times
Re: chiz's GB Pi2
+ 1 for the battery connector.
Where did you find the "extension" cable ? Make it yourself ?
Where did you find the "extension" cable ? Make it yourself ?
-
toiletpaper69
- Posts: 45
- Joined: Sun May 15, 2016 6:21 am
- Has thanked: 50 times
- Been thanked: 7 times
Re: chiz's GB Pi2
Thanks, guys! 
@Robots86, @SidSilver
I had to order a set of 2-pin JST connectors for the batteries I took from the power banks. The order came with both male and female connectors so I made an "extension wire" with the male connector in the PowerBoost and the female connector exposed through the hole I made in the battery compartment.
-
Fleder

- Posts: 849
- Joined: Thu May 05, 2016 9:04 am
- Location: Germany
- Has thanked: 183 times
- Been thanked: 258 times
Re: chiz's GB Pi2
Wow, this is really a great build! This battery connector is ingenious.
Do you happen to have the link for your JST cables?
I would love to have this connector, too. Only could find the cable so far.
Do you happen to have the link for your JST cables?
I would love to have this connector, too. Only could find the cable so far.


-
Tamasco

- Posts: 67
- Joined: Tue Jun 21, 2016 2:37 pm
- Location: Spain
- Has thanked: 34 times
- Been thanked: 10 times
Re: chiz's GB Pi2
This kind of connectors, could be used for more things than just plugging batteries, right? For example, to connect and disconnect the Pi and the screen, or whatever compound of your project?
Who is online
Users browsing this forum: No registered users and 1 guest