RasPiZeroBoy build (complete)
Posted: Fri Sep 02, 2016 7:12 pm
Hi all,
With thanks to Wermy and this amazing forum I've managed to start building my own custom creation using a Pi Zero as the base. I had a few feature requirements, initially hoping that it would end up being practical. Some ideas I had to shelve but a few were practical and I included.
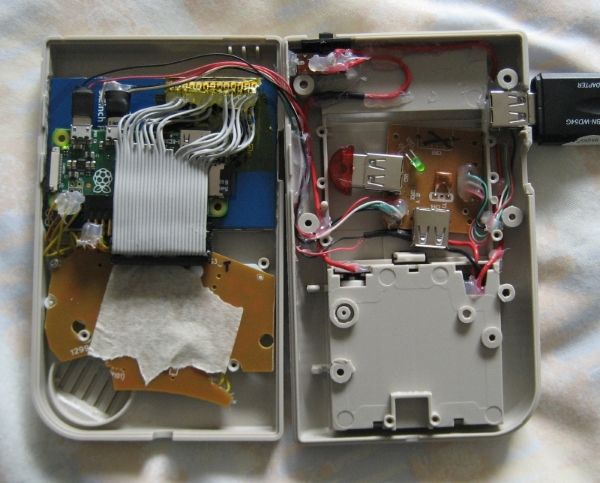
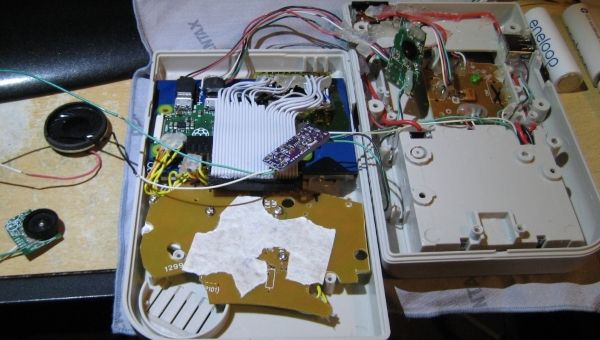
-I wanted to be able to run mine off AA batteries, just like the original Gameboy (mine will run off 3x AA's instead of 4 though). Therefore I could use the original battery compartment and change batteries very quickly.
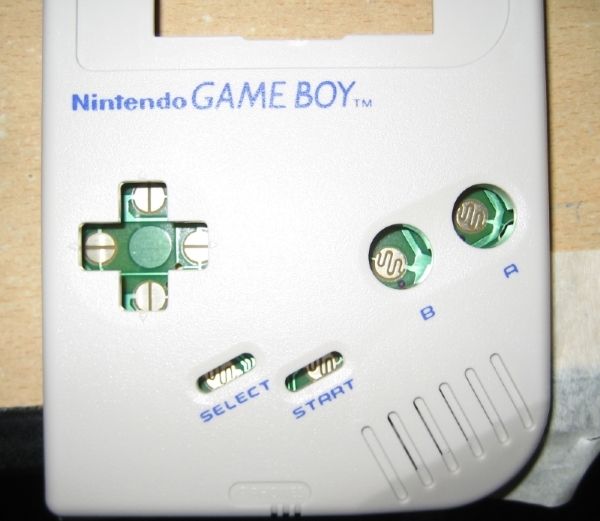
-Also wanted to keep the original screen size and to keep the unit looking as 'stock' as possible. Along with doing as little dremel work as possible.
-Use a cheap usb hub to add extra USB options.
-USB audio dongle with amp for half decent sound.
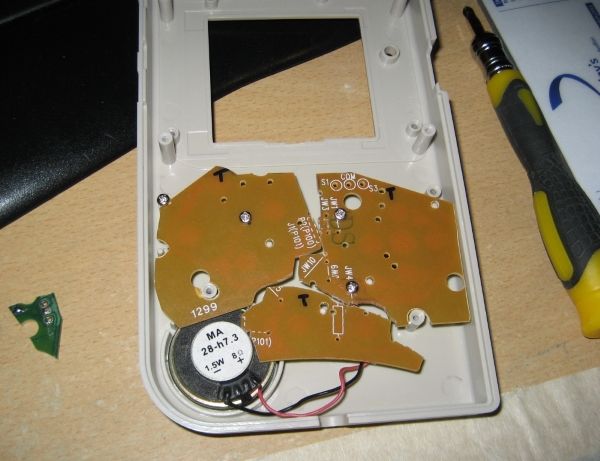
I cannibalised an old PS controller clone to make the button pads. Wiring up the lcd I got was a real chore. I'm not great at soldering to start with but managed in the end. It's a 3.2" and I had to mod the case a bit but I'm using the overscan option to just display the middle section. It looks pretty decent now it's installed, and straightened up. Nothing worse than a wonky looking screen.
I think I need to work on conserving power now, as with it only running on 3x AA batteries it lasts a little over an hour at the moment.
Also the boot up sequence takes a fair time. Not sure how to improve that though. Maybe someone has some tips?
Need to add a headphone jack, extend a power led, and just waiting on some potentiometers from China to arrive and it should all be finished.
[spoiler="Parts list"]new components:
gameboy housing
rasp pi zero
3.2" generic spi lcd display
pluscom 4 port unpowered usb hub ... sku: UHCPK
5v 2A dc step-up power converter board ... sku: MT3608
usb "5.1" sound card
'adafruit' pam8302a 2.5w mono audio amp
10k pot
re-used components:
power switch
green led
old snes clone gamepad
wiring
8ohm 1.5w speaker
hard drive ribbon cable
micro b usb cable
usb otg cable
8gb microsd card
other:
3d printed half-size cartridge
3x AA re-chargable 2100mah eneloop batteries[/spoiler]
[spoiler="Tools used"]Dremel
Soldering iron +solder
hotglue gun +glue sticks
3D printer
superglue
jewellers saw
files
masking tape
digital calipers
sharp knife
metal staight edge (ruler)
kapton tape[/spoiler]
Here's a few pics:
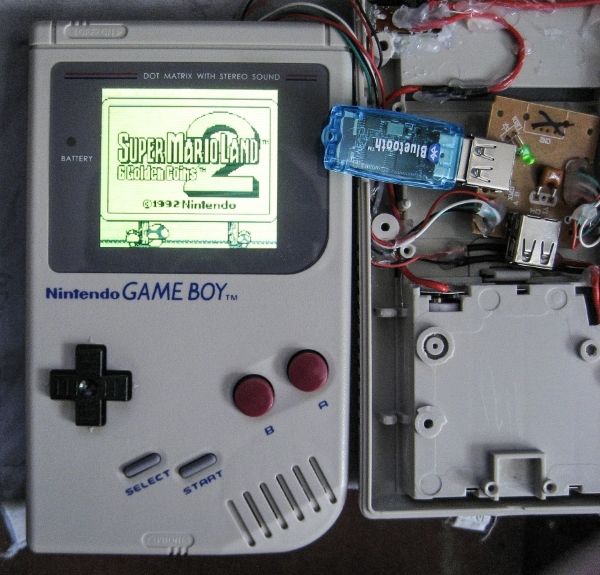
I've got quite far with my build and will post more pics later.
When I figure the forum out I'll post a build list, etc, too.
With thanks to Wermy and this amazing forum I've managed to start building my own custom creation using a Pi Zero as the base. I had a few feature requirements, initially hoping that it would end up being practical. Some ideas I had to shelve but a few were practical and I included.
-I wanted to be able to run mine off AA batteries, just like the original Gameboy (mine will run off 3x AA's instead of 4 though). Therefore I could use the original battery compartment and change batteries very quickly.
-Also wanted to keep the original screen size and to keep the unit looking as 'stock' as possible. Along with doing as little dremel work as possible.
-Use a cheap usb hub to add extra USB options.
-USB audio dongle with amp for half decent sound.
I cannibalised an old PS controller clone to make the button pads. Wiring up the lcd I got was a real chore. I'm not great at soldering to start with but managed in the end. It's a 3.2" and I had to mod the case a bit but I'm using the overscan option to just display the middle section. It looks pretty decent now it's installed, and straightened up. Nothing worse than a wonky looking screen.
I think I need to work on conserving power now, as with it only running on 3x AA batteries it lasts a little over an hour at the moment.
Also the boot up sequence takes a fair time. Not sure how to improve that though. Maybe someone has some tips?
Need to add a headphone jack, extend a power led, and just waiting on some potentiometers from China to arrive and it should all be finished.
[spoiler="Parts list"]new components:
gameboy housing
rasp pi zero
3.2" generic spi lcd display
pluscom 4 port unpowered usb hub ... sku: UHCPK
5v 2A dc step-up power converter board ... sku: MT3608
usb "5.1" sound card
'adafruit' pam8302a 2.5w mono audio amp
10k pot
re-used components:
power switch
green led
old snes clone gamepad
wiring
8ohm 1.5w speaker
hard drive ribbon cable
micro b usb cable
usb otg cable
8gb microsd card
other:
3d printed half-size cartridge
3x AA re-chargable 2100mah eneloop batteries[/spoiler]
[spoiler="Tools used"]Dremel
Soldering iron +solder
hotglue gun +glue sticks
3D printer
superglue
jewellers saw
files
masking tape
digital calipers
sharp knife
metal staight edge (ruler)
kapton tape[/spoiler]
Here's a few pics:


I've got quite far with my build and will post more pics later.
When I figure the forum out I'll post a build list, etc, too.


