Page 1 of 1
ChampX first build piboy pi3
Posted: Tue Apr 03, 2018 3:38 pm
by champx
hi, i'm french (sorry for my poor english) and i'm building a gameboy with a pi3.
in this project, i doesn't want hot glue, if i'll do maintenance, screws are better!
this project is in progress, the lcd was dead..... but there is many parts i have to make in 3d print.
to be continued!
Re: ChampX first build piboy pi3
Posted: Tue Apr 03, 2018 6:37 pm
by Sushi
Bon travail! Basé sur que je vois, je pari que ce projet se révélera être super propre! Partagerez-vous (vous? tu? le francais n'est pas ma première langue) les fichiers pour les parties imprimées? J'adore que vous avez fait avec les boutons à l'arrière.
Google translate: Good work! Based on what I see, I bet that this project will prove to be super clean! Will you share (do you? T? French is not my first language) files for printed parts? I love that you did with the buttons on the back.
Re: ChampX first build piboy pi3
Posted: Wed Apr 04, 2018 8:35 am
by bigteddy82
wow. very cool idea for L/R buttons !!
can you show me more detail for those buttons?
Re: ChampX first build piboy pi3
Posted: Thu Apr 05, 2018 2:24 am
by Billy Blaze
bigteddy82 wrote: ↑Wed Apr 04, 2018 8:35 am
wow. very cool idea for L/R buttons !!
can you show me more detail for those buttons?
I'm very much interested as well!
Re: ChampX first build piboy pi3
Posted: Fri Apr 20, 2018 1:11 pm
by champx
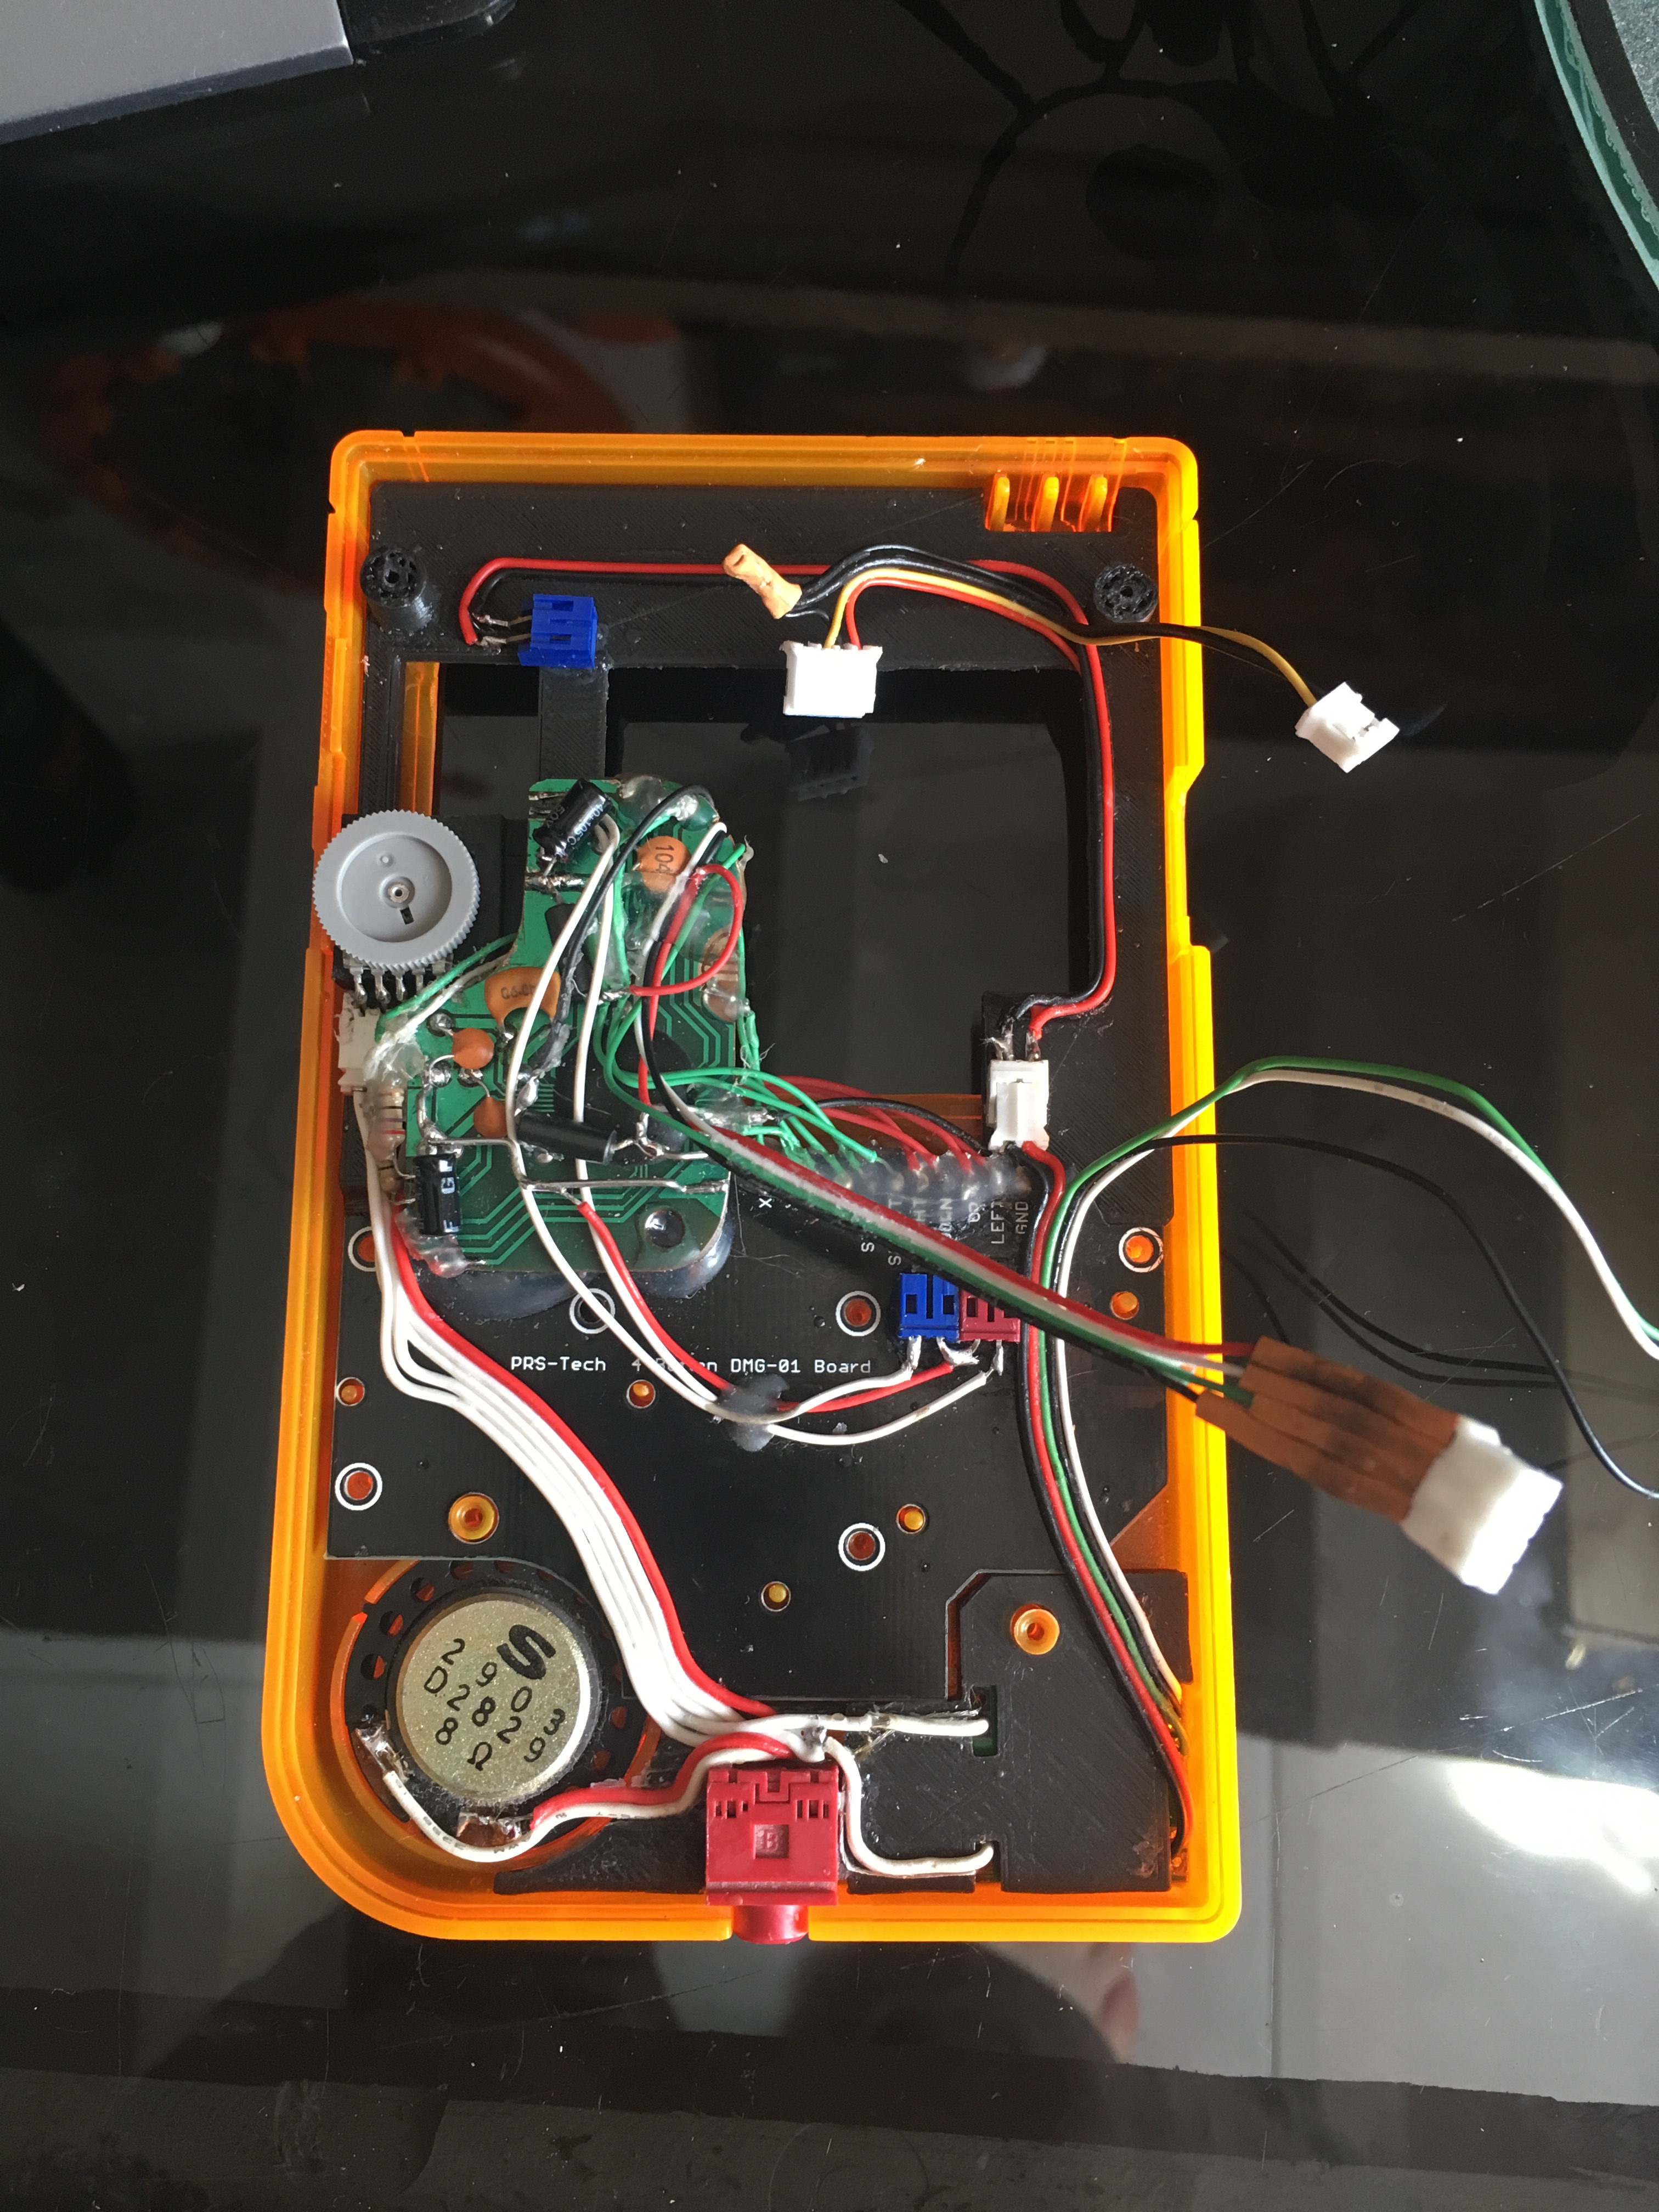
hello, I’m happy because my build is soon over!
as for the sharing of stl, I agree but they are modeling adapted to my parts.
I work a lot with recycling parts.
the stl are also tailor-made for cable runs.
if you really wanted, I would share the most relevant ones.
otherwise, the build has progressed well, I only miss the screen and lipo to finish.
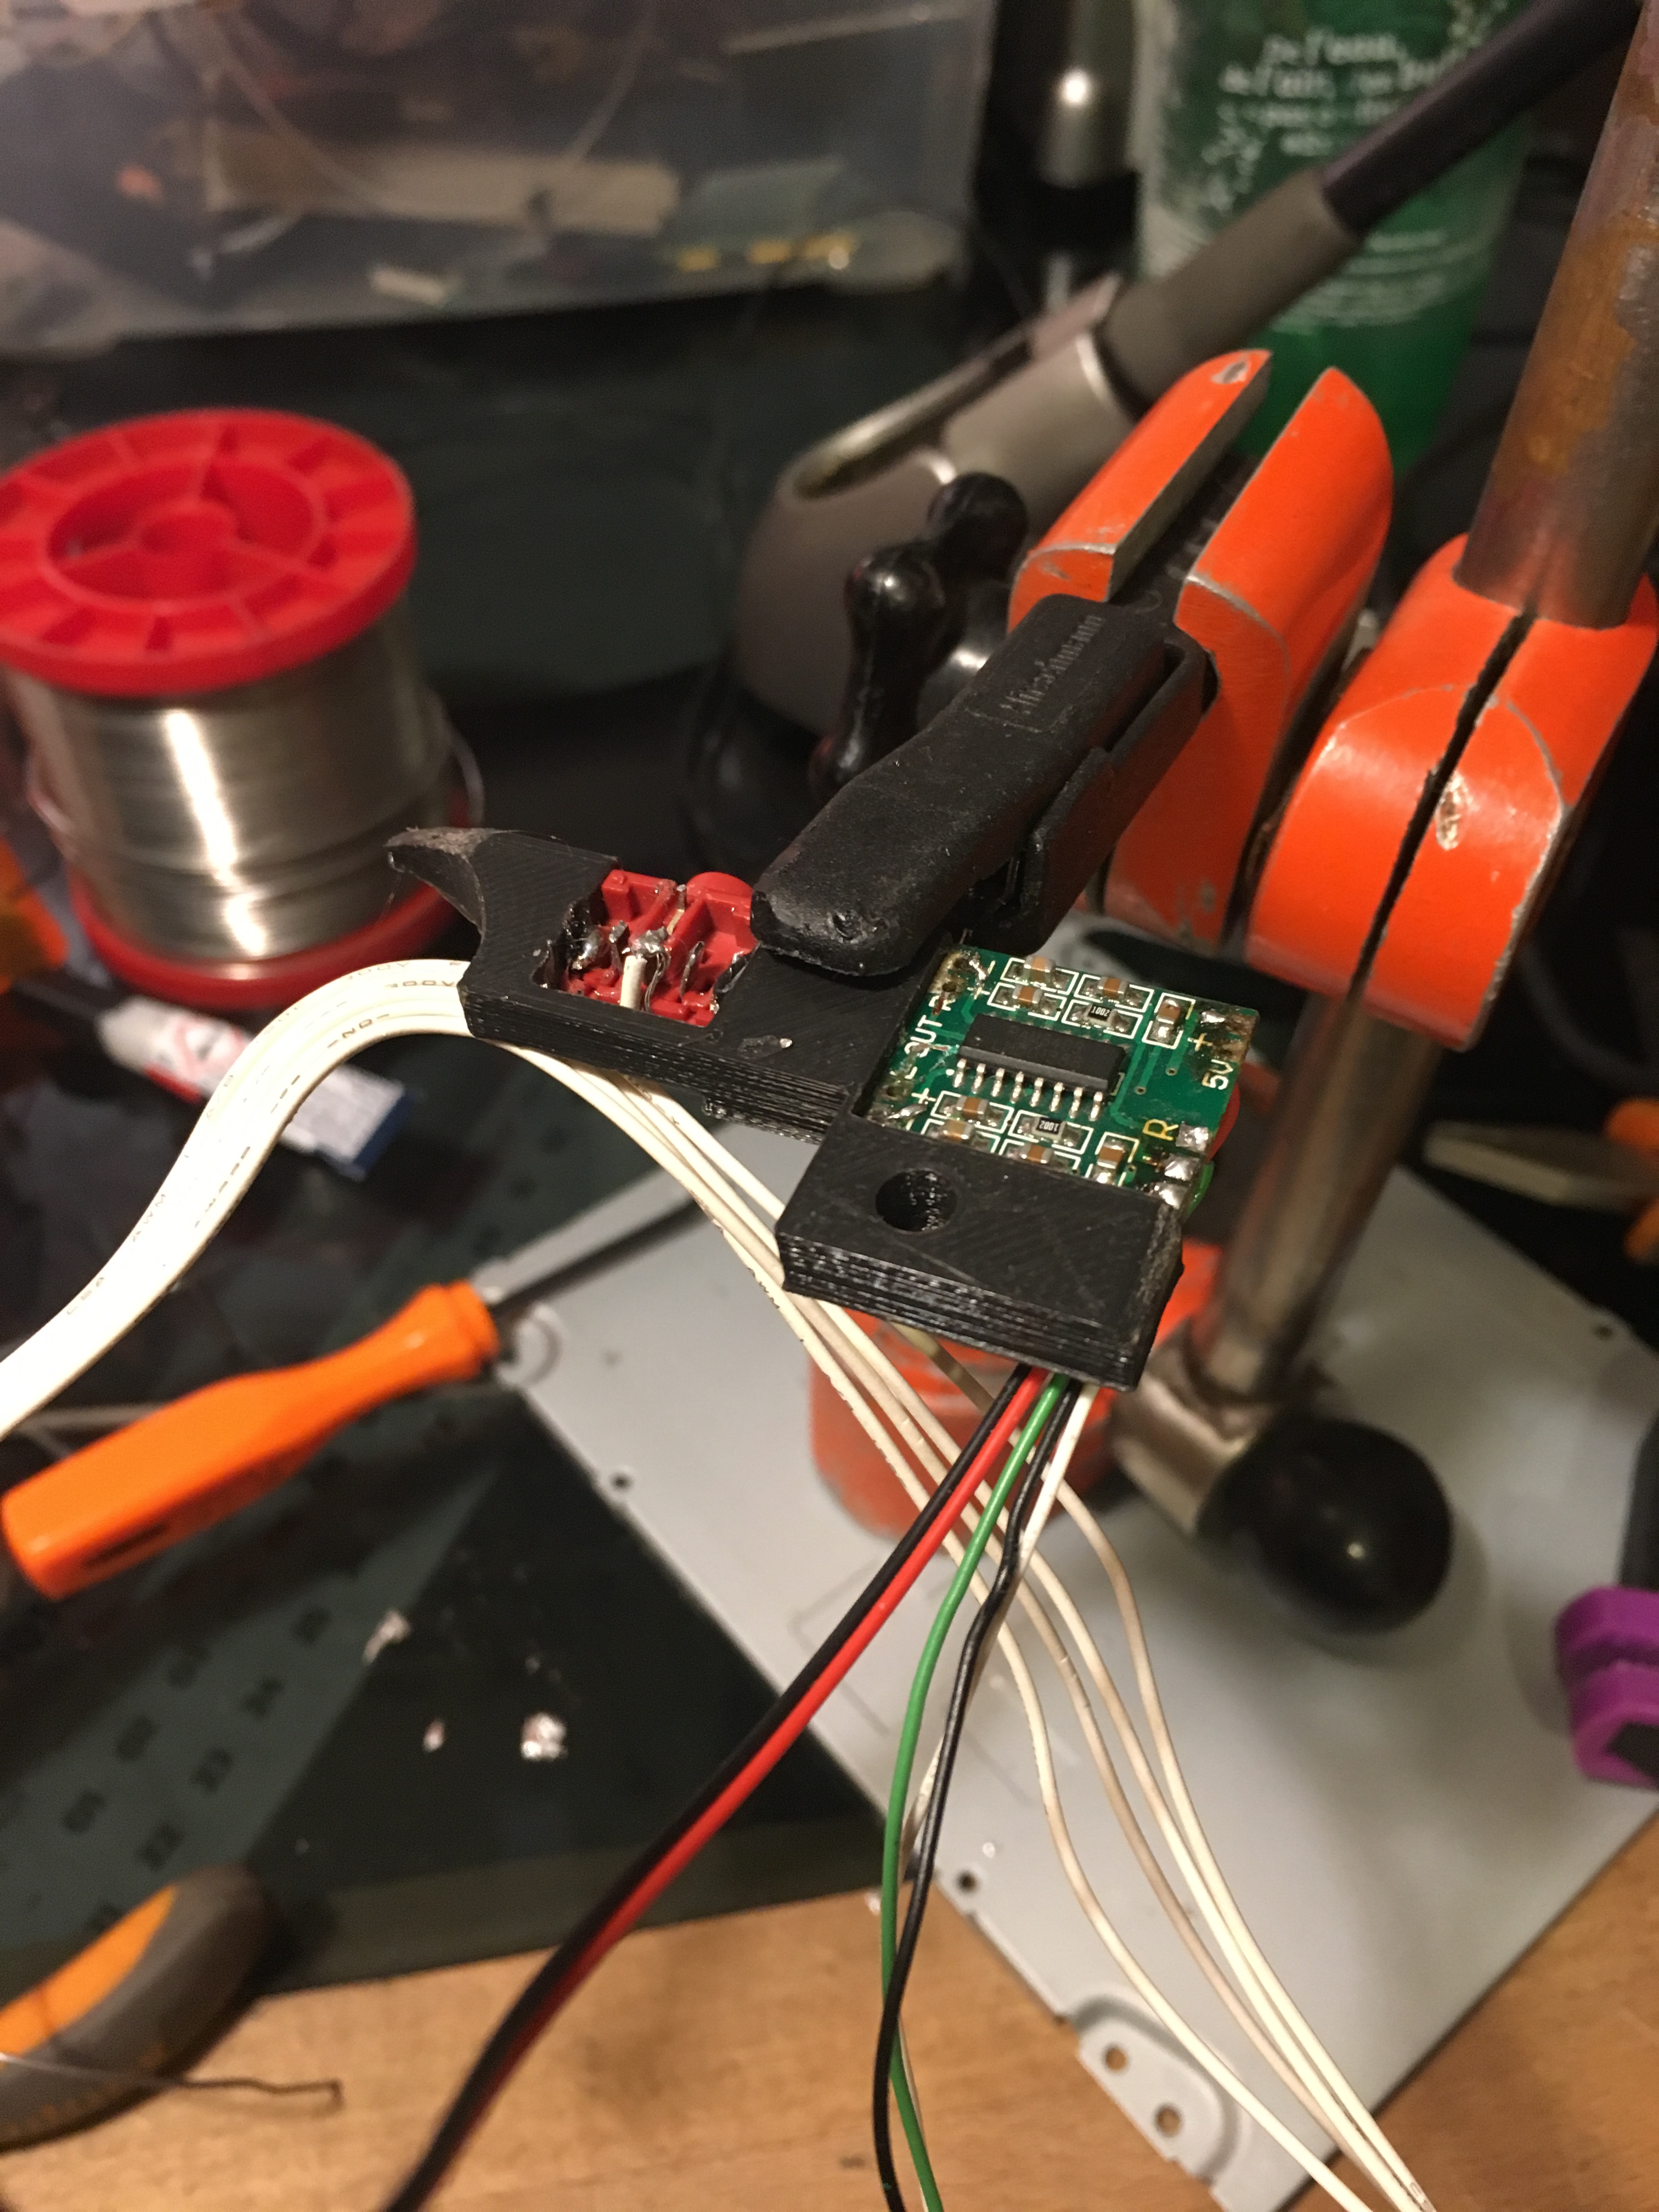
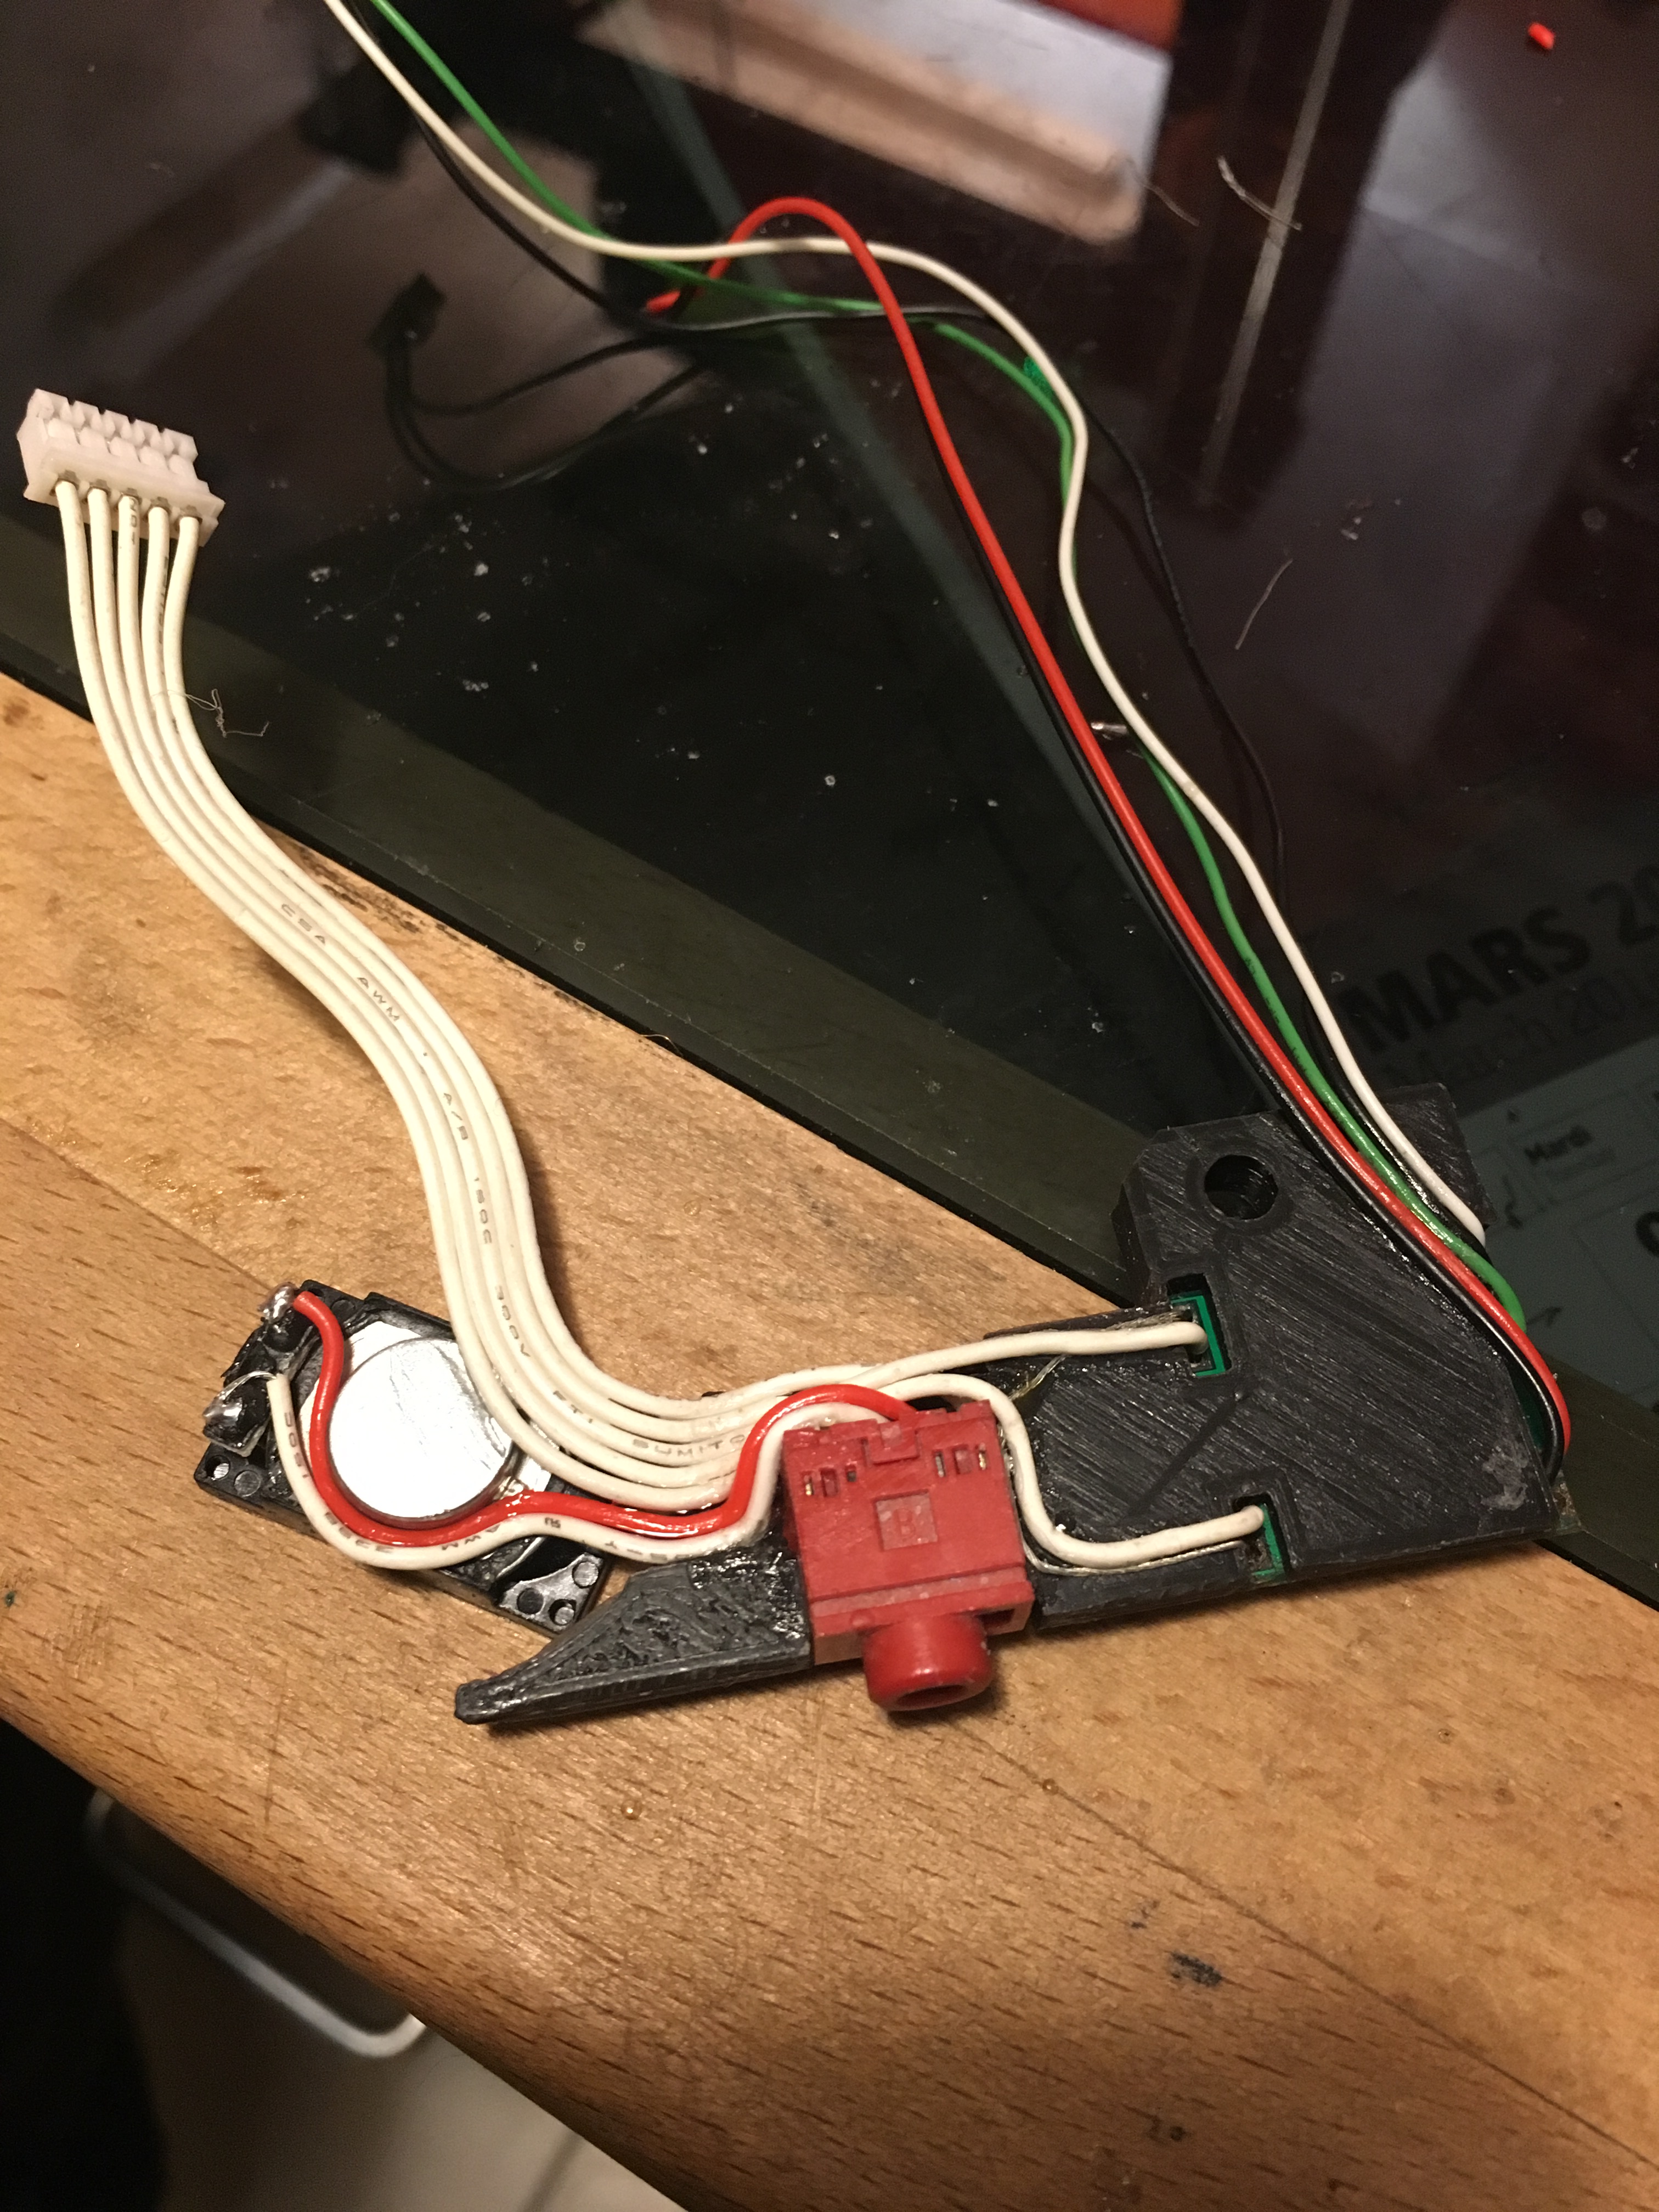
I did the audio part:
the square speaker was for testing, the one in place comes from a gameboy.
2x3w ebay amp (there was mistake because i was using this board for another project) ,
pc sound card jack connector,
3d printed support,
cable glued to make rigid ribbon.
the volume button is fixed on bezel
all parts are dismountable.
for all the project i was using fax connector
the set is perfect for maintenance and the interior is clean!
- IMG_0879.JPG (1.78 MiB) Viewed 8156 times

- IMG_0884.JPG (1.99 MiB) Viewed 8156 times
- IMG_0885.JPG (2.09 MiB) Viewed 8156 times
- IMG_0886.JPG (2.04 MiB) Viewed 8156 times

- IMG_0893.JPG (1.99 MiB) Viewed 8156 times
Re: ChampX first build piboy pi3
Posted: Fri Apr 20, 2018 1:37 pm
by champx
Re: ChampX first build piboy pi3
Posted: Fri Apr 20, 2018 1:44 pm
by champx
at the beginning, i wanted 18650 battery and i cut the dmg battery.....but li-po's are better!
i made a parts to fill the hole!
it allow the jack connector dimensions

- IMG_0912.JPG (1.86 MiB) Viewed 8151 times
Re: ChampX first build piboy pi3
Posted: Fri Apr 20, 2018 1:48 pm
by champx
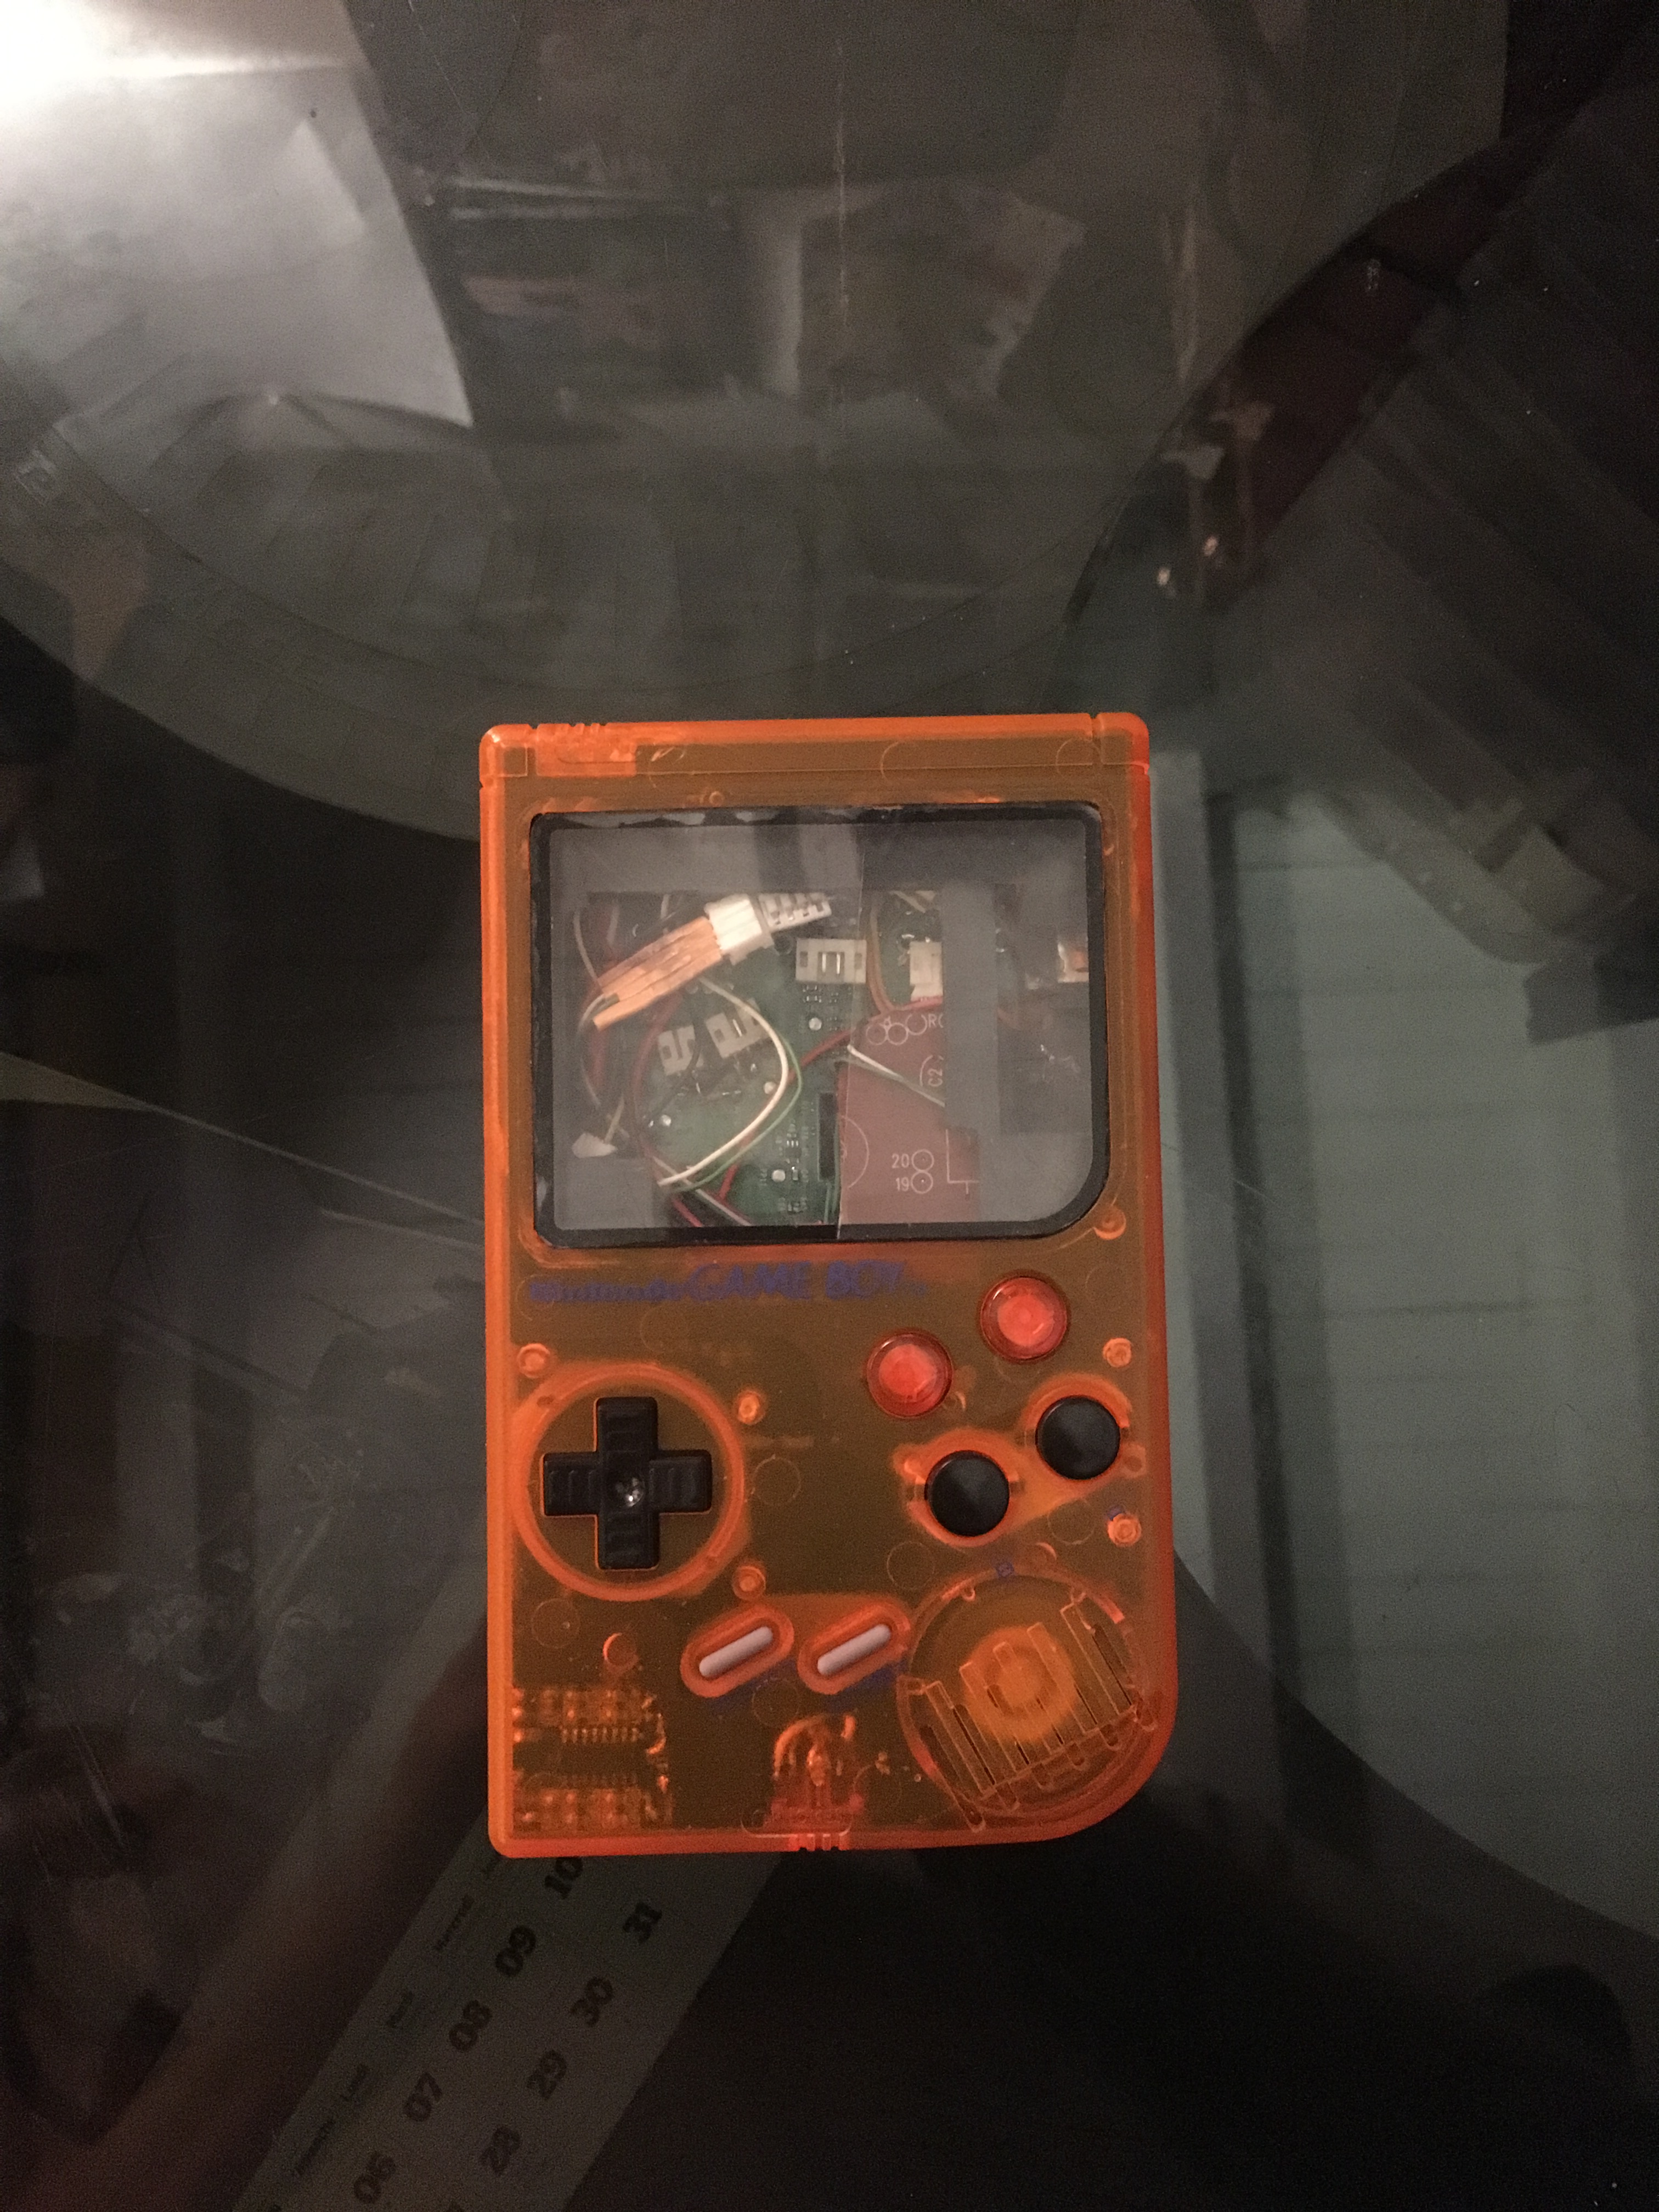
here is near the final.
this is the final color's button configuration.
the lens is a test with cd case..... it's poor quality!
(i have order a gorilla glass on ebay)

- IMG_0917.JPG (1.87 MiB) Viewed 8150 times
- IMG_0919.JPG (2.28 MiB) Viewed 8150 times

- IMG_0920-FullSizeRender.jpg (1.73 MiB) Viewed 8150 times
Re: ChampX first build piboy pi3
Posted: Tue May 01, 2018 12:34 pm
by Wailer
Very impressive, I just love your original approach of building.
Good to see that there are builders who get of off the beaten track, keep up the good work

Btw i love the L and R buttons, very original.
Re: ChampX first build piboy pi3
Posted: Thu May 03, 2018 12:54 pm
by YaYa
Super projet ! Beau boulot

