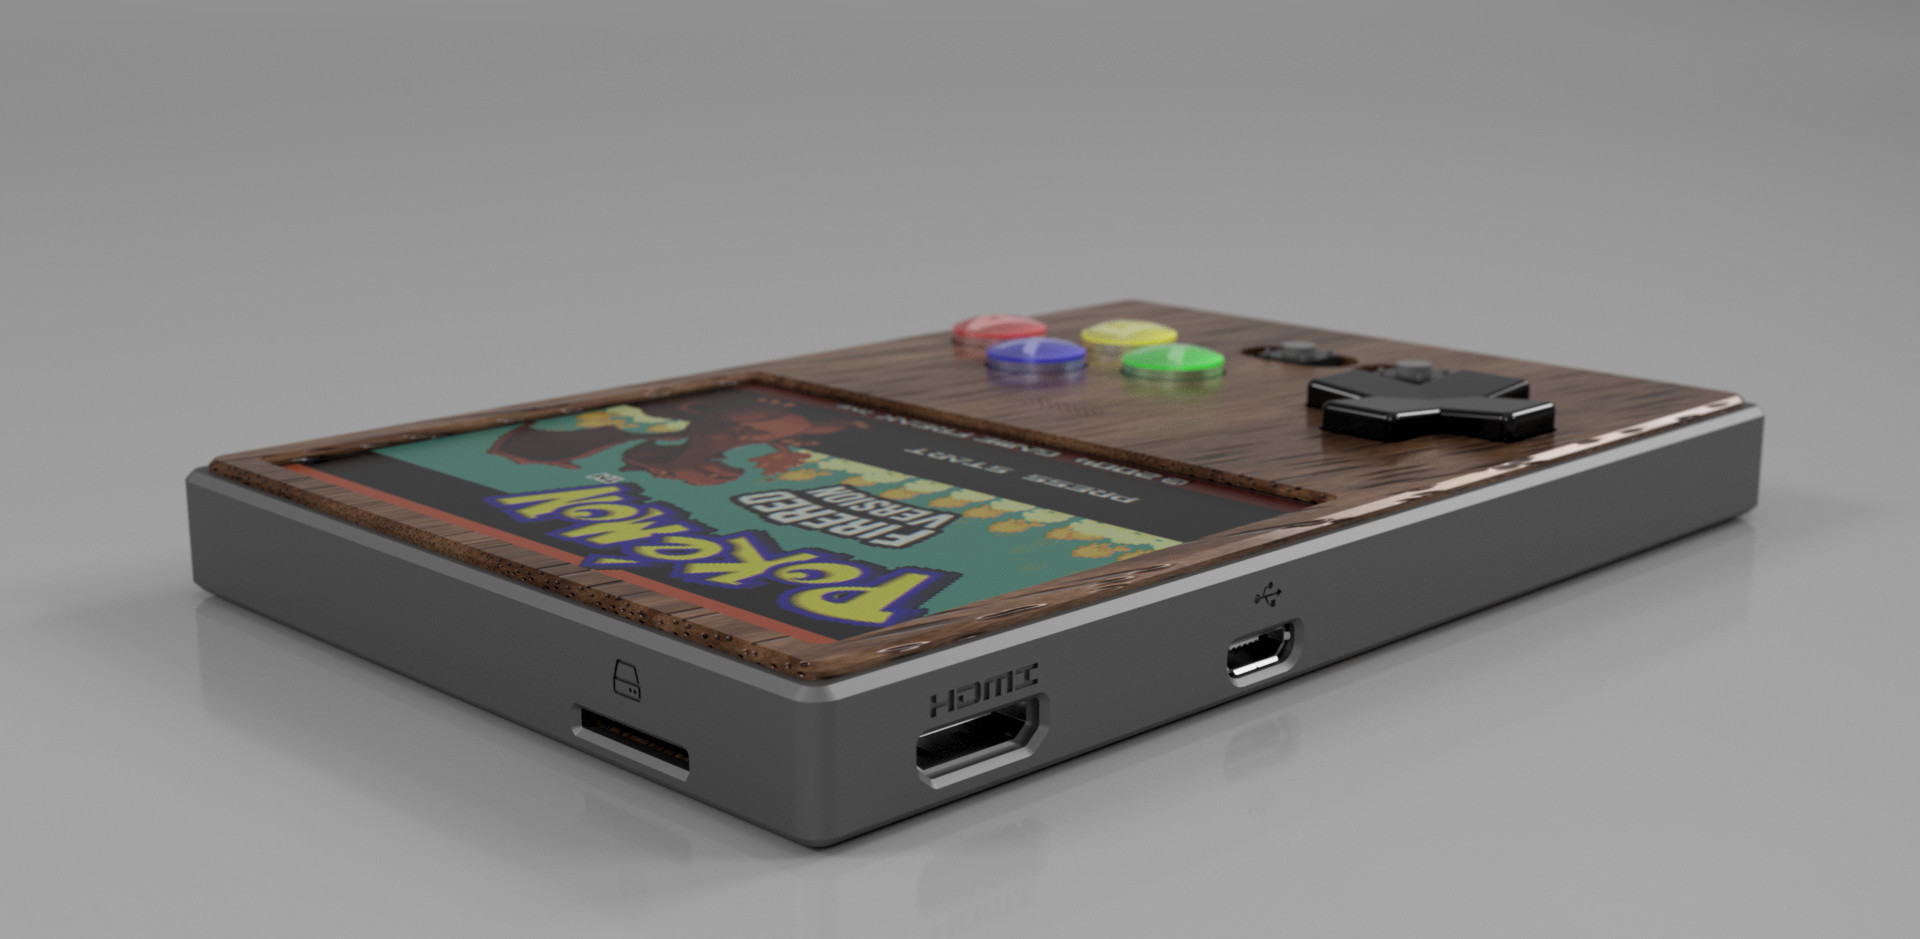
gb9k's slightly different take

Show off your completed Game Boy Zero, or post your build logs here!
User avatar
gb9k
Posts: 5
Joined: Tue Nov 15, 2016 6:10 pm
Has thanked: 4 times
Been thanked: 13 times
Contact:

gb9k's slightly different take

Post by gb9k » Tue Nov 15, 2016 7:18 pm

Wish I heard about this board earlier, as you guys have a LOT of great information that could've made this project so much easier. Here's what I have so far: Image
Rocking @AJRedfern's most excellent splash screen

Image
Obi Wan for size comparison

Image
The end goal. Rendered in Fusion 360.


Parts list (so far):
  • RasPi Zero x1
  • BW 3.5" Screen x1
  • Adafruit PowerBosst 1000c x1
  • Adafruit 2.5W Audio Amp x1
  • Adafruit 8 ohm 0.5W Speaker x1
  • DIY OSHPark PWM Audio Filter x1
  • DIY OSHPark Gamepad x1
  • DIY 3d Print of questionable quality x1
  • Nokia BL-5C Li-Ion Battery x1
  • Omron Tac Switches x12
  • SPDT Slide Switch x1
  • An ungodly amount of time in Fusion 360 x1

nuneberg
Posts: 36
Joined: Fri Nov 11, 2016 4:29 am
Has thanked: 2 times
Been thanked: 1 time

Re: gb9k's slightly different take

Post by nuneberg » Wed Nov 16, 2016 2:00 am

Nice build.
I really like it. :)

Do you have pictures of the build process?

zatarra
Posts: 4
Joined: Mon Nov 14, 2016 10:49 am
Has thanked: 1 time
Been thanked: 1 time

Re: gb9k's slightly different take

Post by zatarra » Wed Nov 16, 2016 2:06 am

great look!

Can you share the stl files? I would really love to extrude that case :)

User avatar
gb9k
Posts: 5
Joined: Tue Nov 15, 2016 6:10 pm
Has thanked: 4 times
Been thanked: 13 times
Contact:

Re: gb9k's slightly different take

Post by gb9k » Wed Nov 16, 2016 3:10 am

nuneberg wrote:Nice build.
I really like it. :)

Do you have pictures of the build process?
Thanks a bunch, man! Sadly, no in process photos.

zatarra wrote:great look!

Can you share the stl files? I would really love to extrude that case :)
Thank you! Can't wait to get in wood and metal.

As for the stl, sorry but I can't put you through the headache to prep it. It's really flimsy; the design is meant for stabilized wood plus aluminum cut on a CNC and the ABS print makes it painfully obvious. With a few spots in the model calling for 0.3mm (0.012") clearances, 0.8mm (0.031") thickness, and 3d printing dimensional accuracy being what it is, the flex shaft got a lot of work to make parts fit.

User avatar
sotasystems
Posts: 160
Joined: Sun Oct 09, 2016 4:56 am
Location: Germany, 127.0.0.1
Has thanked: 95 times
Been thanked: 93 times
Contact:

Re: gb9k's slightly different take

Post by sotasystems » Wed Nov 16, 2016 3:56 am

Crazy how thin and small it is and it still packs everything you need. :)

Do you have any Photos of the inside? I'm curious to see how it looks inside ;)
Ladies and gentlemen, I would like to inform you that I am currently moving very far away, and therefore I am very busy.

UPDATE: I am still alive! My ISP is setting up my internet on the 19th of January at my new place, explaining my offline-ness.

If you write me a PM, I will very likely take some time to respond.

Also, my 2nd build will soon go on, so if you've been following it, please stay tuned! :)

Many thanks for your understanding!

User avatar
Muon
Posts: 73
Joined: Thu Sep 22, 2016 2:35 am
Has thanked: 38 times
Been thanked: 5 times

Re: gb9k's slightly different take

Post by Muon » Wed Nov 16, 2016 5:12 am

sotasystems wrote:Crazy how thin and small it is and it still packs everything you need. :)

Do you have any Photos of the inside? I'm curious to see how it looks inside ;)
+1!

User avatar
AJRedfern
Posts: 85
Joined: Wed Sep 07, 2016 4:29 am
Has thanked: 53 times
Been thanked: 54 times
Contact:

Re: gb9k's slightly different take

Post by AJRedfern » Wed Nov 16, 2016 7:54 am

Looking good! Really like your take on the build and the render of the final design looks awesome. Would be good to see how you've got everything hooked up.

Nice to see the splash screen in use, thank you for the shout out.
AJRedfern - Author of the Game Boy Zero Splash Screen seen in Wermy's Custom Parts Guide Pt 2.
Image
http://www.sudomod.com/forum/viewtopic.php?f=8&t=1440

User avatar
epicpwn
Posts: 47
Joined: Tue Sep 20, 2016 12:38 pm
Has thanked: 33 times
Been thanked: 9 times

Re: gb9k's slightly different take

Post by epicpwn » Wed Nov 16, 2016 9:55 am

Awesome work! I'd love to still print this and possibly improve upon it if you're willing to share the STL files.

User avatar
gb9k
Posts: 5
Joined: Tue Nov 15, 2016 6:10 pm
Has thanked: 4 times
Been thanked: 13 times
Contact:

Re: gb9k's slightly different take

Post by gb9k » Wed Nov 16, 2016 1:07 pm

Great idea, @sotasystems! :D

[spoiler="A look at how neat the wiring needs to be"]Image[/spoiler]

[spoiler="Front faceplate off"]Image[/spoiler]

[spoiler="Under the gamepad. TODO- Add battery access from below for simple user serviceable battery replacement"]Image[/spoiler]

[spoiler="View of wiring below gamepad-screen"]Image[/spoiler]

[spoiler="Lifted the screen. Broke a wire. Insert sad face here. No more pictures, the wire was a pain to resolder"]Image[/spoiler]

@AJRedfern Thanks for the awesome splashscreens! :)

User avatar
sotasystems
Posts: 160
Joined: Sun Oct 09, 2016 4:56 am
Location: Germany, 127.0.0.1
Has thanked: 95 times
Been thanked: 93 times
Contact:

Re: gb9k's slightly different take

Post by sotasystems » Wed Nov 16, 2016 2:17 pm

gb9k wrote:Great idea, @sotasystems! :D
My god! That's really tightly packed! But still really neatly organized! Also, really great job on the custom PCB's! It looks great :)
Ladies and gentlemen, I would like to inform you that I am currently moving very far away, and therefore I am very busy.

UPDATE: I am still alive! My ISP is setting up my internet on the 19th of January at my new place, explaining my offline-ness.

If you write me a PM, I will very likely take some time to respond.

Also, my 2nd build will soon go on, so if you've been following it, please stay tuned! :)

Many thanks for your understanding!

Post Reply

Who is online

Users browsing this forum: No registered users and 1 guest