MintyPi V3 Transferring ROMs
Contents
MintyPi V3: How to Add ROMs
Programs Needed
If you are using Linux, you're all set. You don't need any extra programs since the drives mount as you insert your SD card.
MacOS or Windows:
- FileZilla:
- -Windows: https://filezilla-project.org/download.php?type=client
- -MacOS: https://filezilla-project.org/download.php?platform=osx
- CyberDuck: https://cyberduck.io/?l=en
- WinSCP (Windows): https://winscp.net/eng/download.php
For the sake of this tutorial, I am assuming you are using FileZilla.
Windows users: You need to use something other than Notepad or Wordpad to edit files. Notepad++ is the best free alternative to use: https://notepad-plus-plus.org/
Connecting to WiFi
***PLEASE NOTE:*** You need to connect to a network that you own. A school, office, or open hotspot network will more than likely not work since they will most likely have device to device ftp disabled. You also need to connect to a 2.4 GHz network as the Pi does not have a 5 GHz antenna.
If you are using a RaspberryPi Zero W, it comes with WiFi built in. Enabling it to connect to your network is decently as simple as editing a file (wpa_supplicant.conf) and placing it on the boot drive of your SD card.
When you insert your SD card in to your computer, different things will happen depending on what OS you are using:
Linux No warnings should pop up. You should be able to open both your boot and system partition.
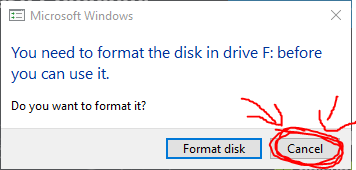
Windows You will be able to access the boot partition. However, you will get a warning popup that states
You need to format the disk in drive (letter): before you can use it.
Do you wish to format it?
CLICK CANCEL AND DO NOT FORMAT THE DRIVE! This is the partition of the SD card that has the actual filesystem for RetroPie. If you do format it, you will have to flash the image again.
MacOS
(I don't have a mac so someone will need to add this)
Now that you have your SD card inserted, open the boot drive of the SD card. Depending on the image used, there might be a supplicant file in the boot drive for editing already. If there is one and then skip the next paragraph.
If there is no wpa_supplicant.conf file If there is not one, create a new file and name it "wpa_supplicant.conf" (without quotes). In the file, copy and paste the following:
country=US
ctrl_interface=DIR=/var/run/wpa_supplicant GROUP=netdev
update_config=1

# RETROPIE CONFIG START
network={
    ssid="your_real_wifi_ssid"
    psk="your_real_password"
}
# RETROPIE CONFIG END
Some things that you will need to change:
- country=US
- Change your country code to that country you are in. You can find a complete list here: https://www.arubanetworks.com/techdocs/InstantWenger_Mobile/Advanced/Content/Instant%20User%20Guide%20-%20volumes/Country_Codes_List.htm
- ssid="your_real_wifi_ssid"
- Change this to your SSID. (the visible name of the WiFi network.)
- psk="your_real_password"
- You probably guessed it, put your password to the WiFi network!
This should serve the majority of people with their network needs, but if you have a different setup for your network (ex: open network, WEP security, hidden SSID), you can find documentation for it here: https://retropie.org.uk/docs/Wifi/#adding-network-details-to-raspberry-pi
If you would like to add multiple networks, simply add another network block after the first. It will try to connect to the networks in order listed. Ex:
country=US
ctrl_interface=DIR=/var/run/wpa_supplicant GROUP=netdev
update_config=1

# RETROPIE CONFIG START
network={
    ssid="network1"
    psk="password1"
}
network={
    ssid="network2"
    psk="password2"
}
# RETROPIE CONFIG END
When you are all finished adding your network(s), save the file to the root folder of the boot drive. At this point, you can unmount the drive safely and plug it in to your device and use the device as normal.
If you would like one generated for you, you can use the following generator: https://codepen.io/LilTrublMakr/pen/yRGPrv
Finding The IP Address
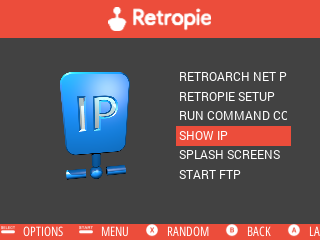
The easiest way to find the IP address of the device (and to make sure it actually connected) is to go to the "Show IP" option in the RetroPie settings menu.
When you get in to that menu, scroll down and you should see an option "Show IP".
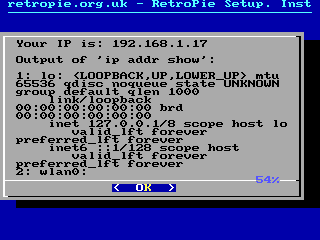
Once you open that menu, it will take a few seconds for it to pop up. On the top, you should see "Your IP is:" and a string of numbers. In my case, it is 192.168.1.17.
If you do not see a string of numbers, make sure that WiFi is enabled by holding the function key. If it says WiFi is disabled, continue to hold down the function key and press left on the D-pad to enable it. Exit out of the 'Show IP' screen by hitting the start button and then try "Show IP" again.
If WiFi is enabled and you aren't getting an IP, you need to redo your supplicant file.
Write this number down or memorize it. We will need it later.
Enable FTP
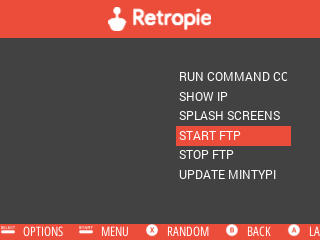
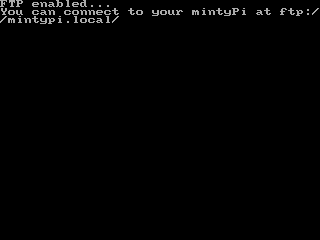
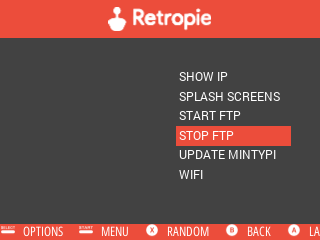
Back in the RetroPie configuration, scroll down to "START FTP" and press the A button. You should see after a few seconds a screen that says "FTP enabled..."
Transferring ROMs
(For this tutorial, I am assuming you are using FileZilla.)
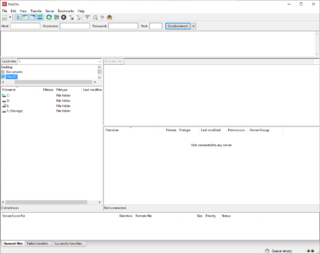
Install and open FileZilla. You should be greeted with a screen like the following (click to enlarge):
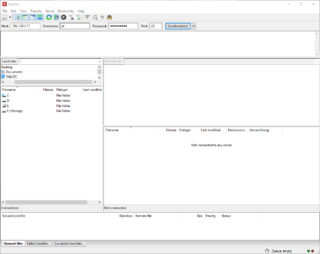
In the top bar, you will enter in the IP we obtained earlier, Username: pi, Password: raspberry (default), Port: 21. It should look like the following (click to enlarge):
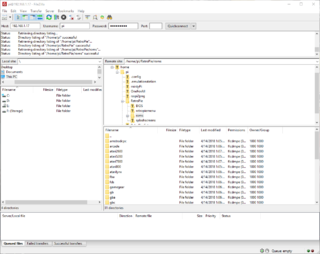
Click on the "Quickconnect" button. You might get an error. Just say yes. When connected, you'll get a file list on the right side of the middle section and you should see a folder called "RetroPie". Double click on that. Next, double click on the "roms" folder. In this folder, you should see a list of all the systems that you can upload your ROMs to. It should look something like this (click to enlarge):
Place your ROMs in the appropriate system folder. Ex: Nintendo Entertainment System ROMs should go in the "nes" folder.
When you are done transferring your ROMs, it is a good idea to disable FTP and WiFi to save power that allows you to play longer on a single charge.
Disabling FTP to Save Power
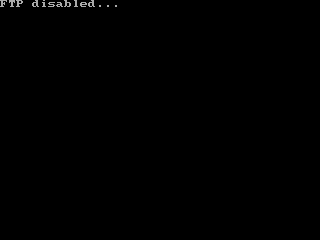
In the RetroPie configuration menu, scroll down to the "Disable FTP" and press the A button. You should get a black screen confirming that FTP is disabled.
When you are back in the RetroPie configuration menu, hold the function button and then press the Left D-pad button to disable WiFi. You can also disable Bluetooth by holding the function button and pressing the A button to further enhance battery life. Release the function button and then press and hold it again to make sure that both radios have been turned off.
