
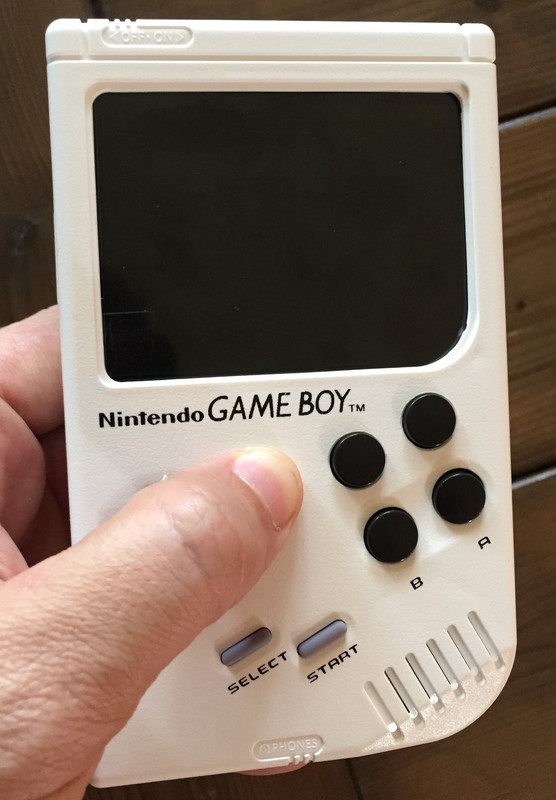
Added a few custom features that I will detail in the next few days besides the normal SNES layout. Here is a list.
- Decided on L1 and R1 buttons only on upper top side of case
- Used my custom made bracket with brass inserts to position the screen and button wells perfectly with a tight closed fit
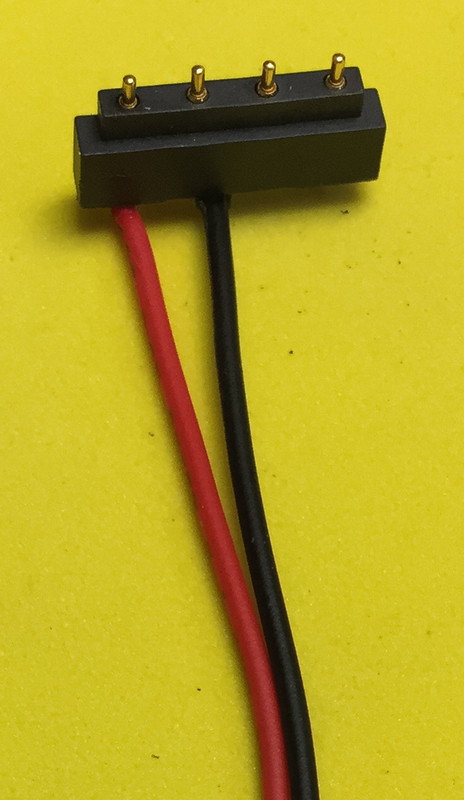
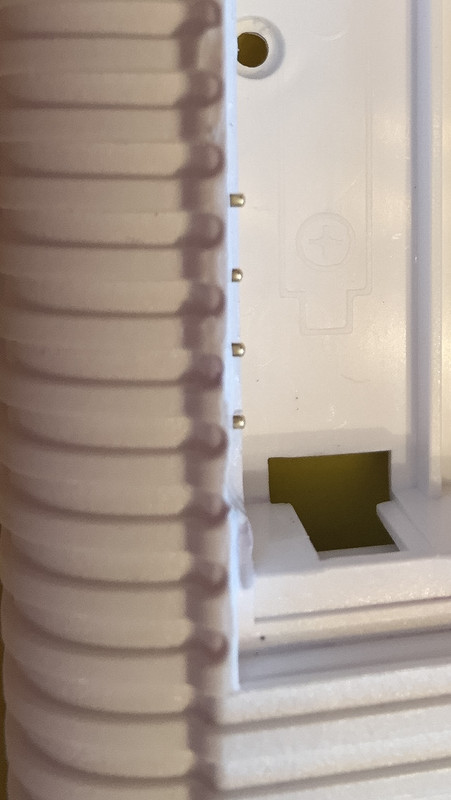
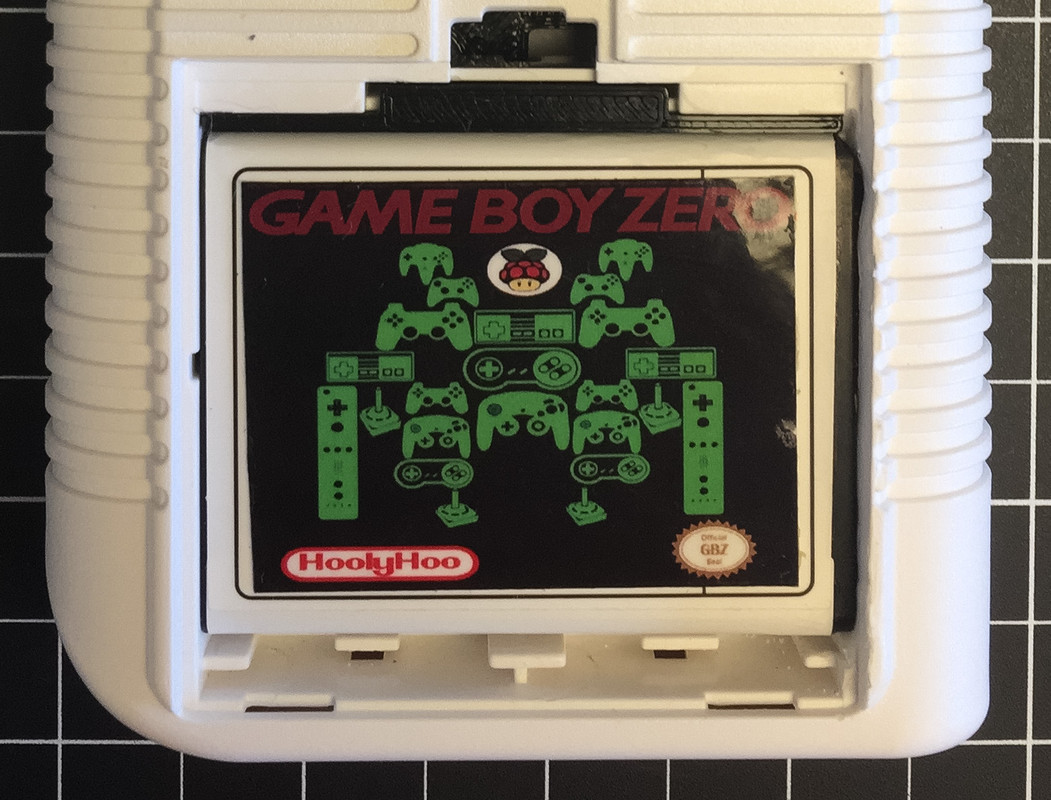
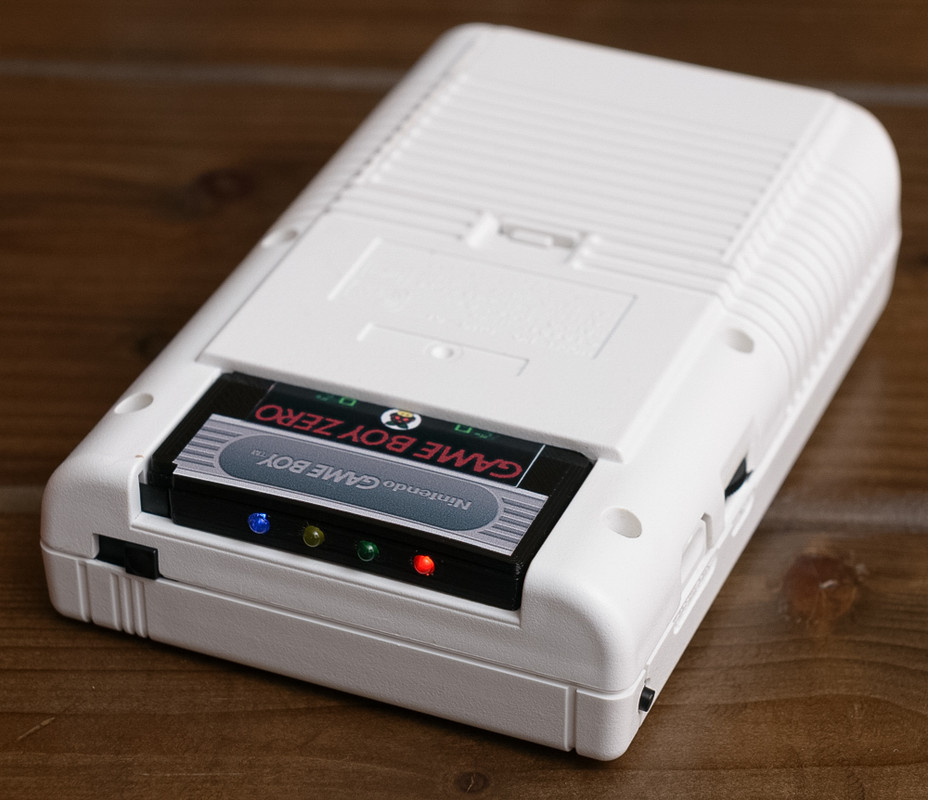
- Added status lights from Kites board to a custom made cartridge that is removable and connects through cartridge slot
- Used a 4800 ma Samsung battery with built in pogo pins in battery compartment that fits perfect for a stock look
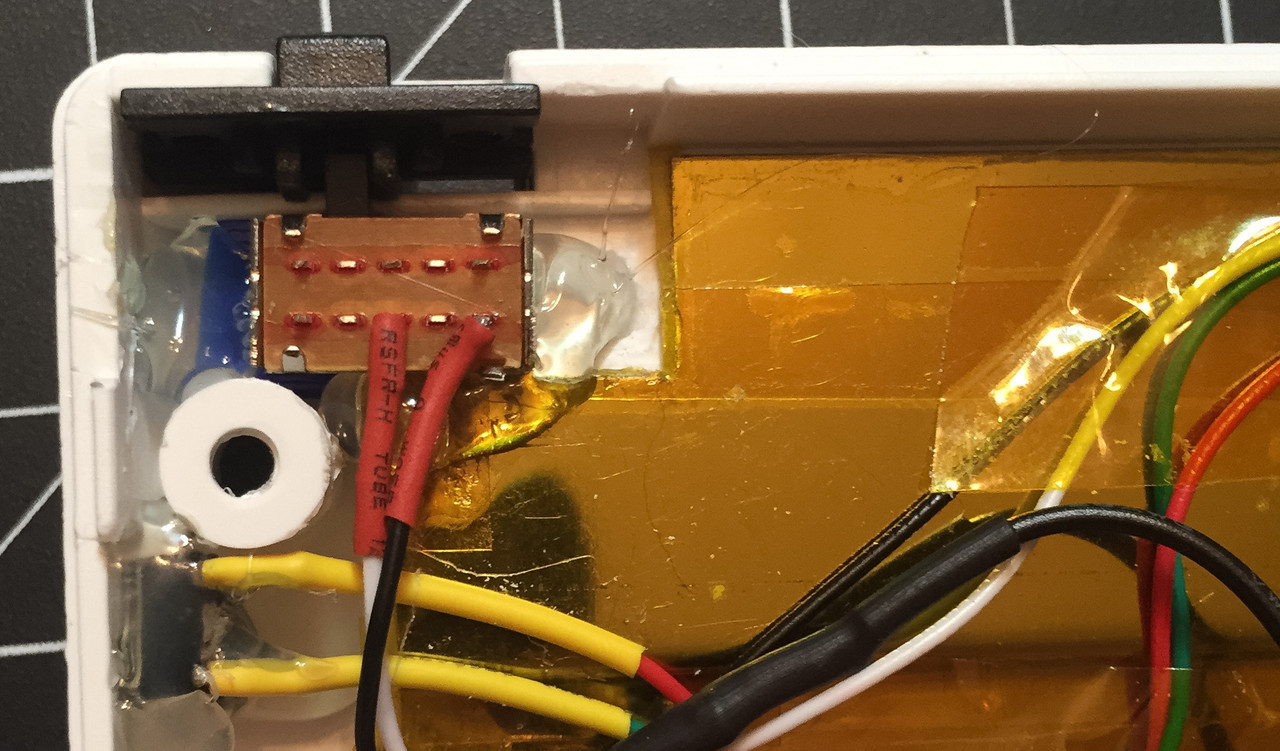
- Went with a low-profile switch so no notching in the case seen when cartridge removed
- Used a 3D printed template to cut out screen opening perfectly
- Used a glass screen cover and painted the black border myself
- Made a custom black and white theme, splash and cartridge stickers to go with the build colors
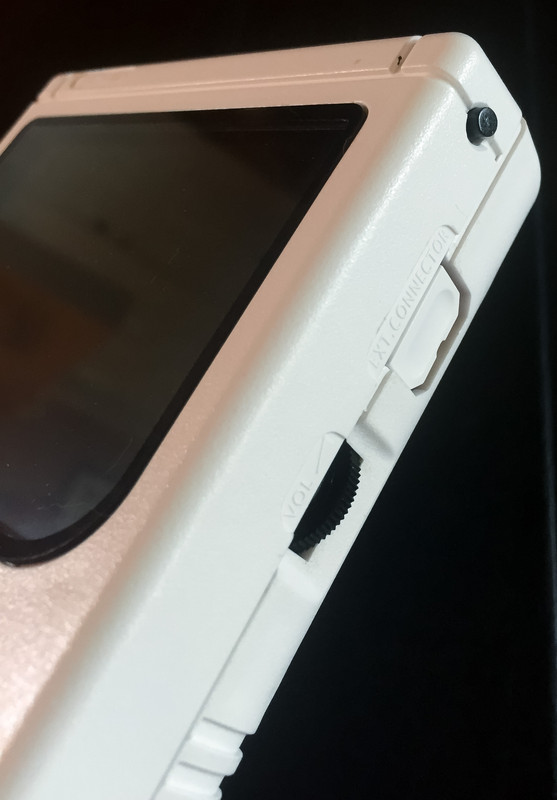
- Custom fit the Ext Connector cover to cover the external USB

-------------------------------------------------------------------------------------------------------------------------------------------------------------------
Case Cutout
So first step, I needed to do was do my case cutout. Was able to just do the screen cutout early after order board since I didn't need the board to do that. On my first build I cut the screen hole out manually. It was a real pain and even then I was not happy with not having perfectly straight lines or even thickness around the border. The thickness is important as too thick and you'll see it even with a screen protector. Too thin and you'll have issues with attaching the screen protector. I just applied some of my woodworking skills and used a 3D printed template and a router. It makes quick work for this job.
3D templateShow
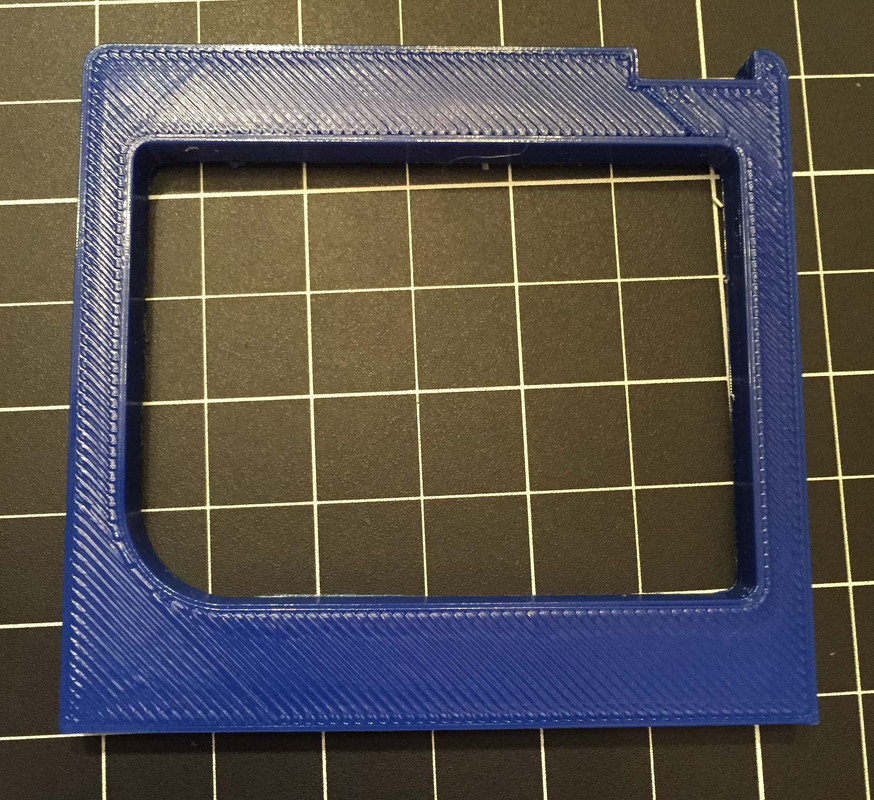
Cut out ScreenShow
Screen Cutout Guide
3D Printed Bracket
After getting the board the next thing on the list was to make the holes for the X and Y buttons. I really wanted a way to secure the two case halves without the need to glue posts to the screen. I went with this bracket I designed with help and input from Kite. It did everything I needed by centering the screen, taking care of the X and Y button wells, and of course closing the case securely.
HoolyHoo SAIO BracketShow
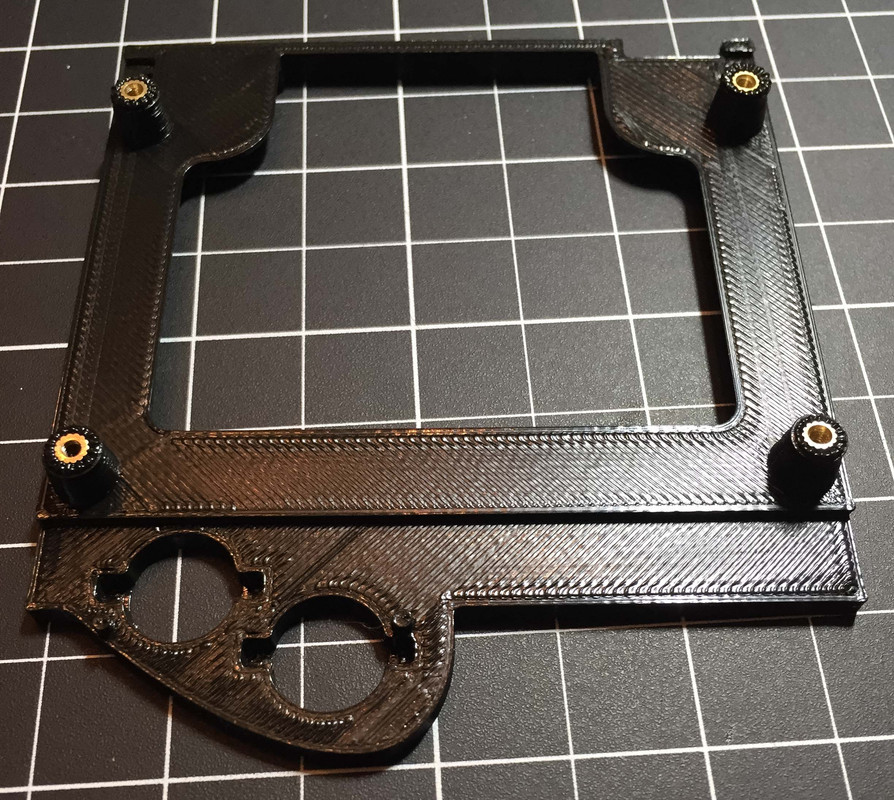
Test FitShow
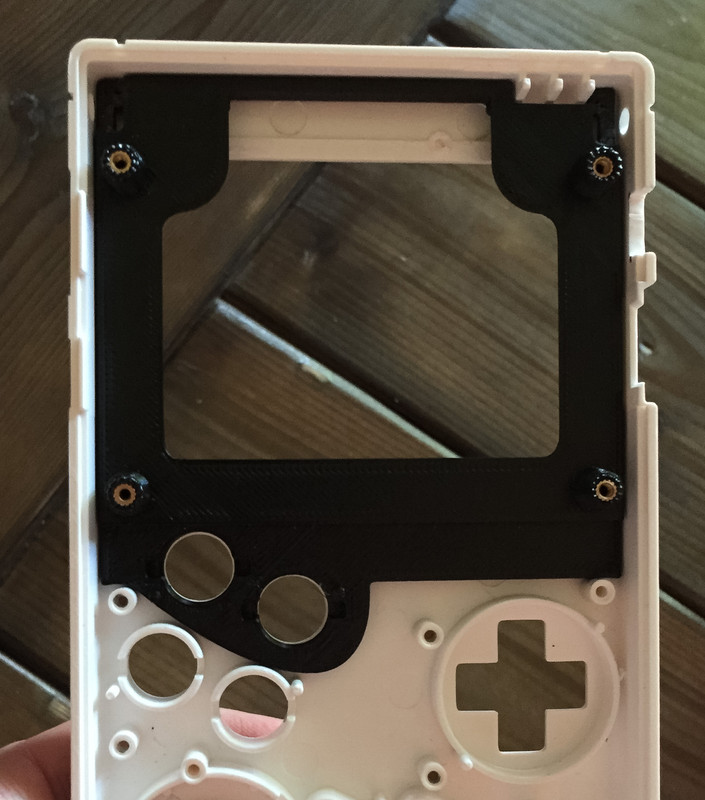
Screen and well align perfectly.
HoolyHoo SAIO Bracket Thread
Battery Compartment
I bought this battery online. 4800 mA Battery. From the start I was looking for a battery that would fit in the original battery compartment but was at least 4000 ma. This fit the bill as it fit perfectly with only a little modification to the case battery compartment. Since it was a cell phone battery I got the idea of trying use pogo pins just like a phone that would make removable seamless and look "stock". Luckily I had an old Motorola phone, circa 2005, and I removed the pogo pins and used it for that purpose.
Pogo PinsShow
In CaseShow
Battery in CompartmentShow
Fits and works great
So now it was time to test Kite's board, after all its the heart of the build. Got it all soldered up and fired it up.
TestShow
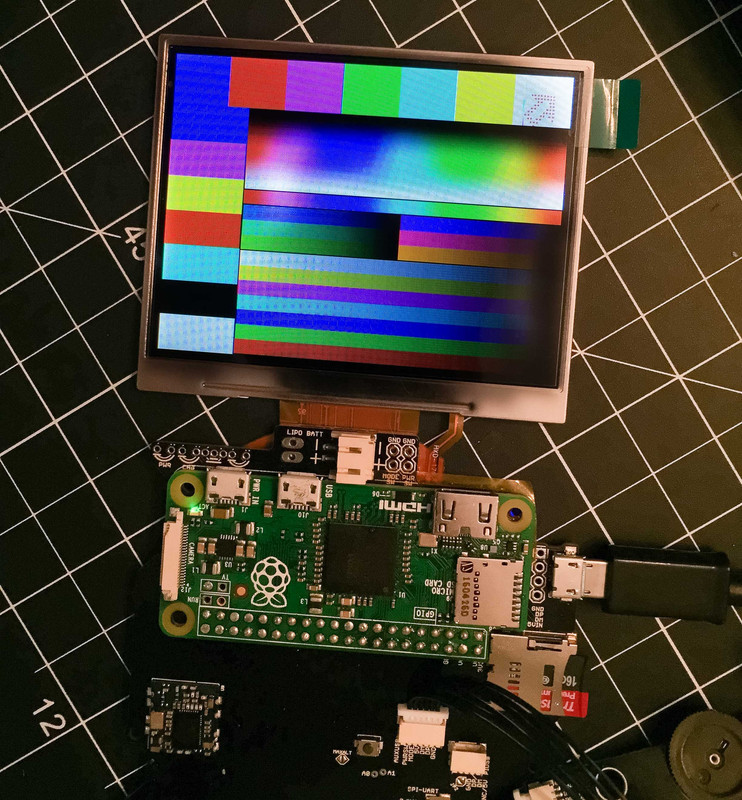
She is a thing of beauty. That screen looks awesome.
I solved my problem by deciding to place the buttons on the top half of the case near the very top of the case on either side. With the buttons there I could press them with my index fingers which seemed to rest up there anyway since I have big hands. The motion, to me is much more natural to me and also since the buttons are now on the top half, I could keep the wires on the same side of the case.
I used standard tact buttons that protruded long enough to make it easy to push but not too long where they looked awkward. I made a special edition of my bracket with notches for the button that fit perfectly just above the screen. Here is a photo of the top half with the shoulder buttons, screen, board and bracket installed.
InternalShow
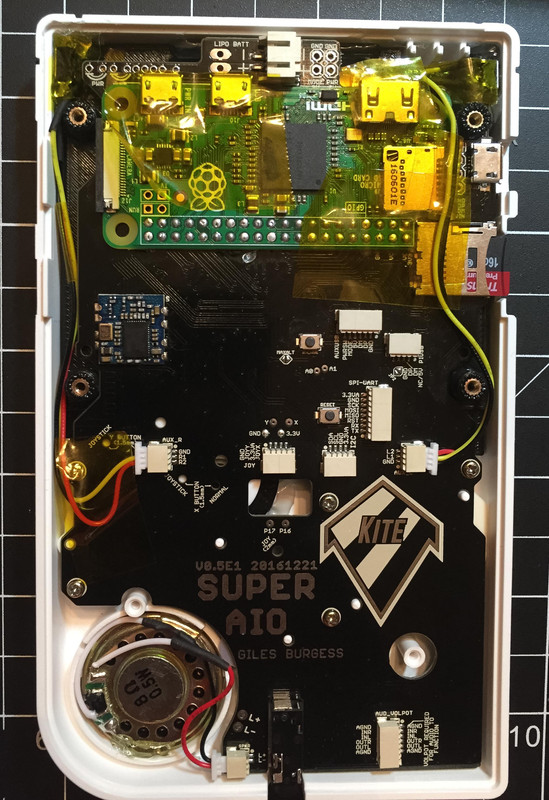
Nice and Tidy!
SwitchShow
So trying to keep that "stock" look, I wanted the status lights from Kite's board but I didn't want to drill holes in the case to display them. I knew I was going to be using an original GB cartridge connector that I had left over from my last build. I also knew that I wanted my cartridge to be removable but had no idea what to use it for. Then, in the middle of the night, like in a dream, I got the idea that maybe I can connect the status led's to a real cartridge pcb and have it connect to Kites board through the connector. So I made this without knowing if it would work.
LED PCBShow
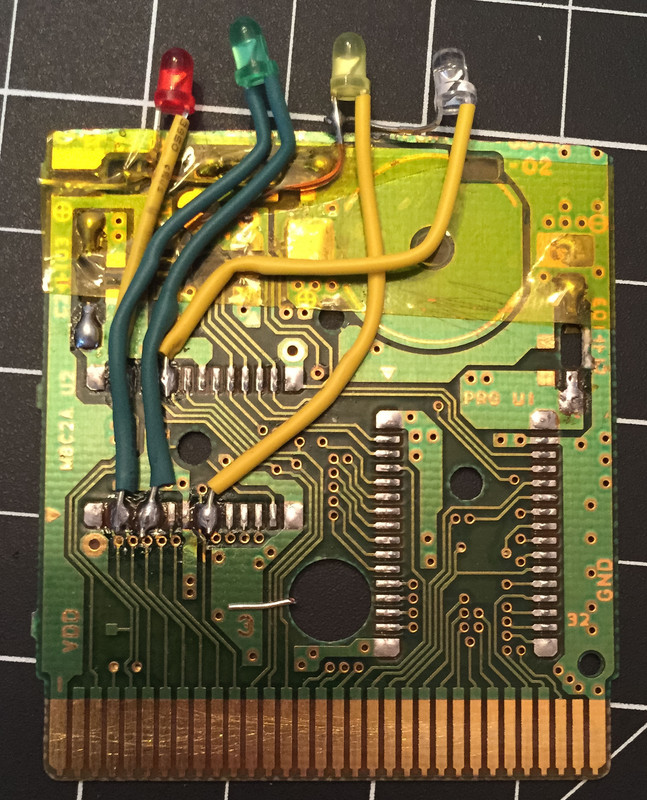
Four colored 3mm LED's
6 Pin ConnectorShow
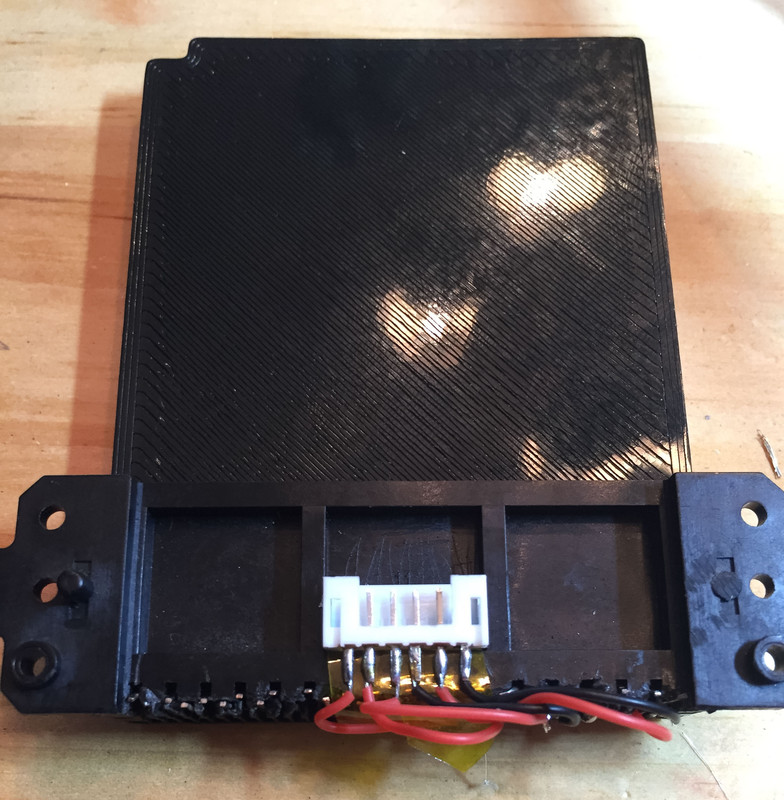
LED'sShow

Yeah, she works!
And another.
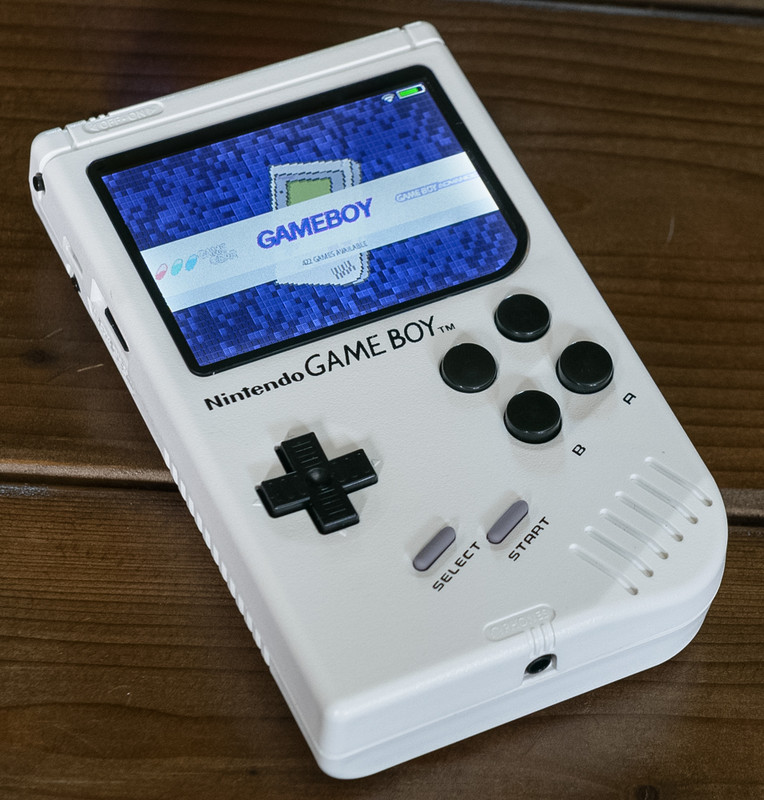
So from the beginning I knew what the color scheme of my GBZ would be, black and white. I liked the simplicity of it and the clean look. So I took a couple of built in themes (Carbon and IO) and combined them to my liking. I darkened the IO theme to get a true black and white and used the graphics from the Carbon theme. I enlarged the graphics in systems view to be better seen by enlarging and enhancing contrast. I also adjusted the detail and basics view to be more readable on the 3.5 inch screens we are using. I think 10 games on the screen at a time in the basic view and 5 games on screen with the detail view look good to me. I just modified the consoles that I use on my GBZ which are Atari2600, Atari7800, Atari Lynx, GameGear, GB, GBA, GBC, Mame, Sega Genesis, NES, SNES, NGPC, Turbo GfX, and the RetroPie menu. If someone needs another system, let me know.
I decided to name the theme StormTrooper after the suggestion from forum member TheDeviantZen. Thanks for the idea. Here are some screenshots.
StormTrooperShow
System View
Another System View
Detail View
Basic View
Storm Trooper Theme DownloadShow
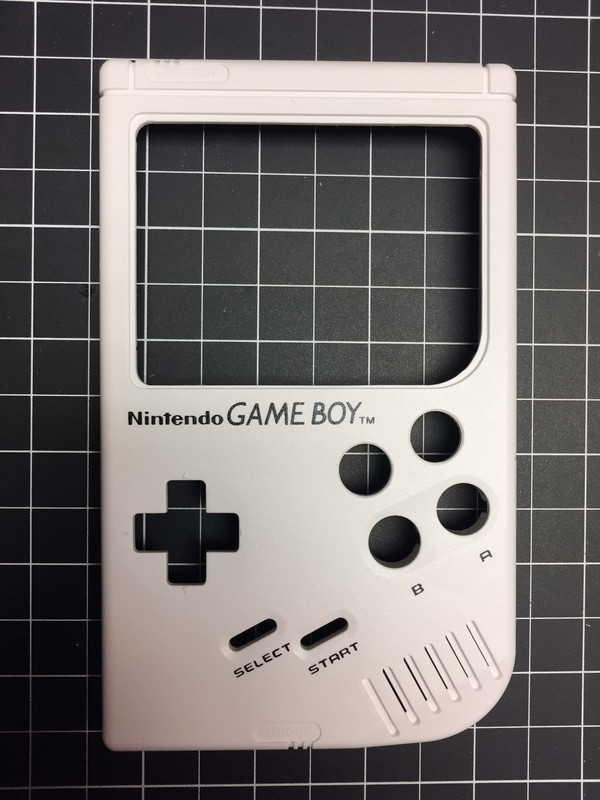
Last thing left was modifying the EXT connector that came with my GB shell.
Took ThisShow
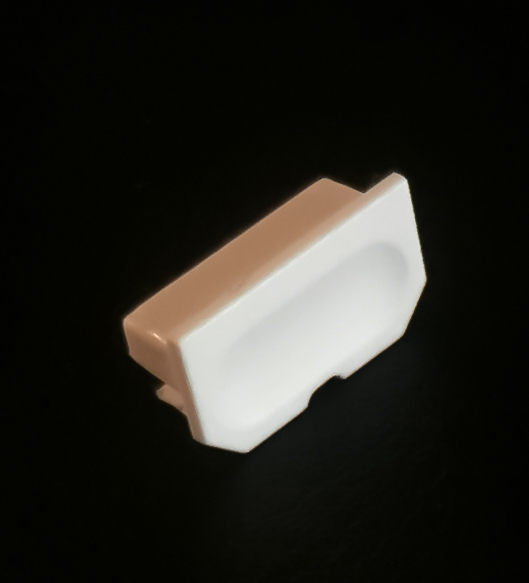
With a Sharp Exacto Knife, Notched It Like ThisShow
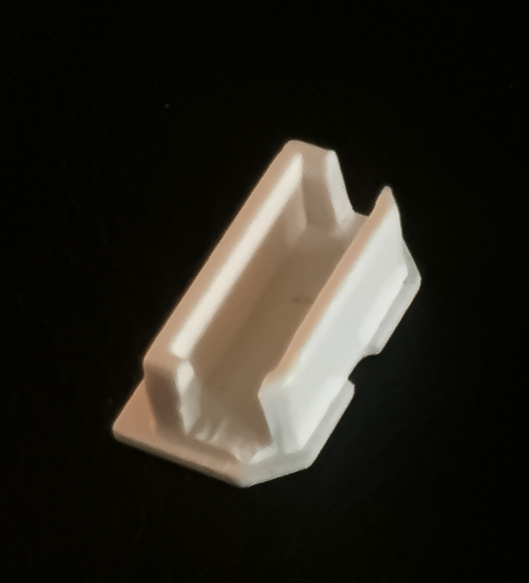
Finished ResultsShow
Very last thing is I took a glass screen protector I had bought for a few dollars and spray painted a 2mm black border on the back side so it would be shiny when seen through the glass and it would not get scratched. I was able to get a perfect border by cutting out a vinyl sticker template on a plotter cutter. The template covered the glass and only left the outside 2mm border. I spray painted and let it dry. Here is a picture of the vinyl template.
Vinyl Sticker TemplateShow
Screen ProtectorShow
I am very pleased on how the build came out but I could not have done it without the help of forum members such as Kite, Wermy, Helder, Camble and many others who have inspired me. For that I just want to say Thank You. I will do my best to keep paying it forward!
Happy Modding Folks!


